How to Make an Excel Invoice Template Easily
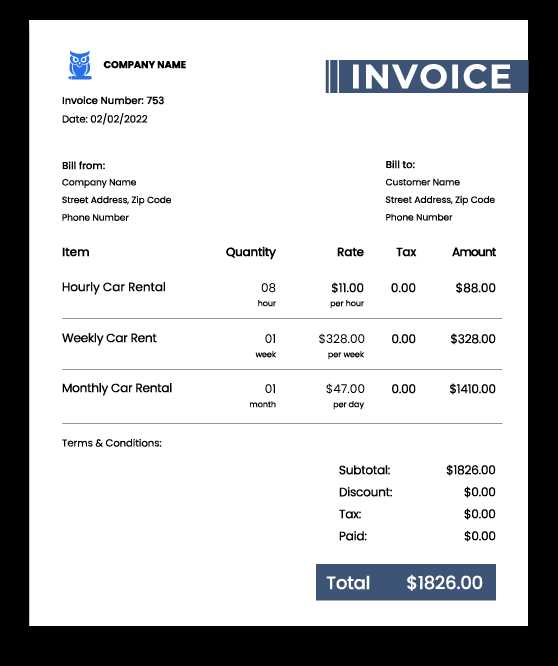
Designing a reliable document for managing payments and keeping track of financial transactions is essential for any business. Having a consistent and easy-to-edit structure allows professionals to focus on their work while ensuring accuracy in all calculations. With a few simple tools, you can build a highly functional system that fits your specific needs.
Whether you’re running a small freelance business or managing larger operations, having a customizable record-keeping method saves time and reduces errors. By automating calculations and organizing key details in a clear, easy-to-read format, you can streamline the payment process and maintain professionalism with each client.
In this guide, we’ll walk you through the process of creating an effective system that not only meets your requirements but also helps present your services in the most efficient manner. The focus will be on user-friendly solutions, offering you flexibility and convenience without needing advanced software knowledge.
How to Create an Invoice Document in Excel
Designing a document for billing that suits your business needs can greatly improve the efficiency of your financial record-keeping. The process involves structuring a clean, easy-to-navigate sheet that captures all the necessary details for each transaction. This approach ensures that you can quickly generate accurate documents for your clients without unnecessary complexity.
To start, it’s important to determine the key elements that need to be included. These often consist of fields for the company name, client details, products or services provided, prices, and total amounts due. You’ll also want to incorporate automatic calculations to avoid manual errors and save time when updating or generating new records.
The next step is organizing the layout to present this information clearly. By utilizing basic functions such as tables, cell formatting, and alignment, you can create a streamlined document that is both visually appealing and functional. This will help establish a professional appearance that meets industry standards, making it easier to manage and send your bills.
Finally, saving and customizing this structure will allow you to reuse it for future transactions. Once created, you can adjust specific details for each client or project while keeping the core format intact. This flexibility ensures that your record-keeping process remains consistent and adaptable to different needs.
Benefits of Using Excel for Invoicing
Utilizing spreadsheet software for creating and managing billing documents offers numerous advantages for businesses of all sizes. It combines flexibility with powerful features, making it an efficient tool for organizing financial data. The simplicity of working with a spreadsheet, combined with its capacity for automation, helps reduce errors and improve overall workflow.
Cost-Effective Solution
One of the key benefits is that spreadsheet software is widely accessible and usually comes with no additional cost, especially for users who already have access to basic office suites. This makes it an ideal solution for small businesses or freelancers who need an affordable and reliable tool for handling their financial paperwork.
Easy Customization and Flexibility
Another significant advantage is the ability to customize your layout and structure without limitations. You can create documents that are tailored specifically to your business needs, adjusting fields, colors, and formats as required. Here are a few specific benefits:
- Simple Design: You can design a clean and professional layout in minutes.
- Flexible Structure: Modify the document to include any data fields you need, such as custom discounts, taxes, or additional charges.
- Instant Updates: Easily change rates, quantities, or other variables without having to manually adjust calculations.
Automation and Accuracy
Another reason to use spreadsheets is their ability to automate calculations. By using formulas, you can instantly calculate totals, apply tax rates, and track outstanding balances. This helps eliminate the risk of human error and speeds up the billing process. Some key automation features include:
- Automatic Calculations: Sum up amounts and apply formulas with a few clicks.
- Built-in Functions: Use pre-set functions like VAT, discounts, and currency conversion to save time.
- Consistent Output: Generate uniform documents every time, ensuring your billing process remains professional and accurate.
Incorporating these advantages into your financial workflow can enhance productivity and improve the overall quality of your client-facing documents. By choosing a solution that offers both simplicity and power, you can focus on growing your business while keeping your invoicing process organized and efficient.
Key Elements of a Simple Invoice
For an effective billing document, certain core components are necessary to ensure clarity and completeness. These elements help convey essential details about the transaction, making it easy for both parties to understand the terms, amounts, and due dates. While additional features may be added depending on business needs, these fundamental aspects are present in almost every billing document.
Essential Information to Include
Regardless of the type of transaction, a straightforward billing document should have several key sections. These sections ensure that both the seller and the buyer can easily track payment details, products or services provided, and any applicable terms. Below is an outline of the most critical elements:
| Section | Description |
|---|---|
| Business Details | Include your company name, address, and contact information. |
| Client Information | Provide the recipient’s name, address, and contact details. |
| Transaction Details | List the goods or services provided with quantities and unit prices. |
| Amount Due | Calculate the total amount owed, including taxes or discounts if applicable. |
| Payment Terms | Specify payment deadlines, methods, and any late fees or early payment discounts. |
| Invoice Number | A unique identifier for easy tracking and reference. |
Layout and Design Considerations
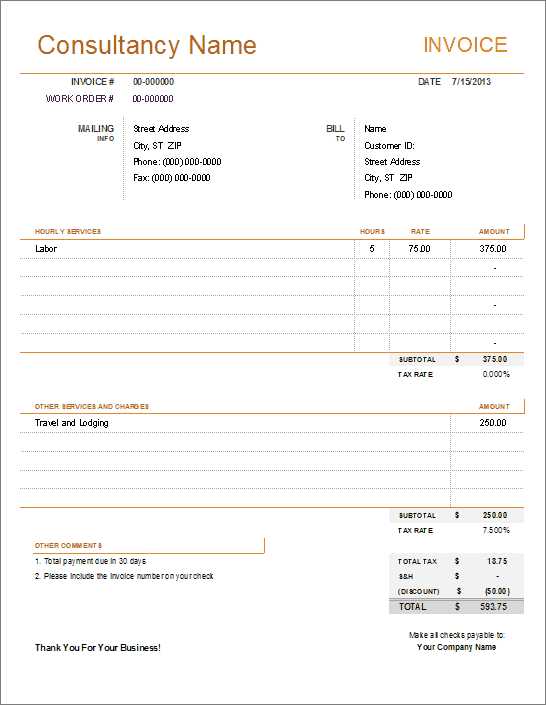
The design and organization of your billing document are just as important as the information it contains. A clean layout with clearly separated sections makes it easier for the recipient to find the details they need. Be sure to use proper spacing, bold headers, and consistent fonts to enhance readability.
Including the key elements listed above ensures that your billing document is both professional and easy to process. By keeping the information organized and straightforward, you can help minimize errors and disputes, leading to smoother transactions with clients.
Setting Up Your Excel Workbook
Creating a well-organized file for tracking transactions requires careful setup of your workbook. The key is to ensure that all necessary sections are structured logically, allowing for easy updates and accurate calculations. By setting up the document in an efficient way from the beginning, you can save time and reduce errors when creating future records.
Initial Setup of the Workbook
The first step in creating an efficient document is to prepare the file itself. This involves adjusting some basic settings that will provide a clean and easy-to-read layout. Here’s how to start:
- Create a new document: Open a blank spreadsheet to begin your work.
- Set page orientation: Choose between portrait or landscape depending on your preferred layout.
- Adjust cell size: Resize rows and columns to suit the amount of content you plan to enter.
- Choose a consistent font: Select a clear, professional font for readability, such as Arial or Calibri.
Organizing Sections for Ease of Use
Once the basic setup is complete, you can move on to organizing the content. It’s important to separate information logically and allow room for automatic calculations. Here’s a guide to organizing your sections:
- Header: At the top, place your business details, client information, and document title.
- Transaction Items: Below the header, list the products or services, including descriptions, quantities, unit prices, and total amounts.
- Totals: Create a section at the bottom for total calculations, including taxes, discounts, and the final amount due.
- Footer: Include payment terms, due dates, and any additional notes at the bottom of the document.
By establishing a solid structure for your workbook, you ensure that the process of entering and updating data will be as simple and efficient as possible. Organizing the information logically not only helps with accuracy but also makes the final document look more professional.
Choosing the Right Invoice Format
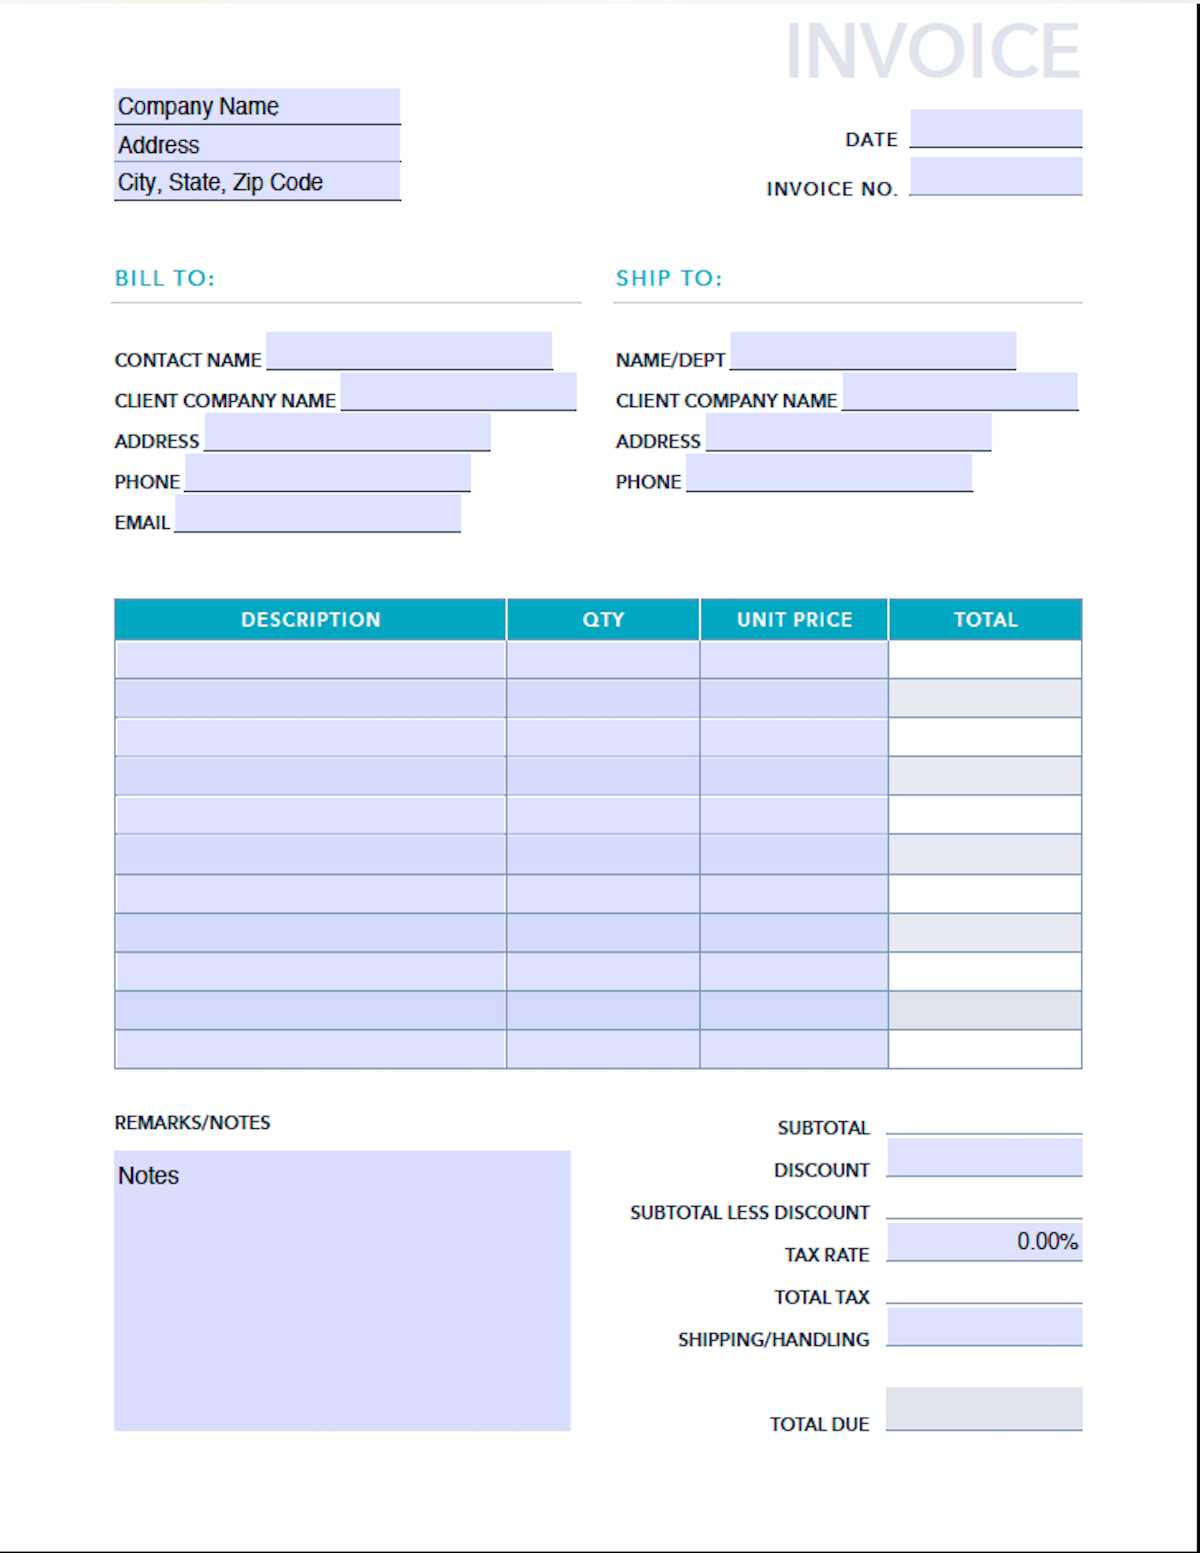
Selecting the appropriate layout for your billing document is crucial to ensure it meets both your needs and those of your clients. A well-chosen format not only enhances clarity but also helps streamline your financial processes. The goal is to find a structure that suits the type of transaction you’re conducting, while remaining professional and easy to understand.
Consider the Type of Business
The format you choose should align with the nature of your business. Different industries might require different types of documents, with specific details or sections. For example:
- Freelancers and Service Providers: A simple layout focusing on services, hours worked, and hourly rates may be ideal.
- Product-Based Businesses: A more detailed structure that includes itemized lists with descriptions, quantities, and prices will likely be necessary.
- Subscription-Based Services: A format that includes recurring charges, billing cycles, and payment terms is important.
Key Factors to Keep in Mind
When choosing the right structure, consider these important factors to ensure your document is both functional and easy to use:
- Simplicity: Choose a clean, minimalistic format to avoid clutter and make the document easier to read.
- Consistency: Keep the layout consistent across all records, so clients can quickly familiarize themselves with the format.
- Automation: Consider a format that allows for the use of formulas for automatic calculations, reducing manual effort and minimizing mistakes.
- Branding: Ensure that the format allows space for your company logo and contact information, adding a professional touch to each document.
By selecting the right structure for your billing records, you not only improve the accuracy and efficiency of your accounting, but also create a more professional image for your business. A well-organized and clear layout will make it easier for your clients to review and process payments, ensuring smoother transactions overall.
Customizing Excel Cells for Invoices
Personalizing individual cells in your document allows you to better organize and present your data, enhancing both functionality and aesthetics. By adjusting the appearance and behavior of specific cells, you can ensure that all important details are clearly highlighted and easy to read. Customization also enables you to automate certain aspects, like calculations, and makes the entire process more efficient.
Formatting Cells for Clear Presentation
The way you format the cells can greatly impact the readability of your billing document. Customizing cell borders, alignment, and fonts helps to create a structured layout that is visually appealing. Here are some key adjustments to consider:
- Cell Borders: Use borders to separate different sections, making the document easier to navigate. You can apply thick borders to important areas, like the total amount due, to draw attention.
- Text Alignment: Align text appropriately in each cell–left for descriptions, right for amounts, and centered for titles or headers.
- Font Styles and Sizes: Choose readable fonts and adjust sizes to create a clear hierarchy of information. For example, use larger text for headings and smaller text for details.
Using Formulas for Automation
To reduce manual entry and enhance accuracy, you can customize cells to automatically calculate totals and taxes based on the data entered. Formulas allow for seamless updates whenever a change is made. Here are a few useful formula customizations:
- SUM: Use the SUM function to calculate the total of a column or row, such as the sum of all item prices or the total amount due.
- Multiplication: For unit prices and quantities, use the multiplication formula to get the total cost for each item automatically.
- Tax Calculation: Customize a cell to calculate taxes based on a specified percentage, ensuring tax amounts are always accurate.
- Discounts: Set up cells to apply discounts automatically when a certain condition is met, such as for bulk orders or early payments.
By customizing cells in this way, you not only improve the appearance and usability of your billing document, but you also make the process more efficient. Automation helps eliminate errors, saves time, and ensures that your records remain consistent and accurate.
Adding Company Details in Excel
Incorporating your business information into the document ensures that clients have all the necessary contact details and can easily identify the source of the record. This step is essential for creating a professional appearance and improving the clarity of the document. By properly formatting this information, you not only maintain consistency but also make the process more efficient for future use.
Placing Business Information in the Document
When adding company details, it’s important to place them in an easily accessible area, typically at the top of the document. This makes it simple for clients to find your contact information without having to search through the document. Follow these steps to add your company details:
- Company Name: Enter your business name in a bold font, making it prominent at the top of the page.
- Address: Below the company name, provide your business address. Ensure that it is formatted correctly, with line breaks to separate street, city, and postal code.
- Contact Information: Include phone numbers, email addresses, and a website URL if applicable. Place each in separate lines to maintain clarity.
Formatting the Company Section
Proper formatting helps make the business details stand out, ensuring they are visible and easy to read. Adjusting text alignment, font size, and using bold or italic styles can enhance this section’s appearance. Here are a few tips:
- Text Alignment: Align your company name and contact information to the left or center, depending on your preferred layout.
- Font Size and Style: Use a larger font for your business name, with a smaller font for contact information.
- Cell Merging: Merge cells if necessary to create a more organized, centered look for your company name at the top.
Including this information at the top of the document not only improves professionalism but also ensures that clients can easily reach you if needed. By customizing this section with attention to detail, you create a document that reflects the quality and reliability of your business.
Creating a Professional Invoice Layout
Designing an effective layout is key to ensuring your document is both visually appealing and functional. A well-organized structure makes it easy for clients to understand the details of the transaction, while also reflecting your business’s professionalism. By balancing clarity with aesthetic appeal, you can create a polished and consistent look for each record.
Essential Design Considerations
When developing the layout, focus on the following key aspects to achieve a clean, readable design:
- Header Placement: Position the document title, such as “Billing Statement” or “Receipt,” at the top in a prominent location. Include your business name and contact information here as well.
- Section Separation: Divide the document into clear sections using horizontal lines or spacing. Separate client information, product/service details, and totals to make the document easy to navigate.
- Visual Hierarchy: Use bold fonts for headings and important sections, and smaller or regular fonts for less critical information. This helps guide the reader’s eye through the document in a logical flow.
- Alignment: Align text consistently–left-align descriptions and right-align amounts for easy comparison. Ensure that totals and key figures are centered or bolded to make them stand out.
Formatting Tips for a Polished Look
Achieving a professional look goes beyond organization; the right formatting choices can make a significant difference. Consider the following formatting tips:
- Consistent Fonts: Use a clear, legible font such as Arial or Calibri. Keep font sizes consistent throughout the document, using larger text for headings and smaller text for details.
- Color Scheme: Choose a subtle color scheme that matches your branding. Light background colors with dark text provide good contrast and readability.
- Spacing and Margins: Ensure adequate spacing between sections to avoid a crowded appearance. Set standard margins to ensure the content is well-positioned within the page.
- Table Use: Tables are effective for organizing itemized details, such as product descriptions, quantities, unit prices, and totals. Make sure the table layout is simple and easy to follow.
By considering these design elements, you’ll create a visually appealing and easy-to-understand document that reflects your professionalism. A clean and organized layout not only enhances client trust but also ensures the document’s effectiveness in communicating important financial information.
How to Include Client Information
Including accurate and comprehensive client information is a key part of any business record. It ensures that the recipient of the document can easily identify the transaction and contact you if needed. Properly formatted client details also lend credibility to your document, making it more professional and organized.
Essential Client Details to Add
When entering client information, it is important to include all the necessary details to ensure that the recipient is clearly identified. Here are the key elements to consider:
- Client Name: Always list the full name of the client or company. This is the most important detail, as it directly associates the document with the recipient.
- Address: Include the full billing address, with separate fields for the street address, city, state/province, and postal code.
- Contact Information: Provide the client’s phone number and email address, allowing easy communication if there are any questions regarding the document.
- Account Number (if applicable): For clients with ongoing relationships, you may want to include their account number or unique reference number for easier tracking.
Formatting Client Information
Proper organization and formatting of client details will enhance readability and create a more professional appearance. Consider the following tips:
- Align Information: Align client details to the left or center, depending on your layout. Ensure that each element (name, address, etc.) is placed on its own line or in a consistent pattern to avoid clutter.
- Font Consistency: Keep the font size consistent across all client information. Use slightly larger or bold text for the client’s name to make it stand out.
- Spacing: Provide enough spacing between sections to ensure the information is easy to read and visually appealing.
By ensuring all client information is clearly listed and well-organized, you create a more professional, accurate, and reliable document. This small step can have a big impact on how your business is perceived and how easily clients can find the details they need when reviewing the document.
Adding Product or Service Descriptions
Providing clear and detailed descriptions of the products or services delivered is essential for transparency and client understanding. This information ensures that both parties are on the same page regarding what was provided, how much was delivered, and at what price. Properly formatted descriptions also help avoid confusion or disputes later on.
Organizing Product or Service Details
When listing items or services, it’s important to provide enough detail for each entry while maintaining clarity. The following sections should be included for each product or service offered:
| Item/Service | Description | Quantity | Unit Price | Total |
|---|---|---|---|---|
| Product/Service Name | Short description of what was provided | Number of units or hours | Price per unit or hourly rate | Amount due for this item |
Formatting Descriptions for Clarity
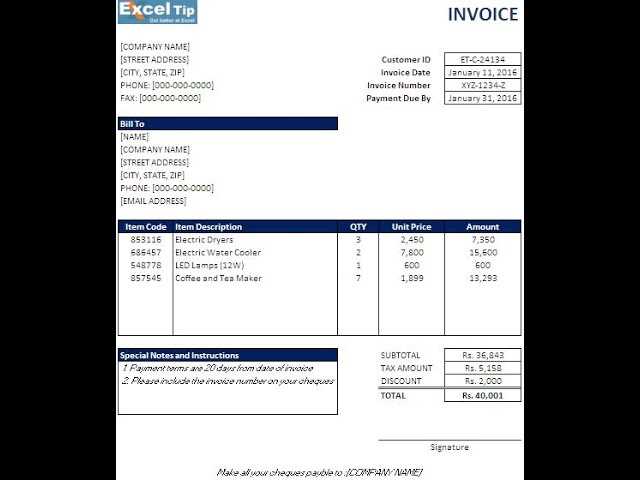
To ensure the descriptions are easy to read and understand, formatting plays an important role. Below are a few tips for presenting the information clearly:
- Be Concise: Keep descriptions brief but informative. Focus on the most important details, such as key features, specifications, or services rendered.
- Use Bullet Points: For more complex items, break down the description into bullet points for better readability.
- Column Alignment: Align quantities, unit prices, and totals to the right to make it easy for clients to compare numbers at a glance.
- Consistent Formatting: Use consistent terminology and formatting for each line item, ensuring all products or services are listed in the same way throughout the document.
By clearly outlining the details of the products or services provided, you not only ensure transparency with your clients but also improve the overall professionalism of the document. A well-organized item list makes it easier for clients to verify the transaction and reduces the likelihood of misunderstandings.
Inserting Prices and Calculations Automatically
Automating price entry and calculations can significantly reduce errors and save time, especially when dealing with multiple items or services. By setting up formulas to handle these tasks, you ensure that totals are always accurate and that any changes made to unit prices or quantities are immediately reflected throughout the document. This feature is crucial for improving efficiency and ensuring consistency in every transaction.
Setting Up Automatic Price Calculation
One of the most useful features is the ability to automatically calculate the cost for each item based on its quantity and unit price. Here’s how you can set up this process:
- Multiply Quantity by Unit Price: Use a formula to multiply the quantity of an item by its unit price. For example, in cell C2 (quantity) and D2 (unit price), you can insert the formula =C2*D2 to get the total price in cell E2.
- Summing Up the Total: To calculate the total for all items, use the SUM formula to add up the individual item totals. For example, =SUM(E2:E10) would sum the totals in cells E2 through E10.
- Tax Calculation: If applicable, set up a cell that automatically calculates tax based on the total amount. For example, =E11*0.1 will calculate a 10% tax on the total amount in cell E11.
Additional Automation Features
Beyond basic calculations, you can also automate other elements of the document, such as discounts and final totals. Here are some additional automation tips:
- Applying Discounts: To automatically apply a discount, set a formula that reduces the total by a certain percentage. For example, =E11-(E11*0.1) will reduce the total in cell E11 by 10%.
- Dynamic Totals: Use conditional formulas to adjust prices based on specific conditions. For example, if a customer qualifies for a discount based on order volume, you can set up an IF formula like =IF(C2>10,E2*0.9,E2) to apply a 10% discount when more than 10 units are ordered.
- Final Amount Due: After applying all taxes and discounts, you can use a formula to calculate the final amount due. For example, =E11+E12-E13 will subtract the discount from the total and add the tax.
By automating these calculations, you not only streamline the process but also minimize the potential for human error. This level of precision and efficiency is especially beneficial for businesses with frequent transactions, as it helps ensure consistent and accurate records.
Formatting the Invoice for Clarity
A well-formatted document enhances readability and helps ensure that all key details are easy to find and understand. Clear structure and visual organization make it easier for the recipient to review the transaction and find the information they need quickly. A cluttered or poorly organized document can lead to confusion, errors, and delays in processing.
Key Formatting Principles
To improve the clarity of your document, follow these essential formatting principles:
- Use Headings and Subheadings: Organize the document with clear headings for different sections. For example, use “Client Information”, “Itemized List”, and “Total Amount Due” as section headers to guide the reader.
- Consistent Alignment: Align text consistently to create a uniform appearance. For instance, left-align descriptions and quantities, and right-align prices and totals for easy comparison.
- Appropriate Font Size: Use a larger font for headings and important information like the total amount due. This helps key figures stand out and makes the document easier to scan quickly.
- Spacing Between Sections: Adequate spacing between sections prevents the document from looking overcrowded. Ensure there is enough space between rows of itemized descriptions, and between the client’s details and the total section.
Visual Enhancements for Better Clarity
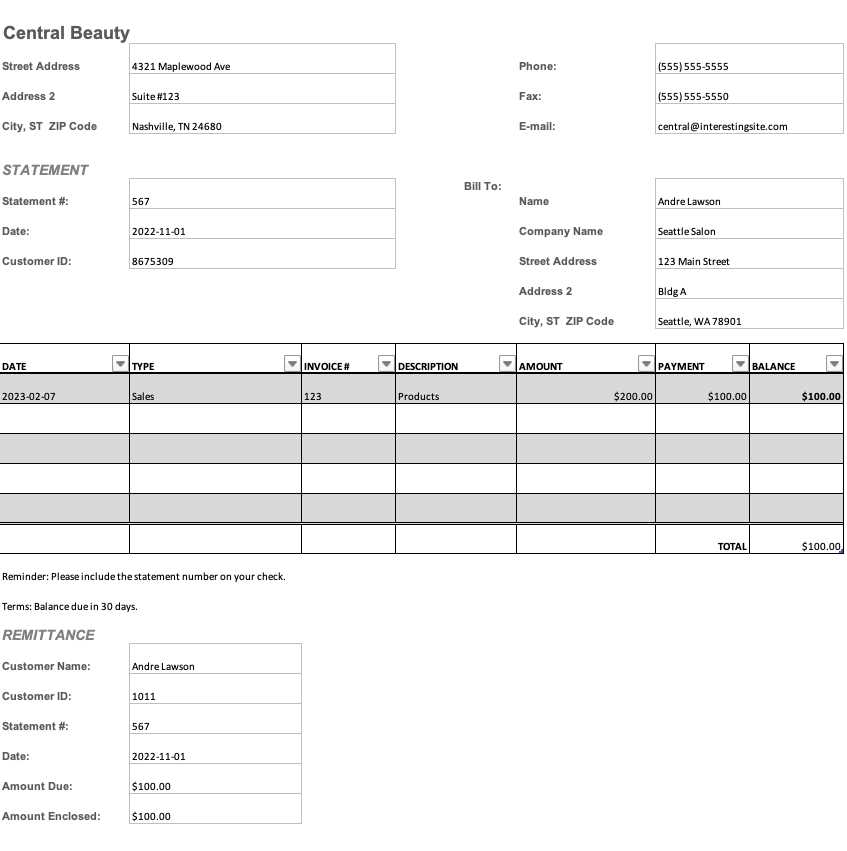
In addition to structural formatting, visual enhancements can greatly improve readability and professionalism. Consider these tips:
- Bold or Highlight Important Information: Highlight critical elements, such as the total amount due or due date, using bold text or shading to make them stand out.
- Use Borders and Lines: Adding borders to different sections or between rows can help separate information and give the document a structured, organized look.
- Color Scheme: Select subtle background colors for headers or totals to differentiate sections without overwhelming the reader. Ensure that the text remains legible by using high-contrast color combinations.
- Tables for Itemized Information: Using tables to display itemized lists makes the details easier to read and understand. Ensure the table is simple and well-organized, with clear column headers like “Item”, “Description”, “Quantity”, “Unit Price”, and “Total”.
By following these formatting strategies, you create a document that is not only visually appealing but also easy to read and understand. A well-organized and clear layout fosters professionalism and helps ensure that all transaction details are easy for the recipient to process, reducing the likelihood of mistakes or confusion.
Including Payment Terms and Due Dates
Clearly specifying payment terms and due dates is vital to avoid confusion and ensure timely payments. Including these details helps set expectations for both parties and creates a clear understanding of when payment is due, as well as any penalties for late payment. By outlining these terms, you also help protect your business interests and maintain smooth financial transactions.
Payment Terms to Include
Payment terms outline the specific conditions under which the client must settle the amount due. These terms may vary depending on the nature of your business, the relationship with the client, or the type of transaction. Common payment terms include:
- Net 30, Net 60, Net 90: These terms specify that the total amount is due within 30, 60, or 90 days from the issue date. It is one of the most common arrangements in business transactions.
- Due on Receipt: With this term, payment is expected immediately upon the client’s receipt of the document.
- Installment Payments: For larger amounts, it may be appropriate to break the total into smaller payments due over a specified period.
- Early Payment Discount: Offering a discount (e.g., 2% off for payment within 10 days) encourages clients to pay sooner, benefiting both parties.
Setting Clear Due Dates
The due date indicates the final day by which the client must make the payment. It’s essential to make this date easy to find and clearly stated on the document. Here’s how you can effectively present it:
- Bold and Highlight: The due date should be bold or highlighted to stand out, ensuring it captures the client’s attention immediately.
- Clearly Label: Use a clear label, such as “Due Date” or “Payment Due By”, followed by the exact date. This avoids any confusion about when payment should be made.
- State Late Fees (if applicable): If you have a policy for late fees, specify the fee amount or percentage that will be added if payment is not made by the due date. For example, “A 5% late fee will be applied after [due date].”
By clearly stating the payment terms and due dates, you set professional expectations and ensure that the transaction process is transparent. It also helps encourage clients to pay on time, improving cash flow and minimizing delays.
Using Excel Functions for Totals
Automating calculations for totals is an essential step when organizing financial documents. By leveraging built-in functions, you can ensure that your calculations are accurate and update automatically as you make changes. This not only saves time but also minimizes the chances of human error, making the document more reliable and efficient.
Key Functions for Summing Values
There are several powerful functions available that can help you calculate totals, taxes, discounts, and other important figures with ease. Below are the most commonly used functions:
- SUM: This is the most basic and commonly used function for adding up a range of numbers. For example, =SUM(B2:B10) will add the values from cells B2 to B10.
- SUMIF: This function allows you to sum values based on a condition. For example, =SUMIF(A2:A10, “Product A”, B2:B10) will add the values in B2 to B10 only where the corresponding value in A2 to A10 is “Product A”.
- SUMPRODUCT: This function multiplies corresponding values in two or more ranges and then sums the results. It’s useful for calculating totals with different quantities and prices. For example, =SUMPRODUCT(A2:A10, B2:B10) will multiply each quantity by its corresponding price and then add them up.
Advanced Calculations for Discounts and Taxes
Besides basic totals, you may need to calculate additional amounts such as taxes or discounts. These can be easily automated using the following functions:
- Tax Calculation: To calculate tax on the total amount, use a formula like =SUM(B2:B10)*0.1 to apply a 10% tax to the sum of values in cells B2 to B10.
- Discount Calculation: If you are offering a discount, use the =SUM(B2:B10)-SUM(B2:B10)*0.1 formula to apply a 10% discount to the total amount.
- IF Function: The IF function can be used to apply conditional discounts or taxes based on certain criteria. For example, =IF(B2>100, B2*0.9, B2) will apply a 10% discount to amounts over 100.
By utilizing these functions, you can easily update totals in real-time as you make changes to the quantities or prices in your document. This automation significantly improves efficiency, especially for documents with multiple items or services, and ensures that all calculations are accurate and up-to-date.
How to Save and Share Your Template
Once you’ve designed a well-structured document for financial transactions, it’s essential to save and share it efficiently. By saving your work in a reusable format, you can ensure that it remains accessible for future use and sharing with clients or colleagues. Additionally, knowing how to properly share your document will make collaboration easier and help you maintain consistency across various recipients.
Saving Your Document for Future Use
To ensure you can use the document again and again, it’s important to save it in the right format. Here are the key steps:
- Save as a Master File: Always keep a copy of your original document as a master file, which can be edited and customized for different clients. Save it in the standard working format (e.g., .xlsx).
- Save as a Template File: If you want to make the file available as a template for future use without altering the original design, save it as a template (.xltx). This allows you to open a fresh copy each time, keeping the original intact.
- Version Control: If you frequently make updates or changes, consider saving multiple versions with clear naming conventions (e.g., “Invoice_Template_v1,” “Invoice_Template_v2”). This makes it easy to track changes and roll back if necessary.
Sharing Your Document
Sharing your work with others is a key aspect of collaboration. Depending on your needs, there are several ways to share your document:
- Email: One of the easiest ways to send a file is through email. Simply attach your document as a file (e.g., .xlsx or .xltx) and send it to the desired recipient.
- Cloud Storage: Using cloud storage platforms like Google Drive, Dropbox, or OneDrive allows you to store your document online and share a link with others. This method also facilitates collaboration, as multiple users can access and edit the document.
- PDF Format: If you want to prevent accidental edits or share a finalized version, consider saving the document as a PDF. This ensures the format remains intact, and the recipient can only view or print the document.
By saving your document appropriately and selecting the best sharing method, you ensure that your financial records are accessible and easy to manage, all while maintaining professional standards. With these steps, you can streamline the process for both you and your clients, ensuring smooth transactions and collaboration every time.
Automating Invoice Numbering
Automatic numbering simplifies the management of financial records, ensuring that each document is uniquely identified and easily tracked. By setting up an automated system for numbering, you eliminate the risk of duplication, streamline your processes, and improve organization. This method allows you to maintain a clean and efficient workflow for all future transactions.
Using Formulas for Automatic Numbering
In many cases, it’s best to set up a numbering system that updates automatically as you create new entries. Here are some ways to implement automatic numbering:
- Start with a Base Number: Begin by entering your starting number in the first cell (e.g., “INV-001”). In the next row, use a formula to automatically increment the number. For example, use =TEXT(LEFT(A2, 3) & TEXT(RIGHT(A2, 3)+1, “000”)) to increase the number with each new entry.
- Use ROW Function: Another simple option is to use the ROW() function. If you begin numbering in row 2, use the formula = “INV-” & TEXT(ROW()-1, “000”) to generate an incremental number based on the row number. This method automatically updates each time a new row is added.
- Custom Numbering System: If you need more control over your numbering, such as including a year or month, you can combine the TEXT() function with the YEAR() or MONTH() functions. For example, = “INV-” & TEXT(YEAR(TODAY()), “0000”) & “-” & TEXT(ROW()-1, “000”) will generate a number like “INV-2024-001”, “INV-2024-002”, etc.
Tracking and Managing Number Sequences
Once automatic numbering is set up, it’s important to ensure that numbers are properly tracked and managed to avoid any gaps or duplicates:
- Monitor for Gaps: When adding new entries, check that the numbering system is incrementing without gaps. If you accidentally skip a number, use a simple formula to find the missing value or fix the sequence manually.
- Control for Manual Changes: To prevent users from manually altering the sequence, consider locking the cells containing the formula. This will prevent accidental changes to the numbering system.
- Backup Regularly: Always save backups of your document to avoid losing your data. You can store backups in cloud storage or external drives to ensure that all records are safely preserved.
By automating the numbering process, you eliminate much of the manual work and reduce the chance for error. This efficient system allows you to focus on
Tips for Keeping Your Template Updated
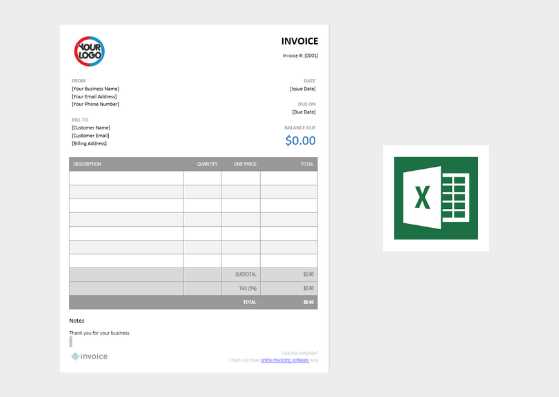
Maintaining an up-to-date financial document is crucial for staying organized and ensuring consistency across your records. As business needs and regulations evolve, so should the structure and details of your document. Regular updates allow you to stay compliant, address client feedback, and incorporate new features that enhance your workflow.
Regularly Review and Adjust Fields
It’s essential to periodically evaluate the content and layout to ensure everything is still relevant and efficient. Here are a few tips to help you keep things current:
- Adjust for New Requirements: Stay informed about any legal or industry-specific changes that may require you to update sections like taxes, payment terms, or business contact details.
- Incorporate Client Feedback: If clients suggest changes, such as clearer descriptions or additional fields, take their feedback into account and update your document accordingly.
- Refine the Layout: As your business grows, you may need to add new services or products. Make sure your document layout is scalable, so it can accommodate these additions without losing clarity.
Automate Updates for Efficiency
Using automation tools within your software can simplify updates and reduce manual effort. Here are a few strategies:
- Use Dynamic Date Functions: Incorporate functions that automatically update dates, such as the current month or year. This way, you don’t need to manually change them each time you create a new document.
- Update Pricing Automatically: If your rates change regularly, use a reference sheet for pricing. This way, you can adjust the rates in one location, and they will automatically update in your document whenever you create a new entry.
- Utilize Master Versions: Keep a master version of your document that contains all the updated fields and calculations. From this master, create duplicates for specific transactions, ensuring that the latest format is always used.
By regularly updating your document and taking advantage of automation, you can keep your records accurate, relevant, and professional without constantly starting from scratch. This approach helps ensure that your workflow remains efficient while adapting to any changes in your business environment.