How to Edit Your Invoice Template in QuickBooks
Creating professional and personalized financial documents is essential for any business. Customization allows you to reflect your brand’s identity, enhance customer trust, and ensure all necessary details are clearly presented. A well-crafted bill or receipt can improve client satisfaction and streamline communication.
Many software solutions provide the tools to modify these documents, enabling you to adjust various design elements and include specific information. This flexibility ensures that your financial paperwork meets both your business needs and regulatory requirements.
In this guide, we will walk you through the process of tailoring your billing format, from adjusting layout features to incorporating essential data. You will learn how to make these changes efficiently, ensuring a professional appearance every time.
How to Edit Your Invoice Template in QuickBooks
Customizing financial documents in your accounting software is an important step to ensure consistency and professionalism in your business transactions. Adjusting layout, fields, and design elements helps align these documents with your brand identity and requirements. Here is a step-by-step process for making those changes, allowing you to tailor each detail to better suit your needs.
Accessing the Document Customization Options
The first step in modifying your billing document is navigating to the customization section in the software. Follow these instructions to get started:
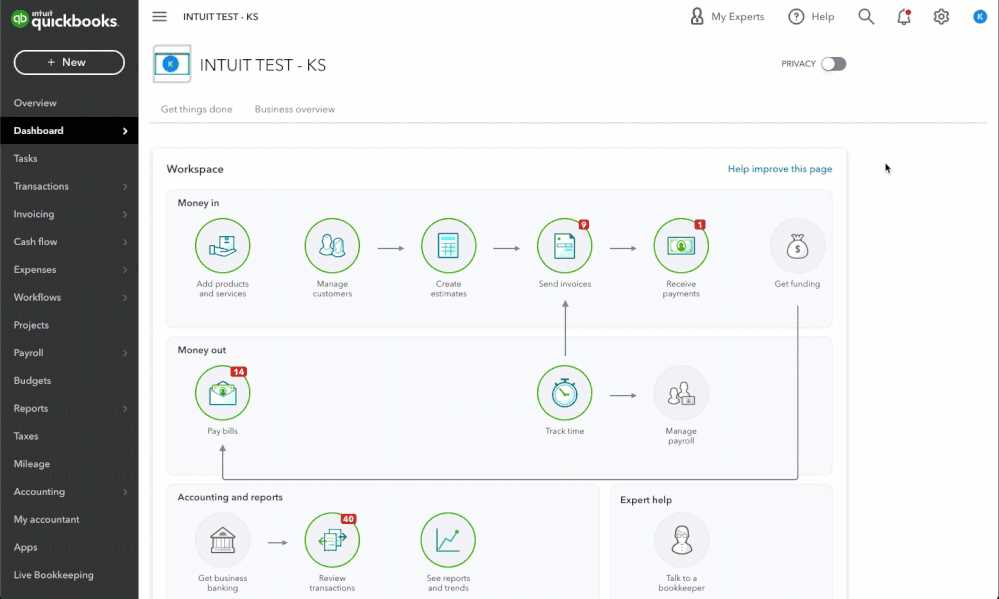
- Log into the accounting platform and go to the main dashboard.
- Locate the “Settings” option, usually found in the gear icon on the top right.
- Under the “Your Company” section, click on “Custom Form Styles” to view existing options.
- Select the format you want to alter, or create a new one from scratch.
Adjusting Layout and Design Features
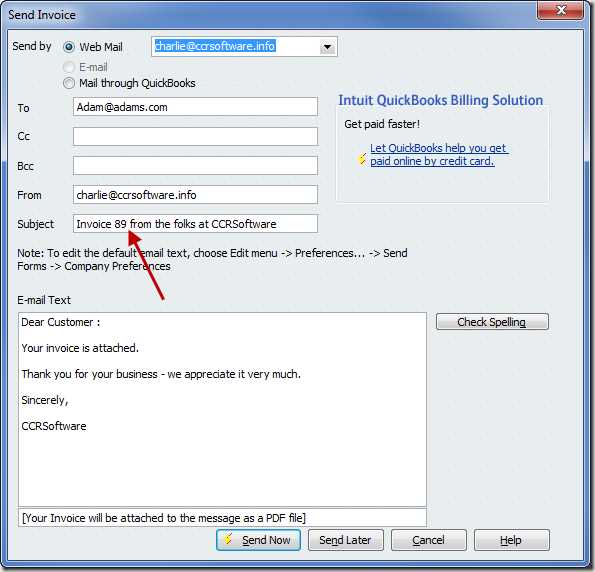
Once you’ve accessed the customization screen, you can begin modifying various aspects of the document, such as:
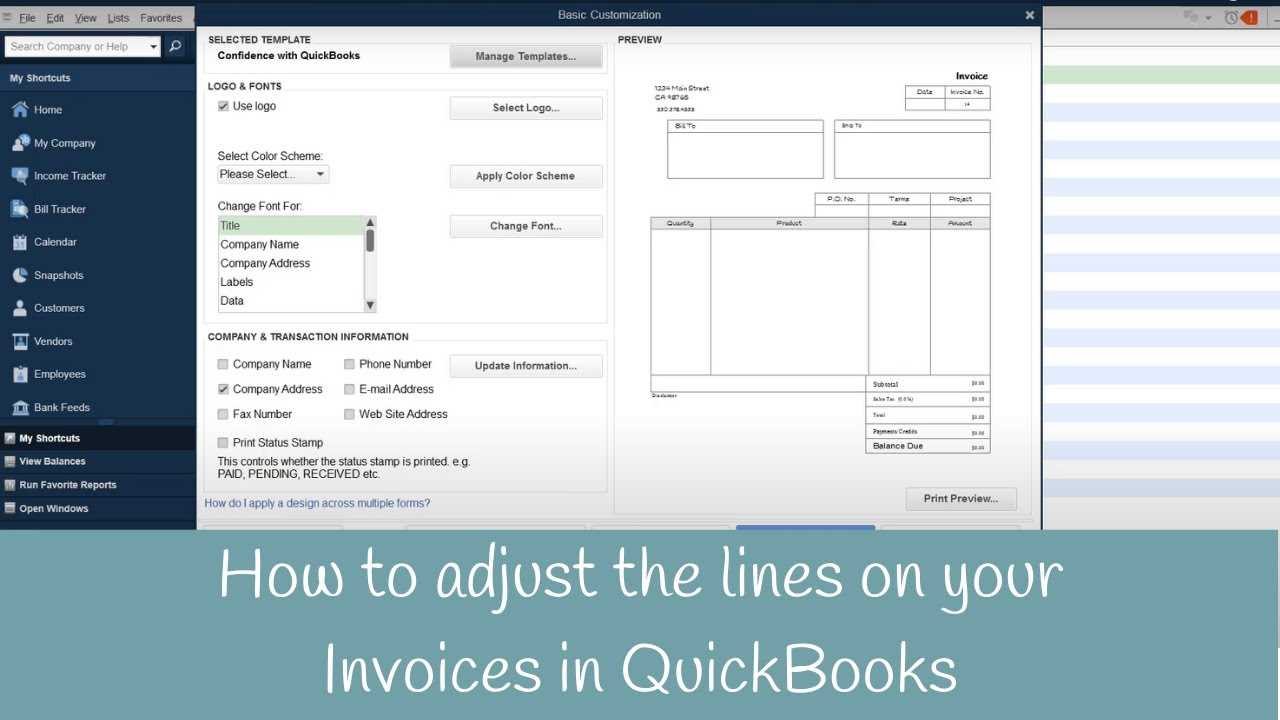
- Logo Placement: Upload or move your company’s logo to a preferred location on the page.
- Font and Color: Choose fonts and colors that align with your business branding guidelines.
- Field Adjustments: Add or remove fields to ensure all relevant information is captured correctly.
- Section Organization: Reorganize the layout to emphasize specific details like totals or payment terms.
Once the adjustments are made, be sure to preview the document to verify that the changes reflect your preferences accurately. When satisfied, save the new version for future use and apply it to upcoming transactions. This process ensures that all of your billing documents are uniform and tailored to your brand’s standards.
Understanding QuickBooks Invoice Customization
Customizing billing documents allows businesses to personalize their communication with clients, making transactions more professional and aligned with brand identity. The ability to adjust design, structure, and content ensures that all necessary information is included in a clear and accessible manner. With proper configuration, these documents can reflect your business’s unique style and operational needs.
Key Features of Customization
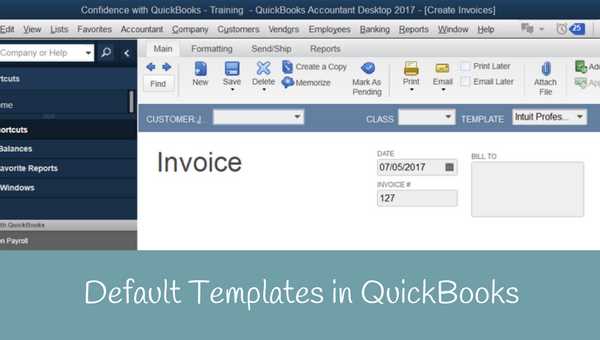
The software offers several options to personalize the appearance and content of financial paperwork. These include:
- Design Adjustments: Modify fonts, colors, and logos to match your branding.
- Content Fields: Add, remove, or reorder sections to emphasize key details such as item descriptions, totals, and payment terms.
- Layout Structure: Choose from various pre-designed formats or create one from scratch to suit specific preferences.
Benefits of Personalization
By tailoring these documents, businesses can improve client experience by ensuring clarity and consistency. Customization also allows you to provide all necessary details in a well-organized format, helping clients easily understand their transactions and payment expectations. Additionally, a personalized appearance enhances your brand’s professionalism and can increase client trust.
Why You Should Customize Your Invoice
Customizing financial documents plays a crucial role in presenting your business in a professional and consistent manner. Tailoring these papers to reflect your brand identity not only makes them more recognizable but also enhances the overall customer experience. A well-designed billing document can establish trust, improve clarity, and streamline communication with clients.
Personalized documents can provide a clear structure that highlights the most important details for your clients, such as due dates, payment terms, and product descriptions. By removing unnecessary clutter and focusing on key information, you make it easier for customers to understand their obligations and proceed with payments on time.
Additionally, having a custom format can help reinforce your brand’s image. With your logo, company colors, and preferred layout, each document becomes a reflection of your business’s professionalism. This level of attention to detail can leave a positive impression, building long-term customer relationships and encouraging repeat business.
Key benefits of customizing billing documents include:
- Improved professionalism: Stand out with a polished and branded appearance.
- Clear communication: Ensure your clients understand all transaction details.
- Brand consistency: Reinforce your identity with personalized design elements.
- Increased efficiency: Minimize errors by tailoring the structure to your needs.
Step-by-Step Guide to Editing Templates
Customizing billing documents in your accounting system is a straightforward process that allows you to tailor essential elements such as design, content, and layout. The following guide will walk you through the necessary steps to adjust these documents according to your specific needs. By the end, you’ll be able to create a professional, personalized format that reflects your business’s identity.
Accessing the Customization Settings
Before making any adjustments, you need to open the customization settings within your platform. Follow these steps:
- Log into the software and navigate to the dashboard.
- Click on the gear icon in the upper right corner and select “Settings”.
- Under the “Your Company” section, choose “Custom Form Styles” to view your available formats.
- Select an existing format to modify, or choose to create a new one.
Making Changes to the Document Layout
Once you’re in the customization interface, you can begin adjusting the document’s layout and design. Here’s how to do it:
- Change fonts and colors: Select from available options or upload custom branding colors to match your business identity.
- Rearrange sections: Organize fields such as product details, payment terms, and totals to prioritize essential information.
- Add a logo: Upload and position your company logo to enhance the professional appearance of the document.
- Modify content fields: Add or remove specific fields to meet your business requirements, such as tax rates or order numbers.
Once these changes are complete, make sure to preview the document to confirm everything looks correct. Afterward, save your newly customized format and use it for future transactions.
Choosing the Right Template Style
Selecting the appropriate format for your financial documents is a key step in ensuring clarity and professionalism. The right style not only reflects your brand’s image but also enhances readability, making it easier for clients to understand key details. Different styles are suited to different business types and transaction needs, so it’s important to choose one that aligns with your goals.
When deciding on a style, consider the following factors:
- Business Type: A simple design may be best for small businesses or freelancers, while larger companies might benefit from more complex layouts that include detailed information like tax calculations or project breakdowns.
- Client Preferences: Think about the preferences of your customers. Do they prefer a minimalist design, or do they expect more detailed and decorative documentation?
- Brand Identity: The style should match your branding, from color schemes to logo placement. A consistent look across all your documents reinforces your company’s image.
- Functional Features: Different styles offer various built-in features like itemized lists, payment terms, and customizable fields. Choose one that allows you to include all necessary information without overloading the document.
Once you’ve assessed these factors, explore the available options to find a style that best suits both your business’s needs and your clients’ expectations. Keep in mind that you can always make adjustments later if your preferences change or evolve over time.
Adding Your Logo to Invoices
Including your business logo on financial documents is a simple yet effective way to reinforce brand identity and create a more professional appearance. A logo helps clients recognize your company immediately and adds a level of credibility to the paperwork. By positioning your logo in the right place on the document, you can enhance both its aesthetic appeal and functionality.
Steps to Upload Your Logo
To place your logo on billing documents, follow these steps:
- Navigate to the “Settings” menu on the dashboard.
- Under the “Custom Form Styles” section, select the template you wish to modify.
- Click on “Edit” to open the customization options.
- Locate the section for logo customization and click the “Upload” button.
- Select the logo file from your computer and adjust its size and position on the document.
- Save the changes and preview the document to ensure proper alignment.
Positioning and Sizing Tips
Once the logo is uploaded, ensure it is placed in a prominent yet unobtrusive location. Typically, the top-left or top-center of the document works best for visibility without overcrowding the layout. Below is a simple table outlining best practices for logo placement:
| Position | Effect |
|---|---|
| Top-left corner | Most common placement, enhances visibility and professionalism. |
| Top-center | Draws attention to your brand immediately, but can take up more space. |
| Bottom-right corner | Less common but can work for less formal documents or as a footer. |
Make sure your logo is clear and not too large, as an oversized logo may distract from the actual content of the document. A balanced design ensures that the logo supports the document’s overall appearance without overwhelming it.
Personalizing the Invoice Layout
Customizing the layout of your financial documents allows you to create a structure that best represents your business and meets your specific needs. A well-organized layout ensures that key details are easy to locate, improves readability, and enhances the overall client experience. Personalizing the structure can help prioritize important information, such as payment terms, item descriptions, and totals, making your documents both functional and professional.
Rearranging Key Sections
The layout offers flexibility to rearrange the sections in a way that best suits your workflow. You can modify the order of fields to highlight certain details, such as:
- Client Information: Positioning the client’s name and contact details at the top or left ensures quick access for easy reference.
- Itemized List: Placing the list of products or services in a prominent area helps clients review their purchases with ease.
- Payment Terms: Clearly visible payment instructions and due dates can reduce confusion and promote timely payments.
- Total Amount Due: Positioning the total amount at the bottom or right allows for a final clear summary of the transaction.
Choosing the Right Spacing and Alignment
Along with adjusting the order of sections, you can also control the spacing and alignment of text and numbers. For instance, aligning currency values to the right or centering titles can create a more polished and visually appealing layout. Adequate spacing between sections improves clarity and prevents the document from feeling overcrowded.
With the ability to customize every detail, you can ensure that your billing documents are perfectly suited to your business needs while also reflecting a professional image to your clients.
Modifying Font and Colors
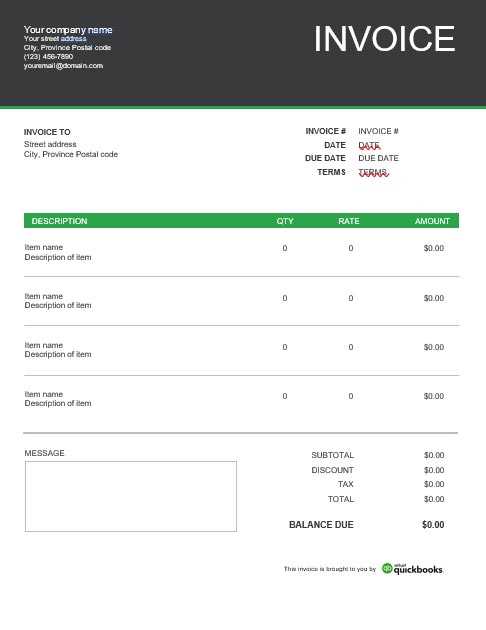
Adjusting fonts and colors is an effective way to enhance the visual appeal of your financial documents while maintaining consistency with your brand’s identity. The right typography and color scheme can help guide the reader’s attention to key details and improve overall readability. By customizing these elements, you can create a polished, professional appearance that reflects your business values.
Choosing the Right Fonts
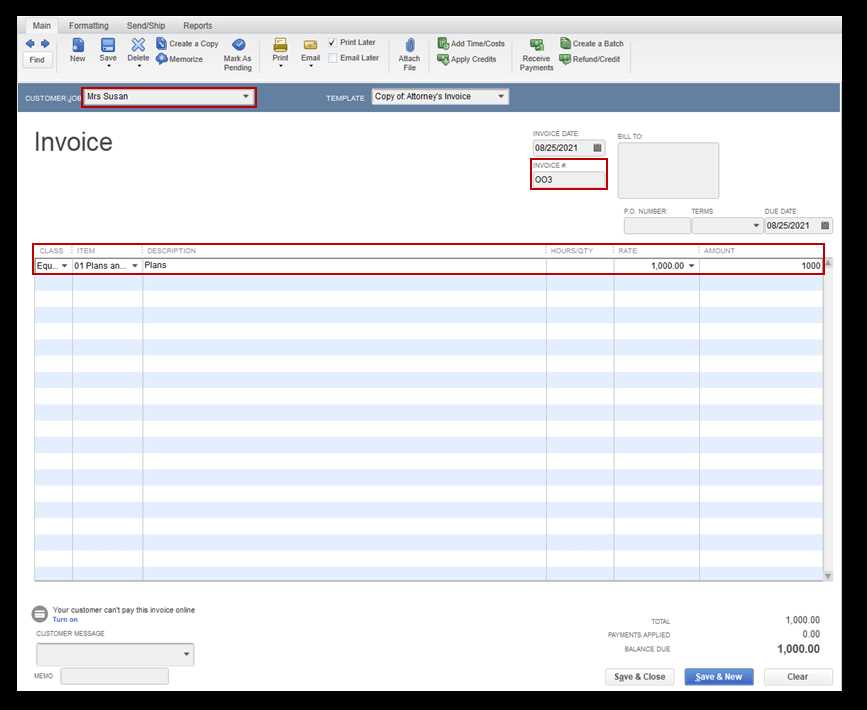
Font selection plays a vital role in how your document is perceived. It’s essential to use fonts that are both readable and professional. Consider the following tips when selecting fonts for different sections:
- Title Fonts: Choose bold or larger fonts for headings like “Invoice” or “Total Due” to ensure they stand out.
- Body Text: Use simple, easy-to-read fonts for product descriptions, payment terms, and client details. Sans-serif fonts like Arial or Helvetica are great choices.
- Emphasis: Use italics or bold formatting sparingly to highlight important information, such as due dates or discounts.
Picking the Right Color Scheme
The colors you select should complement your brand and enhance readability. Here are some considerations when choosing color schemes for your documents:
- Primary Colors: Use your company’s main colors for headings, logos, or borders to maintain brand consistency.
- Neutral Background: A white or light background ensures the text remains legible. Avoid overly bright or dark backgrounds that can strain the eyes.
- Contrast: Ensure sufficient contrast between text and background colors to improve readability. For example, dark text on a light background is easier to read than light text on a dark one.
- Accent Colors: Use accent colors sparingly for emphasis, such as highlighting important figures (like totals or discounts) to draw attention.
By thoughtfully selecting and adjusting fonts and colors, you can create documents that not only look great but also improve functionality and client communication.
Adding Custom Fields to Invoices
Custom fields allow businesses to capture specific information on financial documents that may not be included by default. These fields can be used to track additional data, such as order numbers, customer preferences, or project codes, providing flexibility and improving documentation accuracy. Customization ensures that every transaction reflects the unique details required for your business needs.
Types of Custom Fields to Add
There are several types of custom fields you can include to enhance your documents. Below are a few examples:
- Order or Reference Number: Add a field to track internal order numbers, job references, or project codes for better organization.
- Customer Notes: Include a section for special instructions or customer-specific requests to ensure clarity in communication.
- Discounts or Coupons: Create a space for promotional codes or special discount details, allowing clients to easily see applied offers.
- Tax Identification Number: For businesses that need to display their tax ID, a custom field is a convenient way to keep this information accessible.
Steps to Add Custom Fields
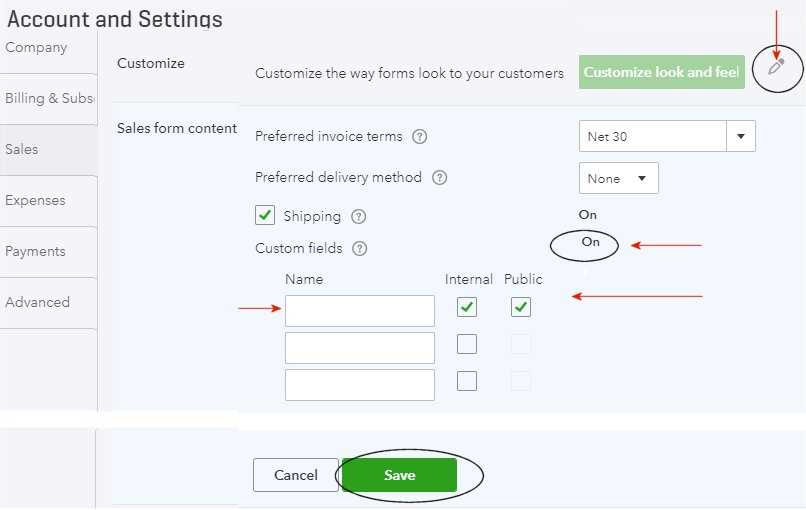
To add a custom field, follow these steps to incorporate it into your document:
- Navigate to the settings section of the software.
- Select “Custom Fields” from the available options under the “Sales” or “Form Customization” category.
- Click on “Add Custom Field” and define the field type (e.g., text, date, checkbox, or dropdown).
- Label the field according to its purpose, and decide if it should be visible on the document’s front or in a more detailed section.
- Save the changes, and preview the document to confirm the new fields are placed correctly.
By adding custom fields, businesses can ensure that all necessary details are included, providing clients with a clearer and more personalized experience.
Setting Up Payment Terms
Payment terms outline the conditions under which a client is expected to pay for goods or services. These terms are essential for managing cash flow and ensuring that expectations are clear between the business and its clients. By setting up clear payment terms, you establish a professional standard that can help streamline the billing process and avoid misunderstandings.
When setting payment terms, businesses typically define the due date, acceptable methods of payment, and any late fees or discounts for early payment. Here’s a guide to the key elements to consider when configuring payment terms:
| Payment Term | Details |
|---|---|
| Due Upon Receipt | Payment is expected immediately upon receiving the document. |
| Net 30 | Payment is due 30 days after the issue date. |
| Net 60 | Payment is due 60 days after the issue date. |
| Early Payment Discount | Offer a discount (e.g., 2% off) if payment is made within a set number of days (e.g., 10 days). |
| Late Payment Fee | Apply a fee (e.g., 5% of the total) if payment is not received by the due date. |
By defining these conditions, you can create consistency in how payments are handled. Once the payment terms are set, they should be communicated clearly to clients, typically included in the document and discussed prior to finalizing transactions. This transparency helps build trust and ensures both parties are on the same page regarding payment expectations.
Incorporating Your Business Information
Including essential business details on financial documents ensures that clients have easy access to the necessary contact and identification information. This not only fosters transparency but also strengthens your professional image. Incorporating key elements such as your business name, address, phone number, email, and tax identification number helps clients reach out when needed and ensures legal and accounting compliance.
To ensure clarity and consistency, place your business information in a prominent location, typically at the top of the document. This allows clients to quickly identify the source of the document and review key contact details. It’s also important to include any legal information, such as your business registration number or VAT number, if applicable.
Here’s a list of the critical details to include:
- Business Name: Make sure it is clearly visible, usually at the top of the document.
- Business Address: Include your physical location, mailing address, or both if relevant.
- Phone Number: Provide a contact number for easy communication.
- Email Address: A direct email address for any inquiries or support.
- Website: Including a link to your business website can also be helpful.
- Tax Identification Number: Ensure you include this for tax reporting and legal purposes if necessary.
By ensuring this information is consistently included on each document, you make it easier for clients to get in touch and complete transactions smoothly, while also maintaining a level of professionalism that supports your brand identity.
Previewing Your Custom Invoice
Before finalizing any changes made to your billing documents, it’s important to preview the customized layout to ensure everything appears as intended. This step allows you to check the accuracy of the data, the placement of sections, and the overall design. A proper preview can help you spot potential errors, such as misaligned fields, missing information, or formatting issues that could affect the document’s professional look.
Previewing the finalized design allows you to see the document from the client’s perspective. It gives you a chance to confirm that all fields are visible, the text is legible, and the overall look matches the branding style you’re aiming for. Make sure to check for consistency in fonts, colors, and spacing across the entire document.
| Preview Check | Details |
|---|---|
| Text Alignment | Ensure that text is aligned properly within each section for clean readability. |
| Data Accuracy | Check that all relevant fields such as client details, amounts, and dates are correct. |
| Section Placement | Confirm that all sections (e.g., itemized list, payment terms) are in their intended positions. |
| Design Consistency | Review fonts, colors, and logos to ensure the document matches the brand style. |
Once you have reviewed the preview and are satisfied with the results, you can save the changes and begin using the customized format for client communications. Remember that if any adjustments are needed after previewing, you can always go back to tweak the layout until everything is perfect.
Saving and Applying Your Template
Once you’ve customized the structure and layout of your billing document to your satisfaction, the next step is to save your work and ensure it’s applied correctly for future use. Saving your changes allows you to maintain a consistent format across all client communications, while applying the new layout to upcoming documents ensures that your branding and professional standards are maintained without having to reconfigure each time.
When saving, make sure to give the layout a distinctive name so you can easily identify it later. After saving, it’s important to select this layout for all relevant documents to guarantee the correct design is used moving forward.
Here’s how you can save and apply your new format:
- Save the Design: Once you’re satisfied with the changes, click “Save” or “Apply” to store the new layout in the system.
- Choose the Default Style: Select the customized layout as the default for all outgoing documents, ensuring consistency across all client interactions.
- Apply to Specific Documents: If you want to apply the layout to specific transactions or clients, manually select the new format when creating each document.
By saving and applying the customized design, you ensure that all documents sent to clients reflect your business identity and meet your operational needs. This streamlined approach saves time and ensures consistency in your communications.
Duplicating an Invoice Layout
Creating a copy of a previously customized document layout can be useful when you want to use the same design for multiple purposes without starting from scratch. By duplicating the layout, you preserve all the customizations, such as colors, fonts, and fields, while having the flexibility to make minor adjustments if needed. This allows for consistent formatting across different documents and saves time during the customization process.
Once a layout is duplicated, you can modify it further without affecting the original version, giving you the freedom to experiment with different styles or adjust specific details for different clients or transactions.
| Step | Details |
|---|---|
| Select the Layout | Navigate to the settings section and choose the layout you want to duplicate from the list of saved designs. |
| Click Duplicate | Look for the “Duplicate” or “Copy” option, usually located near the layout name or settings. |
| Rename the New Layout | Give the duplicated layout a distinct name to differentiate it from the original, ensuring clarity when choosing which design to use later. |
| Make Adjustments | If necessary, modify any section of the new layout to suit the specific needs of a client or project. |
| Save the Duplicate | Save the newly duplicated version to ensure it’s available for future use, without overwriting the original design. |
By duplicating and tweaking a layout, businesses can maintain consistency while also having the ability to create customized variations for different situations. This approach enhances workflow efficiency and provides flexibility in managing client-specific requirements.
Editing Multiple Layouts
Managing several document designs at once can be essential when running a business that needs different layouts for various types of transactions, clients, or services. The ability to modify more than one format at the same time saves time and ensures consistency across all communications. This flexibility allows you to make broad updates or adjustments without the need to manually modify each document one by one.
Whether you’re adjusting the design, content, or both, editing multiple formats at once helps streamline the process of maintaining a cohesive and professional appearance across all client communications. This is particularly useful if you use different layouts for different types of services or customer groups.
| Step | Details |
|---|---|
| Access Layout Settings | Go to the section where all document designs are stored. This is usually under a “Manage Layouts” or “Form Customization” tab. |
| Select Multiple Designs | Choose the layouts you want to modify. Many systems allow you to select multiple formats at once. |
| Apply Global Changes | If applicable, apply broad changes like updating colors, fonts, or adding a new section across all selected layouts. |
| Edit Specific Fields | For more personalized changes, adjust specific fields or sections for each format as needed. |
| Save Changes | Once you’re satisfied with the updates, save all modifications to apply them to the selected layouts. |
Editing multiple layouts simultaneously can significantly improve your workflow, especially when handling a large volume of client interactions. It helps ensure that all documents are updated with the latest changes and provides a uniform presentation across all your materials.
Common Issues with Template Customization
When adjusting the design and layout of financial documents, users may encounter several challenges that can hinder the desired outcome. These issues often stem from formatting conflicts, incorrect placement of fields, or unintended design changes that affect the overall look and functionality of the document. Understanding and addressing these common problems ensures smoother customization and maintains a professional appearance.
Some of the most frequent issues arise when there are discrepancies in field alignment, missing information, or inconsistencies in font and color usage. These problems can lead to a document that looks unprofessional or contains errors, making it harder for clients to understand the content or for businesses to track financial data accurately.
Common Problems and Solutions
| Issue | Solution |
|---|---|
| Misaligned Fields | Check the layout settings and adjust the field positions to ensure proper alignment. Use gridlines or preview mode to verify the placement. |
| Missing Information | Verify that all necessary fields are included and correctly linked to data sources, such as customer details or item descriptions. |
| Font or Color Inconsistencies | Ensure that the chosen fonts and color schemes are applied consistently across all sections. Review settings to make sure no default options have been overridden. |
| Template Not Saving | If changes are not saving, check for any software glitches or connectivity issues. Refresh the page or try saving the document under a new name. |
| Incompatible File Types | Make sure that the file format you’re using is compatible with the system. Convert to the appropriate file type, if necessary. |
Tips for Avoiding Issues
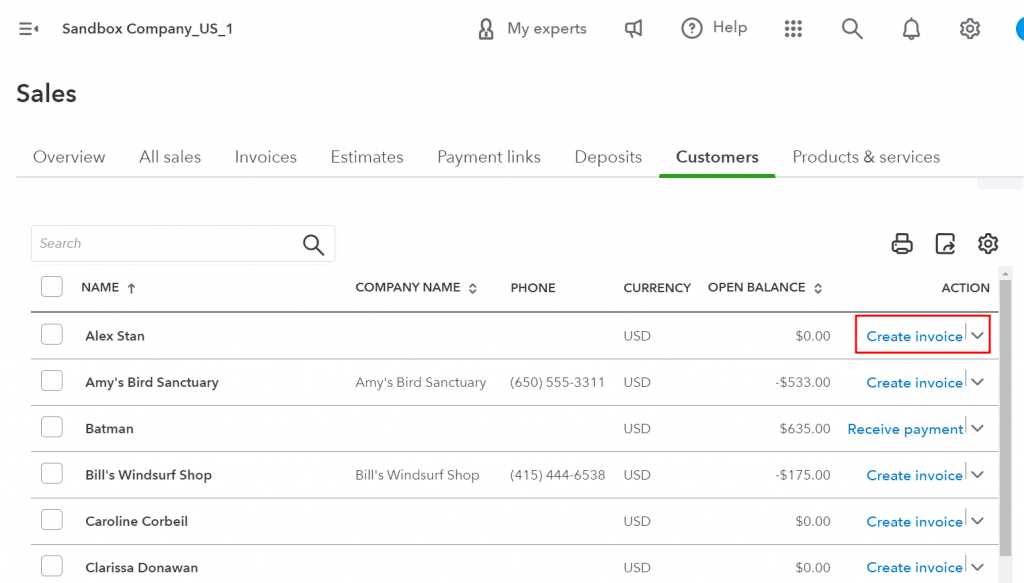
- Preview Changes: Always preview the document before finalizing any modifications to catch any errors early.
- Use Templates as a Base: Start with a pre-designed layout and customize it, rather than building from scratch, to avoid common formatting issues.
- Test Across Devices: Ensure that the document displays correctly on different devices and screen sizes, as layouts can shift depending on the platform.
By addressing these common problems and following best practices, you can ensure that the final document maintains both clarity and a professional appearance, making it easier to communicate with clients and manage your financial records.
Restoring Default Invoice Layouts
Sometimes, after making multiple customizations, you may want to revert back to the original design for a fresh start or to resolve issues caused by recent changes. Restoring the default layout helps eliminate errors introduced by over-customizing or accidental adjustments, ensuring that your documents return to their original, functional state. This is a simple process that can bring clarity and consistency to your billing practices.
Reverting to the default design can be helpful if you prefer the system’s standard formatting or if the changes you made don’t align with your business needs. Restoring the default layout also helps ensure compatibility across different systems and ensures that all essential fields are included and correctly positioned.
Steps to Restore Default Layouts
- Access Layout Settings: Navigate to the section where the document designs are managed.
- Select the Layout: Find the layout you want to reset to default.
- Choose Restore Option: Look for an option labeled “Restore to Default” or “Reset to Original” in the settings menu.
- Confirm Changes: A confirmation prompt may appear; confirm that you wish to reset the layout to its original form.
- Save Changes: Once restored, save the layout to apply the default settings.
When to Restore Default Settings
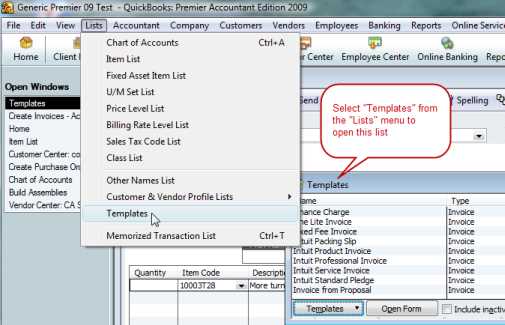
- Inconsistent Formatting: If the design no longer looks cohesive after multiple changes.
- Field Errors: When certain fields are missing or misaligned, and a reset would be quicker than fixing them manually.
- Prefer Simplicity: If you prefer to use the default layout for a clean and simple design without unnecessary customizations.
Restoring to the default layout is a quick way to resolve design issues and start fresh. It ensures that your documents are easy to read and maintain a professional look while simplifying your work process.
Best Practices for Invoice Design
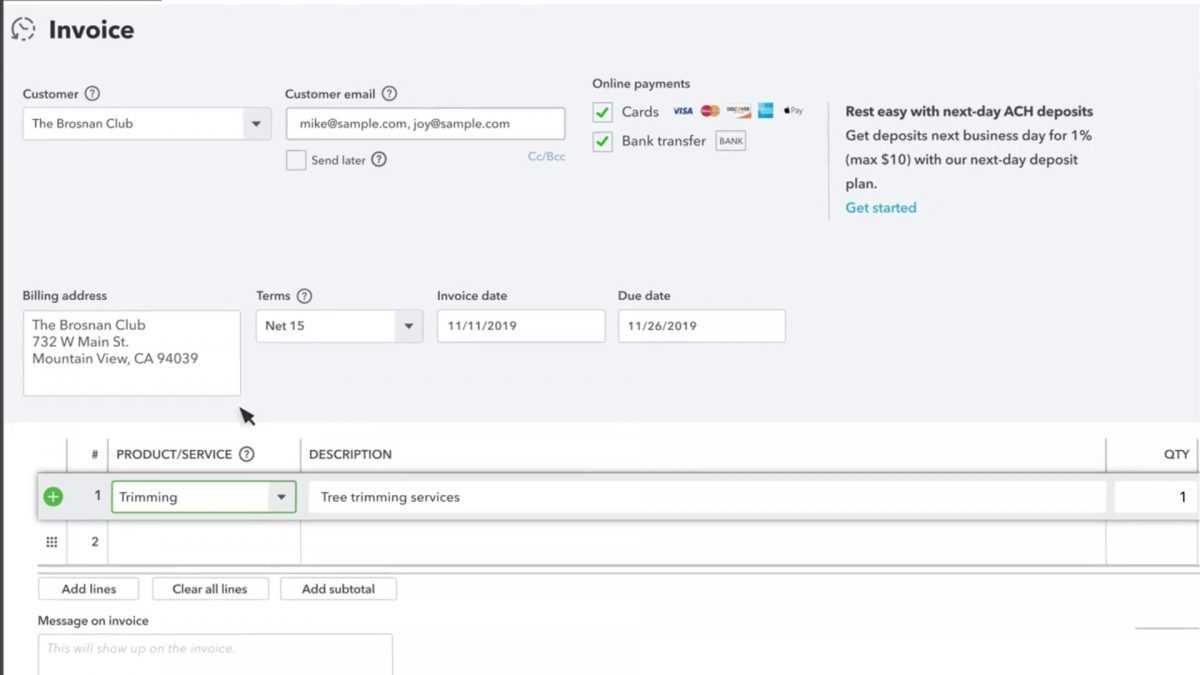
Creating an effective document for billing purposes requires careful attention to detail. A well-designed layout not only ensures clarity and professionalism but also helps clients understand the terms of payment, avoid confusion, and make the process smoother for both parties. By following certain design principles, businesses can improve the readability and effectiveness of their financial communications.
In order to maintain a professional and consistent appearance, it’s important to focus on key elements such as font selection, use of whitespace, and clear sectioning of information. Moreover, keeping the design simple and avoiding clutter can make the document more visually appealing while enhancing its functionality.
Essential Tips for an Effective Layout
| Tip | Explanation |
|---|---|
| Use Readable Fonts | Choose simple, clear fonts like Arial or Helvetica for easy reading. Avoid decorative fonts that may distract from the content. |
| Include Important Information | Ensure that key details such as payment terms, due dates, and contact information are easy to locate and understand. |
| Maintain Consistency | Use the same font size, style, and colors across all sections to ensure a cohesive look. Consistent design enhances the professional appearance. |
| Leave Enough White Space | Proper spacing between sections and text ensures that the content doesn’t look crowded and makes the document easier to follow. |
| Highlight Key Sections | Use bold text or different font sizes for important sections, such as total amounts or due dates, so that they stand out. |
Designing for User Experience
- Keep it Simple: Focus on essential information, making the document easy to navigate and reducing unnecessary distractions.
- Prioritize Legibility: Ensure that your design is clear and easy to read on any device or print format.
- Be Professional: The design should reflect your brand’s identity while maintaining a formal tone appropriate for financial transactions.
By following these best practices, you can create billing documents that are visually appealing, easy to understand, and professional. A well-designed layout not only improves communication but also builds trust with clients, making the entire payment process more efficient.