How to Create a Free Invoice Template for Your Business
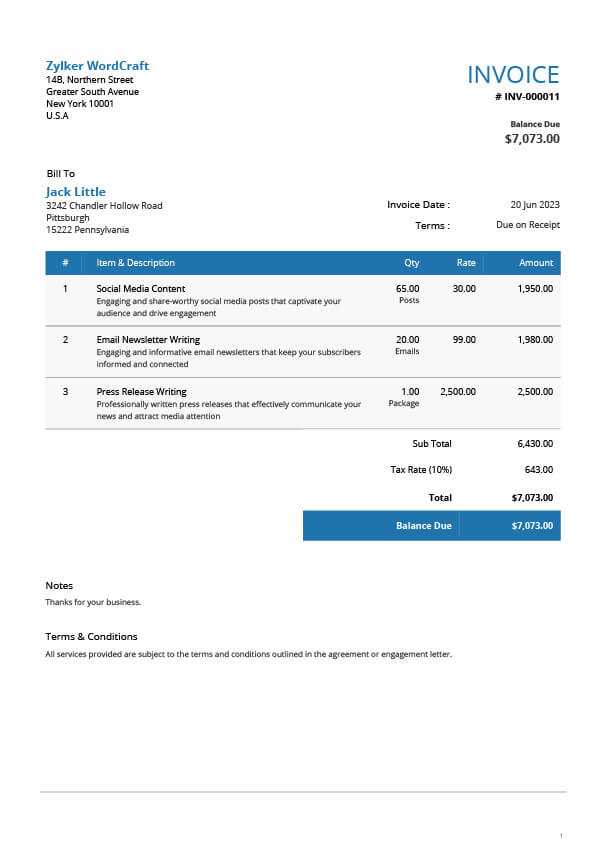
In any business, it’s essential to have a clear and organized way to request payment for goods or services provided. A well-structured billing document can help ensure smooth transactions and provide clients with all the necessary details for prompt settlement. Whether you’re a freelancer or a small business owner, having a reliable system in place to generate these documents is crucial for maintaining professionalism and accuracy.
While there are many paid solutions available, there are also numerous methods to design a suitable billing document without spending extra money. By using simple tools and a little creativity, you can create a document that reflects your brand and meets legal requirements. The key lies in understanding the basic components of such documents and how to adapt them to your specific needs.
In the following sections, we’ll explore various ways to craft a document that is not only functional but also visually appealing. From understanding the necessary fields to customizing the design, you’ll learn how to produce a professional billing record that can be reused for each transaction.
How to Create a Billing Document
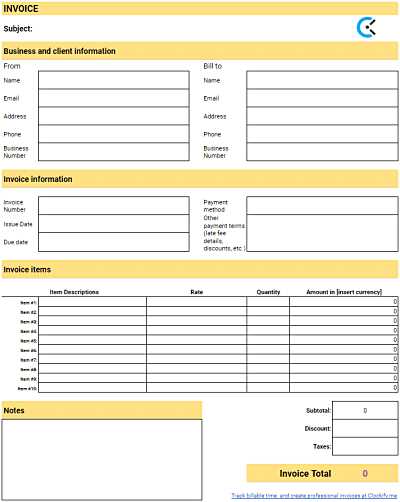
Crafting a well-organized document to request payment doesn’t have to be complicated. By following a few simple steps, you can design a document that looks professional, includes all necessary details, and can be easily customized for every transaction. Whether you need a one-time record or a system for recurring use, the process is straightforward and doesn’t require advanced design skills or costly software.
The first step is identifying the key information that should be included. A successful billing document needs to clearly state the services or products provided, payment terms, and contact details. Once you understand the essentials, you can focus on creating a layout that is clean and easy to navigate.
Here are the main elements to include when creating your document:
- Header: Your business name, address, and contact information
- Client Details: Customer’s name, address, and contact information
- Transaction Details: Description of goods or services, quantity, rate, and total
- Payment Information: Terms of payment, due date, and preferred methods
- Unique Identification: A reference number or ID for tracking
Once you’ve decided what should go into the document, it’s time to choose a platform for creating it. There are many tools available that allow you to easily design and customize the layout. Here are some options to consider:
- Word Processors: Microsoft Word or Google Docs offer simple templates that can be edited to fit your needs.
- Spreadsheet Software: Excel or Google Sheets can be used to create a more structured format, especially when working with multiple entries or calculations.
- Online Tools: Websites like Canva or Zoho allow for quick design with pre-made layouts that can be modified as needed.
By using these tools, you can produce a polished, professional document in just a few steps. The most important part is ensuring that the details are accurate and clearly presented to avoid confusion and facilitate quick payment processing.
Understanding the Basics of Billing Documents
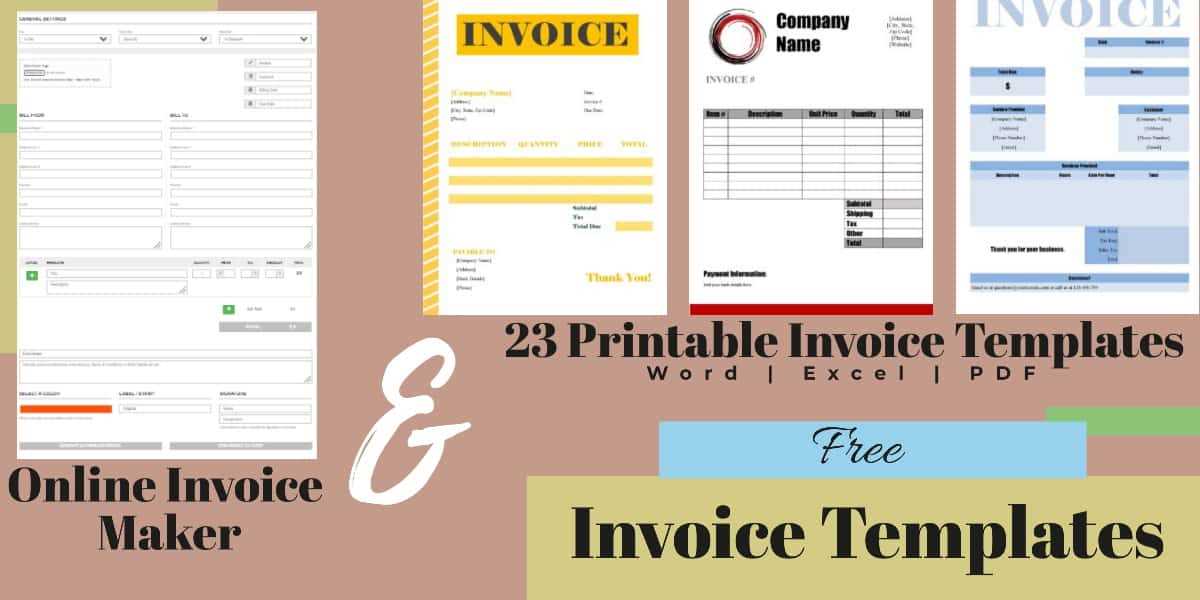
When you provide goods or services to clients, a formal request for payment is an essential part of the transaction process. Such a document not only helps ensure you get paid but also serves as a record for both parties. It outlines the details of the agreement, including the amount owed and the terms of payment. Understanding the core components of this document is crucial for creating one that is both effective and professional.
Key Elements of a Billing Document
To create a well-structured payment request, certain elements must be included. These elements ensure clarity and prevent misunderstandings between you and the client. Here’s a breakdown of the core components:
| Component | Description |
|---|---|
| Header | Contains your business name, logo, and contact details, making the document easily identifiable. |
| Client Information | Includes the client’s name, address, and contact details for clear identification. |
| Itemized List | A detailed description of the products or services provided, including quantities, rates, and totals. |
| Amount Due | Clearly states the total amount owed, along with any applicable taxes or discounts. |
| Terms of Payment | Specifies payment methods, due date, and any late fees if applicable. |
| Unique Reference Number | A unique identifier for tracking and referencing the document. |
Why These Components Matter
Each section of the document serves a specific purpose, ensuring both clarity and professionalism. The header makes the document easily recognizable, while client information ensures it reaches the right recipient. The itemized list provides transparency regarding the transaction details, reducing the chance of disputes. By clearly stating the amount due and payment terms, you help manage ex
Benefits of Using a Payment Request Document
Utilizing a pre-designed structure for your billing records offers several advantages, especially when it comes to consistency, professionalism, and time efficiency. A well-organized document ensures that all essential information is included, reducing the risk of errors and helping to streamline the payment process. By leveraging a ready-made design, you can focus more on your business and less on the technicalities of document creation.
Time-Saving and Efficiency
One of the most significant advantages of using a pre-set structure is the time it saves. Instead of starting from scratch each time you need to request payment, you can quickly input the necessary details into an existing layout. This allows you to produce accurate and polished documents in a fraction of the time.
- Consistent Layout: Avoids the need to create new designs each time, ensuring uniformity in all your documents.
- Easy Customization: With a basic structure in place, adjusting information for each transaction is simple and quick.
- Ready to Use: Most pre-built formats are designed with ease of use in mind, requiring little to no adjustments.
Professional Appearance and Accuracy
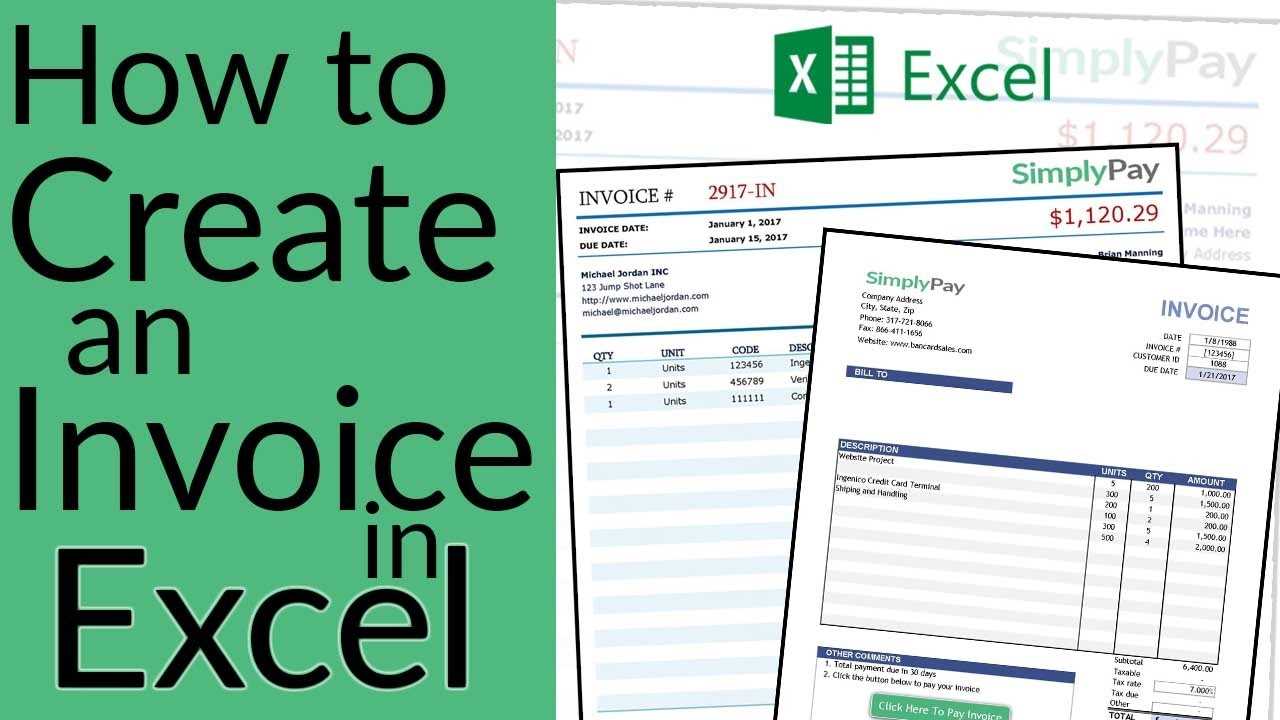
Using a polished, consistent layout enhances your business’s professional image. Whether you are dealing with clients, partners, or suppliers, a well-organized document helps establish credibility and trust. A standard format ensures that all relevant details are included and easy to find, reducing the likelihood of misunderstandings or disputes over payment.
- Clear Structure: Essential details such as amounts, payment terms, and descriptions are prominently displayed.
- Increased Credibility: A well-designed document reflects positively on your business, giving clients confidence in your professionalism.
- Reduced Errors: Using a consistent format helps ensure that all necessary fields are included, lowering the risk of missing critical information.
By adopting a pre-designed document, you not only save time but also create a streamlined and professional process for handling transactions, making it easier for both you and your clients to stay organized and focused on the work at hand.
Choosing the Right Tool for Creation
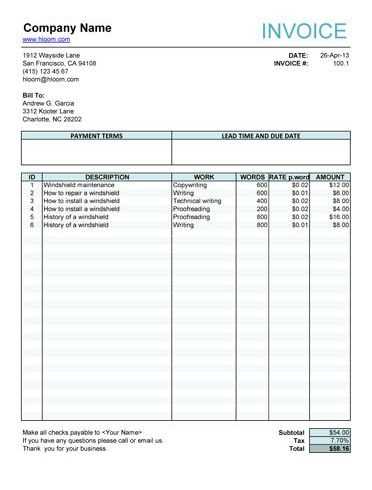
When it comes to designing a document for payment requests, selecting the right tool can significantly impact the efficiency and outcome of your work. There are a variety of options available, from simple word processors to more advanced design software, each with its own strengths. The tool you choose will depend on factors such as your familiarity with the software, the complexity of the document, and your need for customization.
Popular Software Options
Several tools are widely used for creating payment documents, each offering unique features. Some are basic and intuitive, while others allow for more intricate design and layout adjustments. Here are a few commonly used options:
- Word Processors: Programs like Microsoft Word or Google Docs are simple to use and allow you to create a basic layout quickly. They also offer templates that can be easily customized with your own details.
- Spreadsheet Software: Excel or Google Sheets is ideal for those who need to incorporate calculations or track multiple entries. These tools provide a structured format and the ability to manage large datasets.
- Online Design Tools: Platforms like Canva or Adobe Express offer user-friendly interfaces with a variety of pre-designed layouts. These tools are great for those who want more visual customization and branding elements in their documents.
Factors to Consider
Choosing the right platform depends on several factors, including your needs and skill level. Here are some considerations to keep in mind when making your decision:
- Ease of Use: If you are looking for something quick and simple, a word processor might be the best choice. These tools are straightforward and require little to no learning curve.
- Customization Needs: If you need more design flexibility or advanced formatting, design software such as Canva or Adobe Express will give you more creative control.
- Cost: Many tools are free or offer free versions, but some premium features ma
Essential Elements in a Billing Document
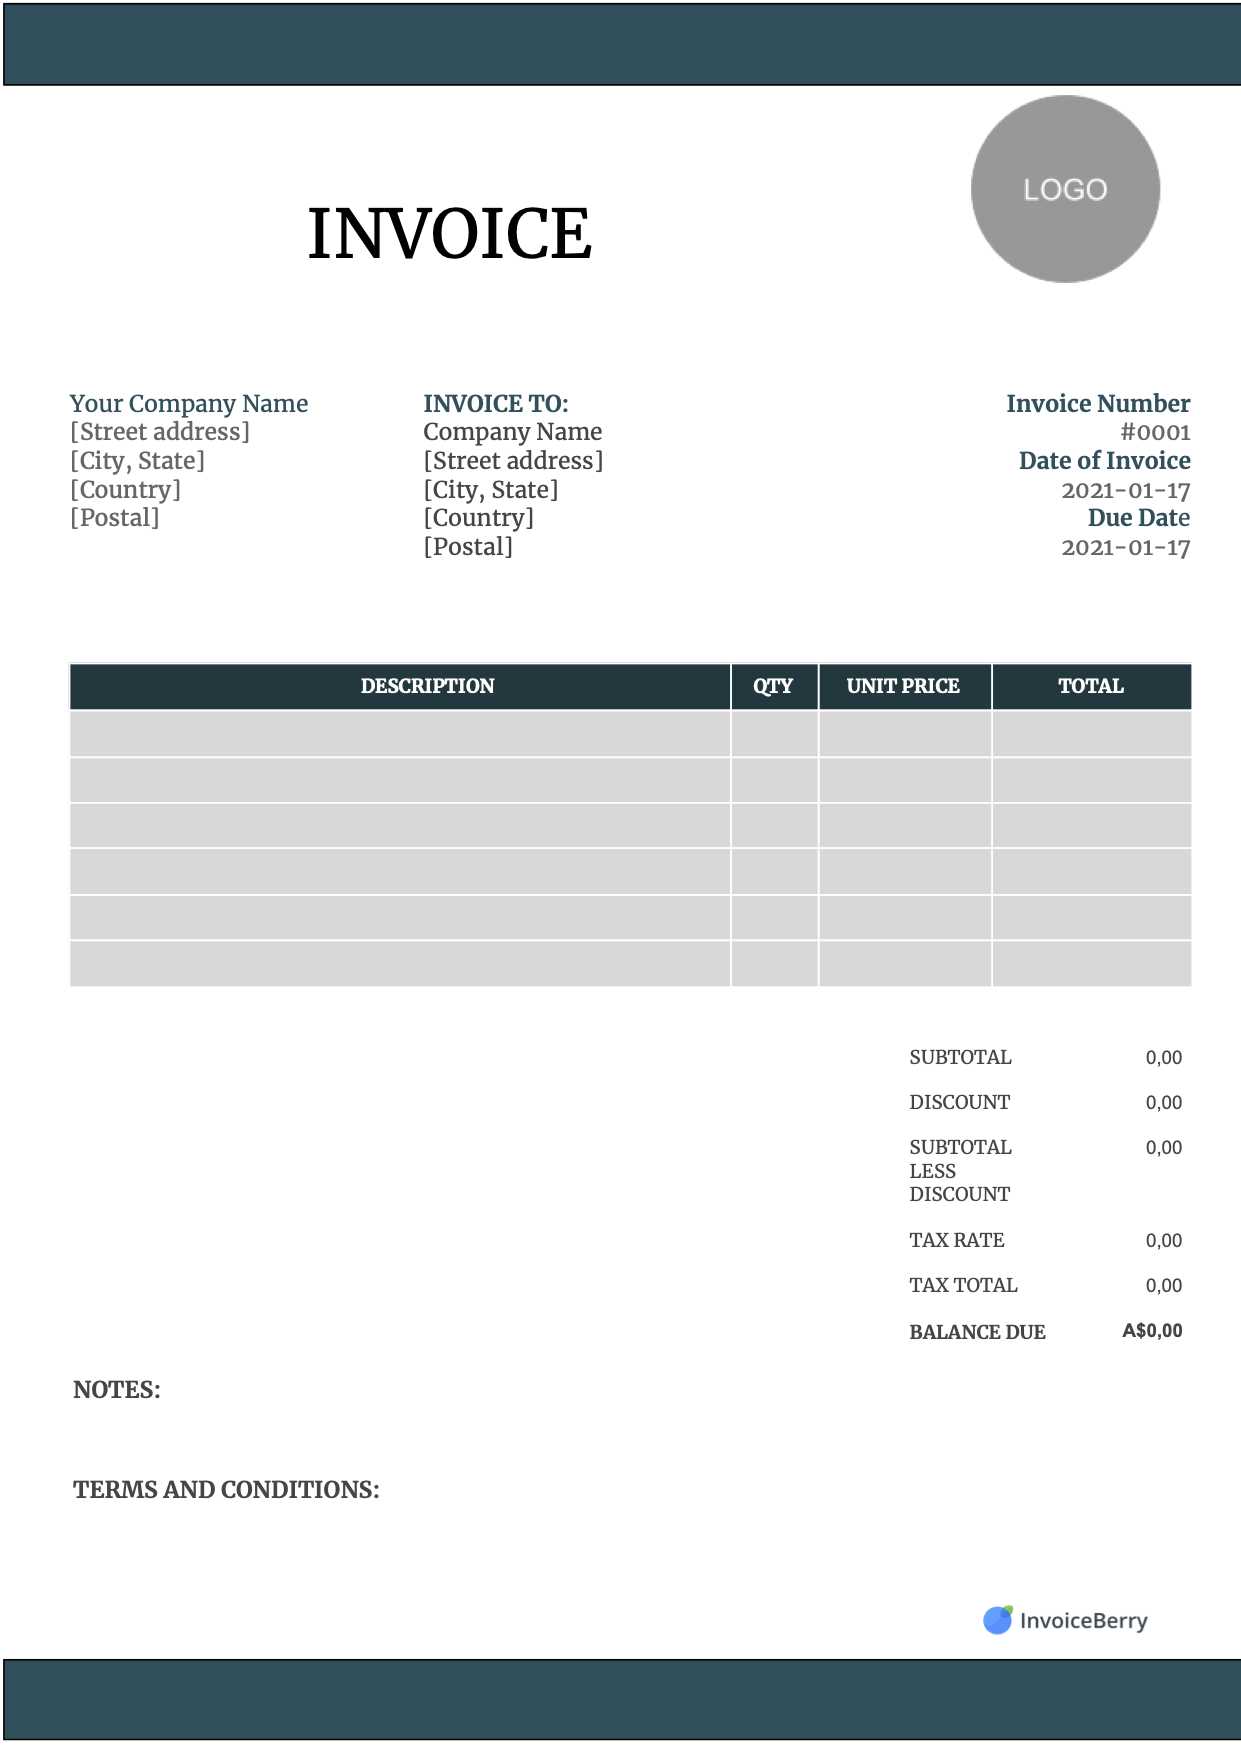
When creating a formal request for payment, it’s crucial to ensure that the document contains all the necessary information. This helps avoid confusion, ensures transparency, and facilitates timely payment. A well-organized document provides a clear summary of the transaction, making it easy for both parties to understand the details. Understanding what needs to be included is key to crafting a document that is both professional and effective.
Below are the essential components that should be present in every payment request:
- Business Information: Your name or company name, address, phone number, and email should be clearly stated at the top of the document. This helps the recipient easily identify who the request is coming from.
- Client Details: Include the client’s full name, company (if applicable), address, and contact information. This ensures that the document reaches the right person and serves as a reference for future communication.
- Unique Reference Number: A specific number or code that identifies the document. This is useful for tracking and keeping your records organized.
- Transaction Date: Clearly mention the date the goods or services were provided, as well as the date the document was issued. This helps both parties keep track of payment schedules.
- Itemized List of Products or Services: Provide a detailed breakdown of what was delivered, including descriptions, quantities, unit prices, and the total for each item or service. This helps the recipient understand exactly what they are being charged for.
- Subtotal and Total Amount Due: Clearly display the subtotal before taxes and any applicable discounts, followed by the final amount due after all adjustments.
- Payment Terms: Specify the agreed-upon terms, such as the due date, acceptable payment methods, and any late fees or penalties for overdue payments.
- Tax Information: If applicable, indicate the relevant taxes, such as sales tax, VAT, or other applicable charges, and how they are calculated.
- Notes or Additional Information: Include any relevant remarks, such as payment instructions, thank-you notes, or reminders about future services. This section is optional but can add a personal touch to the document.
By including all of these elements, you ensure that the document is not only comprehensive but also professional, providing the recipient with all the details they need to process the payment efficiently and accurately.
Customizing Your Payment Request Design
When creating a formal request for payment, the visual presentation of the document can be just as important as the information it contains. A well-designed layout not only looks professional but also enhances readability, making it easier for the recipient to process the details. Customizing your document allows you to reflect your brand identity, maintain consistency across communications, and create a more polished impression.
Choosing a Layout and Structure
The first step in customization is selecting a layout that suits your needs. You can choose from several standard formats, but it’s essential to keep it simple and organized. The most effective designs have clear sections that separate key information such as client details, items, and payment terms.
- Header: The top section should prominently feature your business name or logo. This area sets the tone for the document and should be easily identifiable.
- Body: The main body of the document should be divided into clear sections for transaction details, amounts, and payment terms. Use tables or lists to display items and prices for easy understanding.
- Footer: Include additional information such as payment instructions, terms and conditions, or your contact information.
Incorporating Branding and Personalization
Adding personal or brand-specific elements can make your document stand out and strengthen your business identity. Use color schemes, fonts, and logos that align with your brand’s visual style. However, be mindful of simplicity and readability–avoid overcrowding the document with excessive design elements.
- Colors: Use your brand colors to highlight key sections, such as headers or the total amount due, but ensure the text remains easy to read.
- Fonts: Stick to professional, legible fonts. Use bold or italics to highlight important information like due dates or totals, but avoid using too many different fonts.
- Logo: Including your logo in the header reinforces brand recognition and adds a professional touch to the document.
Customizing your document not only makes it visually appealing but also helps maintain consistency with other business materials. With a few simple adjustments, you can create a document that reflects your unique style and helps you stand out in a competitive market.
Setting Up a Numbering System for Payment Requests
Organizing your payment records is essential for keeping track of transactions and maintaining a professional business structure. One of the most important elements in this process is establishing a clear and consistent numbering system. A well-structured numbering approach not only makes it easier to manage and reference your records but also ensures that each document is unique and can be easily identified for tracking purposes.
Here are the key steps and considerations when setting up a numbering system for your payment requests:
Choosing a Numbering Format
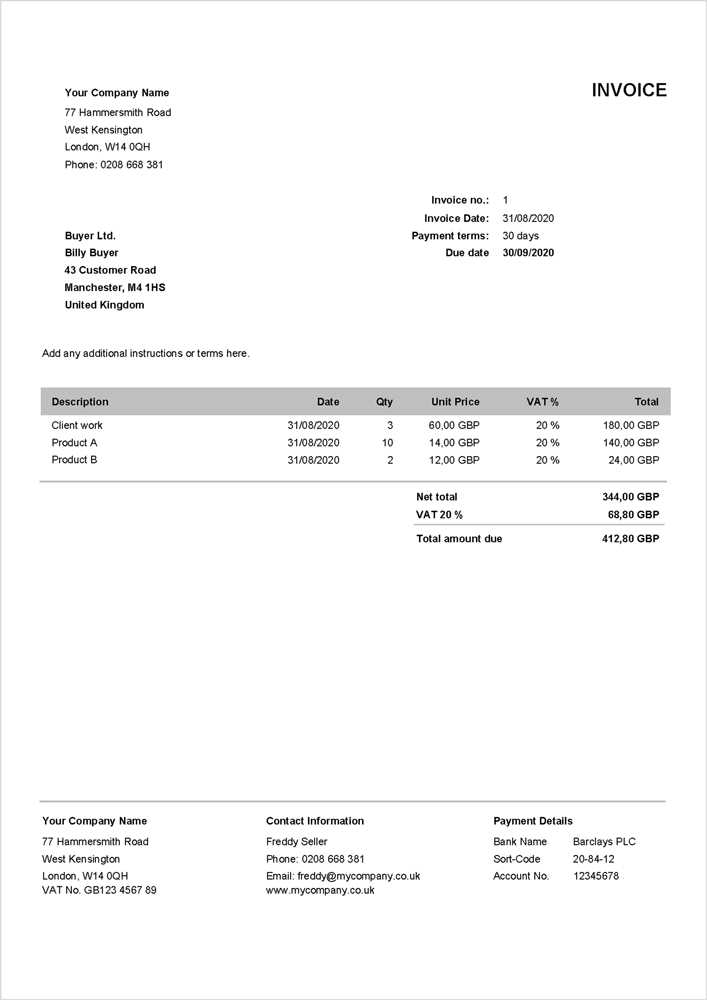
The first decision is selecting a format that works for your business. The numbering system should be logical, simple, and scalable, allowing you to keep track of documents easily as your business grows.
- Sequential Numbers: The most common method is to use a simple, sequential numbering system (e.g., #001, #002, #003). This ensures that each document has a unique identifier and helps maintain a chronological order.
- Date-Based Numbers: Another option is incorporating the date into the number (e.g., 2024-001, 2024-002). This method helps to quickly identify when the document was issued, which can be helpful for year-end or tax-related record-keeping.
- Custom Number Formats: Depending on your business needs, you can add additional elements such as client codes or product/service identifiers (e.g., ABC-001, XYZ-2024-001). This can be particularly useful for large businesses with multiple clients or departments.
Ensuring Consistency
Once you’ve chosen a format, it’s crucial to stick to it. Consistency in numbering helps avoid confusion and makes it easier to manage documents over time. You can implement this consistency by using automated tools or simple systems like spreadsheets or accounting software.
- Automated Systems: Many accounting software options can automatically generate sequential numbers for you, reducing the chances of mistakes.
- Manual Tracking: If you’re manually creating payment requests, maintain a clear log of the numbers you’ve assigned to avoid duplication. Spreadsheets or basic databases can help keep track of issued numbers.
- Backup System: Always ensure that you have a backup system in place, such as saving documents in a cloud storage system or using secure physical records, so that you can reference or recover old documents if necessary.
By setting up a
Adding Payment Terms and Due Dates
Clearly specifying payment expectations in a formal document is essential for maintaining smooth business operations and ensuring timely payments. By outlining payment terms and due dates, you set clear guidelines for when and how payment should be made, helping to prevent misunderstandings or delays. Properly communicated terms not only improve cash flow but also foster positive relationships with clients.
Understanding Payment Terms
Payment terms refer to the specific conditions agreed upon between you and the client regarding how and when payments are to be made. These terms can vary depending on the nature of the business, the relationship with the client, or the type of services provided. It’s important to include terms that are clear, fair, and enforceable.
- Net Terms: This is the most common payment term, where the full amount is due a specified number of days after the document date (e.g., Net 30 means the payment is due 30 days after the document is issued).
- Advance Payment: This term requires the client to pay part or the full amount before services or products are delivered.
- Installments: Some businesses may allow clients to pay in installments. Be sure to specify the amount and due dates for each installment.
- Early Payment Discount: You may offer clients a discount if payment is made before a specific due date. For example, “2% discount if paid within 10 days.”
Including Due Dates
The due date is an essential component that defines when the client should make the payment. Including this information ensures that both parties are aware of the time frame, reducing the likelihood of late payments. Additionally, it helps you keep track of when to follow up with clients.
Payment Term Example Due Date Net 30 Payment due 30 days after the document date March 15, 2024 Advance Payment Full payment required before service begins Before starting project Installments 50% upfront, 50% upon completion First payment due upon receipt, second upon completion Early Payment Discount 2% off if paid within 10 days March 5, 2024 Incorporating Your Business Logo
Including your business logo in formal documents plays an essential role in enhancing your brand’s visibility and professionalism. A logo acts as a visual representation of your company, helping clients and partners instantly recognize your business. By incorporating your logo into your billing documents, you ensure consistency across all your communications and reinforce your brand identity with every interaction.
Benefits of Adding Your Logo
Including your logo in a payment request document offers several advantages that go beyond mere aesthetics. It’s an opportunity to create a lasting impression and build trust with clients.
- Brand Recognition: A consistent logo on all your documents helps clients easily identify your business, improving brand recall.
- Professionalism: A well-placed logo signals that your business is serious and established, giving your document a polished look.
- Trust Building: Including your logo adds credibility and conveys that you are a legitimate business, which can positively influence your clients’ payment behavior.
Where to Place Your Logo
Strategically positioning your logo in the document is crucial for maintaining balance and clarity. The placement should not overwhelm the content but rather complement it. Here are a few common locations for your logo:
- Top Left Corner: Placing your logo at the top left is a traditional and effective way to draw attention without distracting from the content.
- Top Center: This is a more central and prominent placement, which can make the logo stand out, particularly if it’s a key part of your brand identity.
- Top Right Corner: A less common choice, but still effective for businesses that want to keep their documents sleek and minimalistic while placing the logo in a visible position.
- Footer: If you prefer a more subtle approach, the footer is an excellent option, ensuring the document remains neat while still maintaining brand recognition.
When choosing the location, ensure that the logo does not overpower the document’s content. A balanced, professional design enhances the document’s effectiveness and keeps the focus on the important information, such as payment details and terms.
Adding your logo to your payment documents is a simple yet impactful way to reinforce your brand identity, convey professionalism, and make your business stand out in a competitive market. Whether you’re working with clients, suppliers, or partners, a recognizable logo ensures that your communications leave a lasting impression.
Creating a Professional Layout
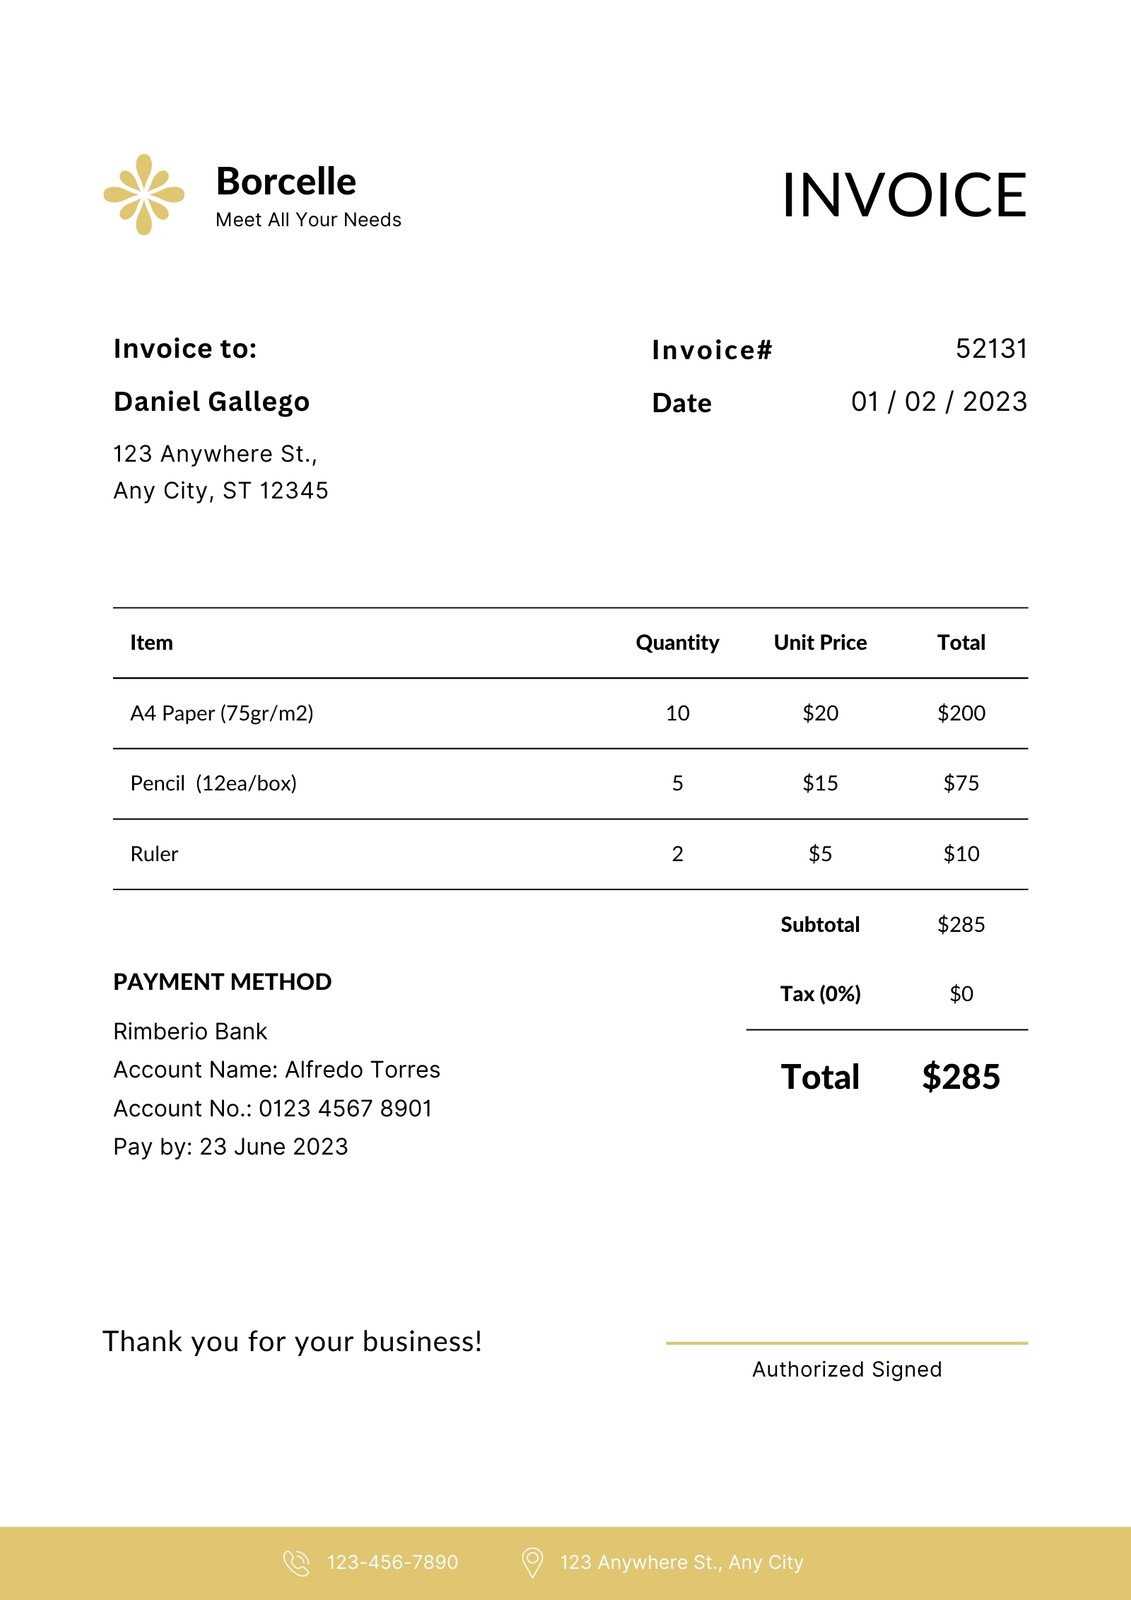
Designing a clean, organized, and aesthetically pleasing document is essential for making a positive impression on clients. A professional layout ensures that all critical information is easy to find and understand, while also reflecting the high standards of your business. A well-designed structure can improve the readability and clarity of your communication, making it more effective and efficient for both parties.
Key Elements of a Professional Design
When creating a professional layout, it is important to focus on both function and form. The design should be visually appealing while maintaining a logical structure. Here are some elements that contribute to an effective and polished design:
- Clear Sections: Divide the document into distinct sections, such as business details, client information, payment items, and terms. This ensures that each part is easy to locate.
- Readable Fonts: Choose simple, easy-to-read fonts for the body text. Sans-serif fonts like Arial or Helvetica are often a good choice for their clarity. Avoid using more than two or three font styles in a single document.
- Balanced Use of White Space: Adequate spacing between sections, text, and elements helps prevent the document from feeling crowded and overwhelming. It also allows the reader to easily absorb the information.
- Consistent Alignment: Ensure that text and elements are aligned properly. This provides a sense of order and makes the document visually appealing.
- Branding Integration: Incorporate your logo and brand colors in a subtle yet effective way. This adds a personalized touch without making the design feel too busy or distracting.
Structuring the Layout for Clarity
The structure of your document plays a significant role in how easily it can be navigated and understood. The goal is to make it as simple as possible for the recipient to quickly find the information they need.
- Header: Place your company name, logo, and contact details at the top. This section should be clearly visible to reinforce your branding.
- Client Information: Immediately below the header, include the recipient’s name, business name (if applicable), and contact information. This ensures that the document is personalized and clearly directed to the correct individual or organization.
- Transa
Including Taxes and Discounts
Properly incorporating taxes and discounts in a financial document ensures transparency and clarity for both you and your client. These elements are crucial for accurate payment calculations and can help avoid misunderstandings. Including them in the right sections, with clear descriptions, enhances the professionalism of your document and ensures that both parties are aligned on the total cost.
Calculating and Adding Taxes
Taxes are an essential part of most transactions, and it’s important to clearly show how they are applied. Depending on your location and the nature of the goods or services, different tax rates may apply. Here’s how you can calculate and display them:
- Identify Applicable Tax Rates: Ensure that you are applying the correct tax rate for your region or industry. This could include sales tax, VAT, or any other applicable taxes.
- Specify the Tax Amount: Clearly indicate the tax amount for each item or service. This helps to avoid confusion and shows how the total is calculated.
- Show Tax Totals: After calculating taxes, make sure to include a separate line showing the total amount of tax being charged.
Applying Discounts
Offering discounts is a great way to incentivize early payments or reward loyal clients. Clearly outline any discounts that apply to the transaction, and ensure they are reflected in the final total. Here’s how you can incorporate discounts effectively:
- Specify Discount Percentage or Amount: State the percentage or flat amount being deducted from the total price.
- Show Discount Clearly: Deduct the discount after calculating the subtotal but before taxes. This ensures that the tax is calculated based on the reduced amount.
- Offer Terms for Discounts: If the discount is conditional (e.g., for early payment), make sure the terms are clearly stated in the document.
Example of Taxes and Discounts Breakdown
Below is an example of how to display taxes and discounts clearly in your financial document:
Description Amount Service/Item 1 $100.00 Service/Item 2 $50.00 Subtotal $150.00 Discount (10%) -$15.00 Subtotal After Discount $135.00 Using Free Templates Online 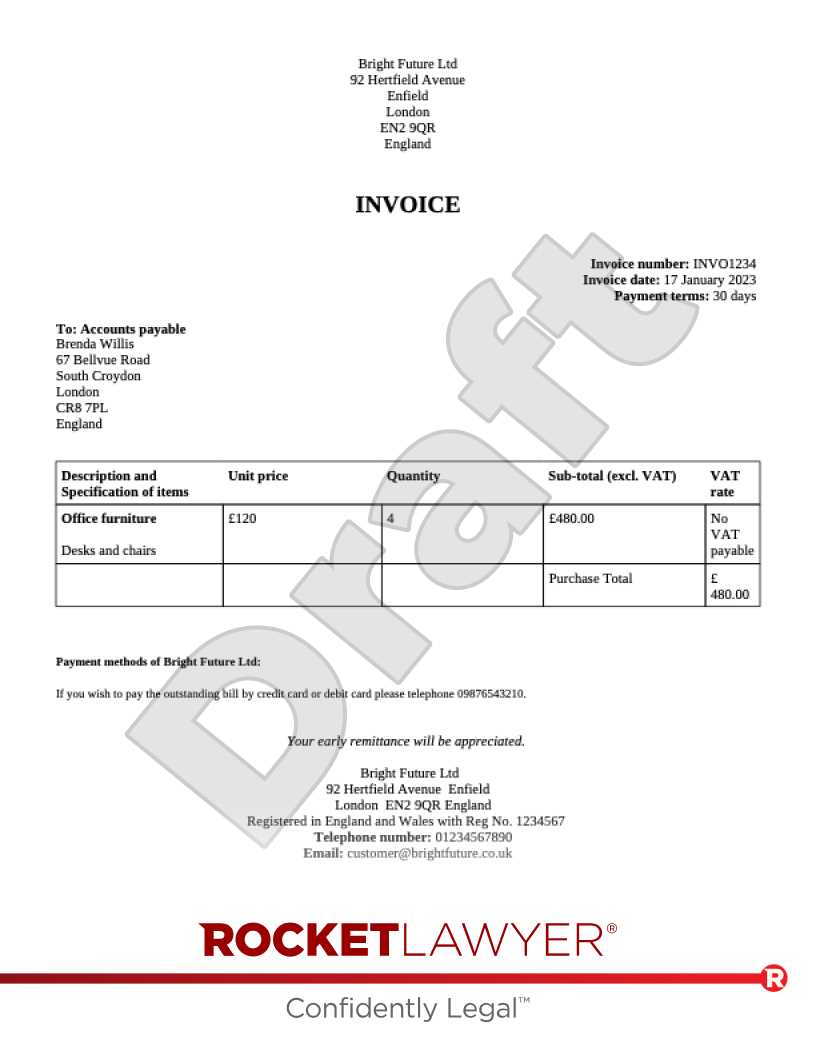
There are many online resources offering pre-designed documents that can save you time and effort in creating professional-looking financial statements. These templates are typically customizable, allowing you to input your own details while benefiting from a structure that adheres to common industry standards. Using online resources can be an excellent way to quickly generate documents without needing advanced design skills or software.
Many websites offer a wide range of options that cater to different business types and needs. These ready-made designs often include all the necessary elements, such as areas for company information, client details, itemized lists, and payment terms, which can be modified to suit your specific requirements. Whether you’re a small business owner, freelancer, or part of a larger organization, these tools can provide a convenient solution for everyday financial documentation.
By leveraging these online resources, you can focus on other aspects of your business, knowing that your payment records are being presented in a polished, professional manner. Additionally, many of these templates are available at no cost, making them an attractive option for businesses that are just starting or looking to cut down on administrative expenses.
Editing a Word Document for Billing
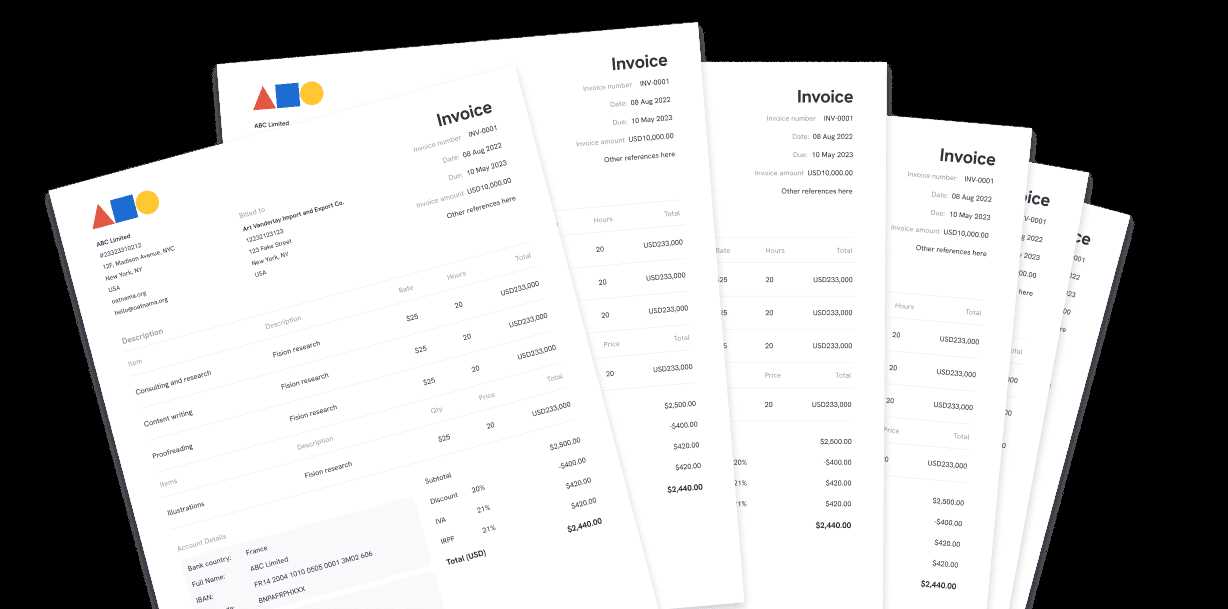
Customizing a pre-designed document in Word is a straightforward process that allows you to tailor the structure and content to suit your specific needs. With the help of basic editing tools, you can replace placeholder information, adjust the layout, and ensure that the document aligns with your brand. Word’s user-friendly interface makes it easy for anyone, regardless of technical expertise, to modify the document for their own purposes.
Steps for Customizing Your Document
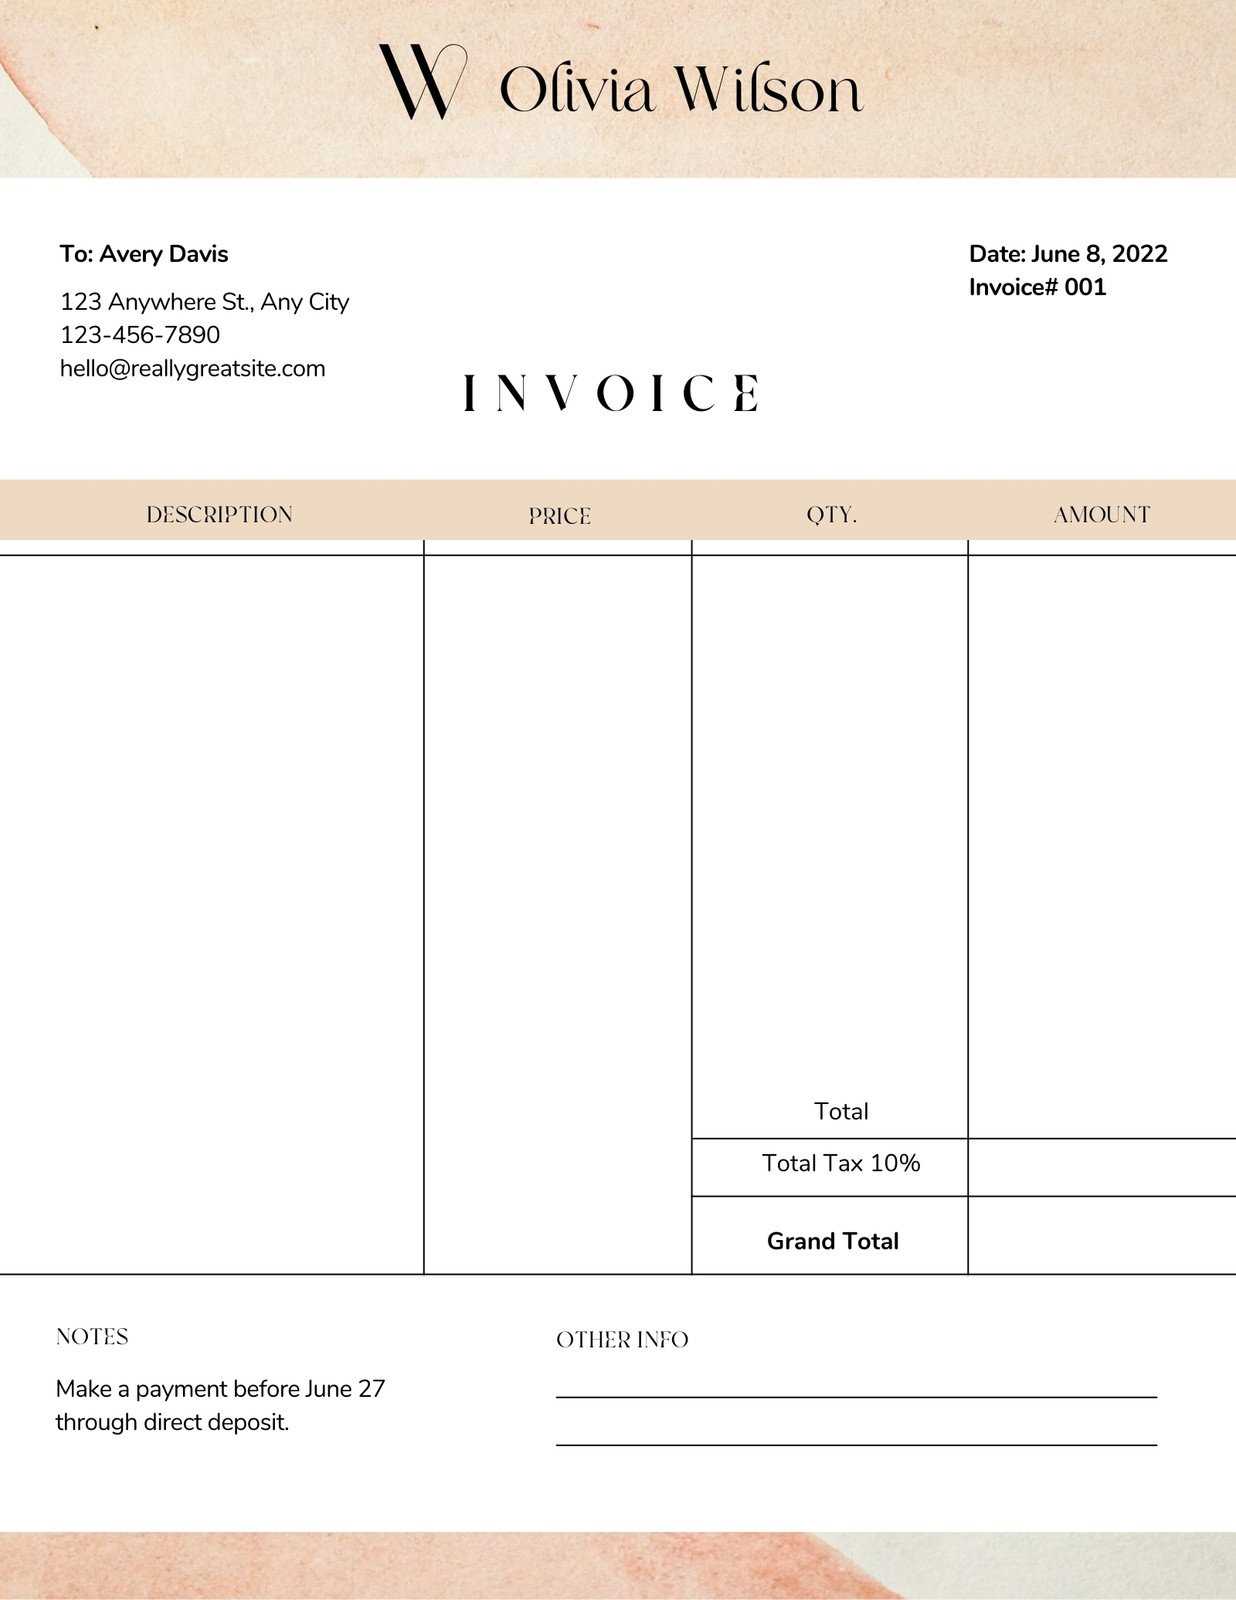
Once you’ve selected the right design, the next step is to personalize it with your business details and any specific requirements you have. Here’s how you can go about it:
- Open the Document: Launch Microsoft Word and open the document you’ve downloaded or chosen from an online source.
- Edit Business Information: Replace the placeholder text with your business name, address, phone number, and email address. This ensures that your details are visible on every document you send out.
- Adjust Layout if Needed: If you need to change the spacing, column structure, or alignment, Word’s layout tools make it simple to adjust. This may be necessary to fit your brand’s style or specific needs.
- Customize the Content: Change any text that is pre-filled with generic terms to match the products or services you provide. Add or remove sections based on what your document needs to include, such as discount details or a payment schedule.
Using Tables for Clear Structure
One of the most effective ways to organize information in your billing documents is by using tables. This helps break down the data into easily readable sections, such as itemized lists, pricing, taxes, and totals. Here’s an example of how to structure this section in Word:
Description Quantity Unit Price Total Consulting Service 2 $50.00 $100.00 Software Development 5 $120.00 $600.00 Subtotal $700.00 Sales Tax (8%) Creating Documents with Google Docs
Google Docs offers a simple and efficient way to create professional documents for billing purposes. Whether you’re working on a desktop or mobile device, the cloud-based platform ensures that you can access and edit your documents from anywhere. With Google Docs, you can design custom documents, add business details, and structure them according to your specific needs without any complex software. It’s an excellent option for individuals or businesses looking to generate clean and well-organized financial statements quickly and easily.
Using Google Docs for Custom Documents
Creating a billing document in Google Docs is straightforward. Start by selecting a blank document or choosing from available pre-made layouts. Google Docs provides various formats, which you can modify to match your business needs. The process includes these essential steps:
- Access Google Docs: Sign in to your Google account and open Google Docs. You can start with a blank document or search for a pre-built design in the template gallery.
- Enter Your Information: Replace placeholder text with your business name, contact details, and client information. This ensures that your document is personalized and ready for use.
- Customize the Layout: Organize the document into clear sections, such as product/service details, pricing, and payment terms. You can use tables to display itemized lists or simple bullet points for clarity.
- Save and Share: Once the document is ready, save it to your Google Drive or share it directly with clients via email or a shared link. Google Docs allows easy collaboration, so multiple users can work on the document if necessary.
Benefits of Using Google Docs for Billing
Google Docs offers several advantages for creating professional documents:
- Real-time Collaboration: Multiple users can access and edit the document simultaneously, making it easy to collaborate with team members or clients.
- Cloud Access: With Google Docs, your documents are saved online, making them accessible from any device with an internet connection.
- Cost-Effective: Google Docs is free to use, offering a no-cost solution for creating professional billing documents.
- Customization: Google Docs provides a variety of formatting options, allowing you to adjust fonts, colors, and layout to suit your business branding.
Using Google Docs for creating billing documents not only streamlines the process but also ensures that you have a professional, easy-to-access record of transactions whenever you need it.
Using Excel for Billing Documents
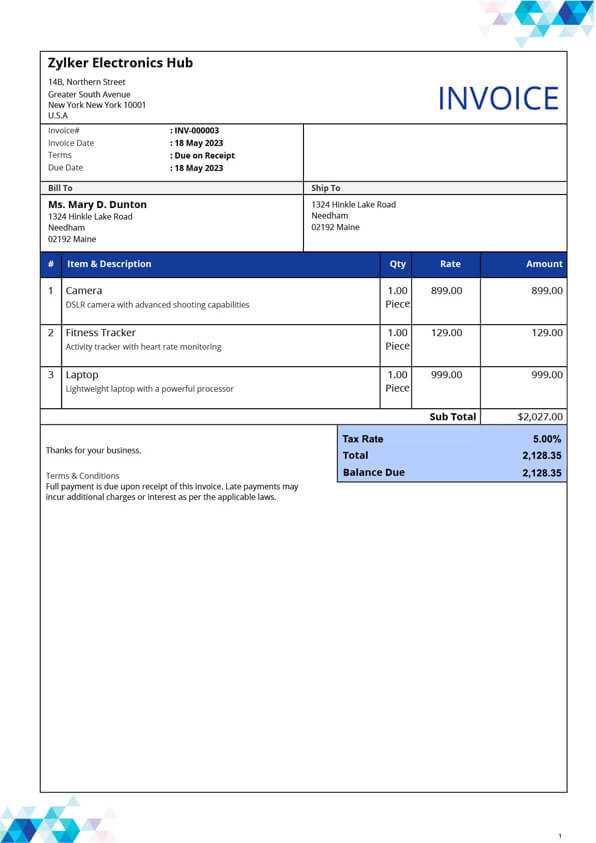
Excel is a versatile tool that allows you to create detailed and organized financial documents with ease. Its powerful grid system and formula capabilities make it a great choice for generating professional records, such as billing statements, without the need for complex software. Whether you are working with itemized lists, tax calculations, or payment totals, Excel helps automate many of the tasks involved in creating clear and accurate records. Additionally, the software provides flexibility, allowing you to customize each document to your specific needs.
Creating a Billing Document in Excel
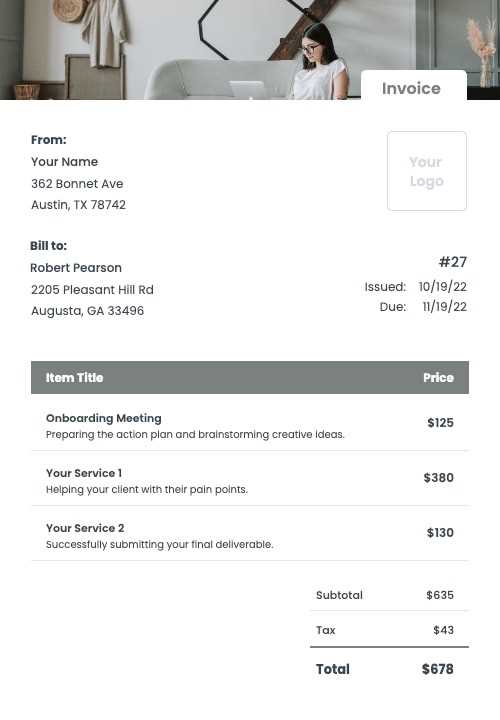
To create a structured and efficient billing record in Excel, follow these key steps:
- Open Excel: Start a new workbook or open a pre-existing file if you have one. You can also find a variety of pre-designed layouts online that you can modify in Excel.
- Set Up Your Columns: Label your columns to include necessary information, such as item description, quantity, unit price, total cost, tax, and payment terms. You can use Excel’s grid to organize the information neatly.
- Use Formulas: Excel’s formulas make it easy to calculate totals, taxes, and discounts automatically. For example, you can use a simple multiplication formula to calculate item totals and a SUM function to calculate the overall total.
- Format for Clarity: Adjust column widths, font sizes, and borders to ensure the document is readable and professional. You can also highlight key sections, such as totals or payment due dates, to make them stand out.
Example of Billing Structure in Excel
Here’s a simple example of how you can structure your columns in Excel:
Description Quantity Unit Price Total Consulting Service 3 $100.00 $300.00 Web Development 2 $200.00 $400.00 Subtotal $700.00 Sales Tax (8%) $56.00 Total Due $756.00 With th
Saving and Sending Your Document
Once you have completed your financial document, the next step is to ensure it is saved in the right format for easy sharing and future access. Proper file management is essential to ensure your records remain organized and secure. After saving the document, you can send it to your clients or recipients quickly and efficiently, ensuring that the information reaches them accurately and on time.
Saving Your Document
There are various ways to save your completed record depending on the software or tool you used. Here are some tips on saving it in the right format:
- Choose the Right File Format: The most common formats for financial documents are PDF and Excel. PDFs ensure that the formatting remains intact when the recipient opens the file, while Excel is useful for documents that require further editing or calculations by the recipient.
- File Naming: Use a clear and consistent naming convention for your document files. For example, include the client’s name, the date, and the type of document. This makes it easier to locate and organize your records later.
- Cloud Storage: Save your documents to cloud services like Google Drive, Dropbox, or OneDrive for easy access from any device, and to ensure that you always have a backup in case your local storage is lost or damaged.
Sending Your Document
Once the document is saved and ready to go, you can send it to your client using a variety of methods. Below are a few options:
- Email: The most common way to send documents is via email. Simply attach the saved file to your email and add a brief message with instructions or a summary of the document’s contents. Make sure to use a professional subject line, such as “Billing Statement for [Client Name] – [Date].”
- File Sharing Links: If the document is too large to send via email, or if you want to share multiple files at once, consider using file-sharing services like Google Drive or Dropbox. You can generate a link to the document and share it with the recipient. Be sure to set appropriate access permissions to protect the confidentiality of the information.
- Direct Messaging Platforms: If you communicate with clients through messaging platforms like Slack, Microsoft Teams, or WhatsApp, you can also send your document directly through those channels. However, keep in mind that these platforms may not be as secure as email or file-sharing services for sensitive financial data.
By saving your document in a widely-used format and sending it through a reliable method, you ensure that your client can easily access and review the information. Always follow up to confirm receipt and address any questions they may have.
Common Mistakes to Avoid When Creating Billing Statements
Creating accurate and professional financial records is essential for smooth business operations. However, there are several common errors that can undermine the effectiveness of your documents. These mistakes, though easy to overlook, can lead to confusion, delays in payment, or even legal issues. Avoiding these pitfalls will help ensure that your records are clear, reliable, and professional, fostering trust with your clients and improving the efficiency of your business transactions.
Frequent Errors to Watch Out For
- Incorrect Contact Details: One of the most critical mistakes is failing to include accurate contact information. Double-check that your business name, address, email, and phone number are correct. Additionally, ensure the recipient’s details are up-to-date to prevent miscommunication.
- Missing or Incorrect Dates: Always include the correct issue date and payment due date. Failing to provide these dates can lead to confusion about when payment is expected and may delay the process. It’s also important to note any late payment penalties if applicable.
- Not Itemizing Charges: Lack of clarity on what products or services were provided can lead to disputes. Make sure to break down all charges, including quantities, prices, and any taxes applied. This helps the recipient understand what they are being charged for and avoids misunderstandings.
- Omitting Payment Terms: Be explicit about your payment terms, including methods of payment, due dates, and any discounts for early payment. Ambiguity in payment expectations can cause delays in receiving funds.
- Failure to Number Documents: Always assign a unique reference number to each financial record. This helps keep your records organized and provides a reference point for both you and your client in case of any issues or inquiries.
- Errors in Calculations: Manual errors in calculating totals, taxes, or discounts can create confusion and lead to financial discrepancies. Always double-check your calculations or use formulas to automate them if possible.
How to Avoid These Pitfalls
- Review Before Sending: Take the time to review your document carefully before sending it. Look for any spelling or calculation errors, as well as missing or incorrect details.
- Use Templates or Tools: Using pre-made designs or software that automatically calculates totals and taxes can significantly reduce human error. Many tools are available to help streamline the process and ensure consistency.
- Keep Records Organized: Maintain a consistent numbering system and keep track of sent records. This helps prevent duplication and ensures that you can easily reference past transactions when needed.
By paying attention to these common mistakes, you can create documents that are accurate, professional, and clear. This will improve the overall efficiency of your billing