How to Set Up Invoice Template in QuickBooks
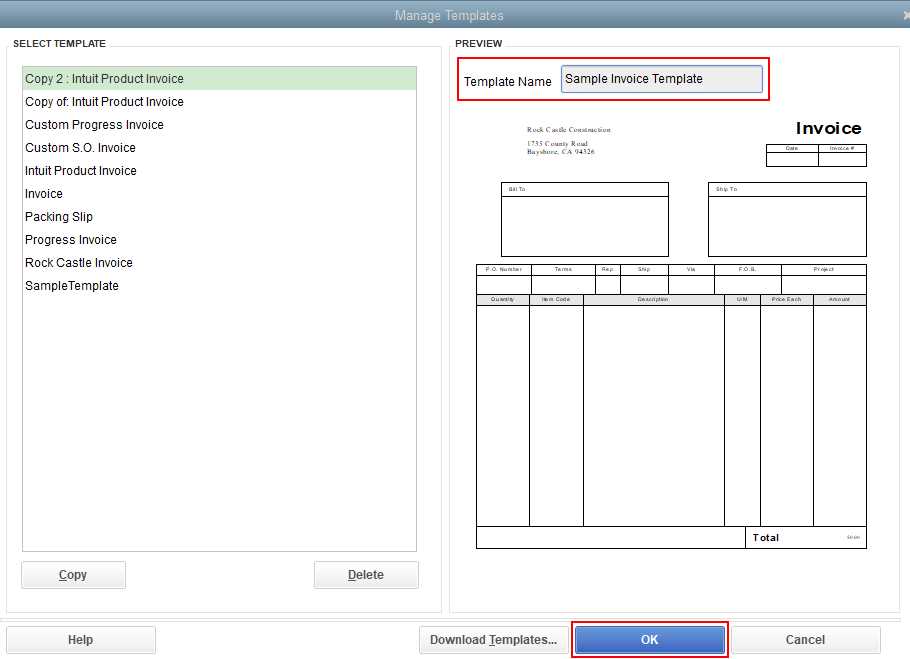
Customizing your billing process can significantly improve how you manage transactions and communicate with clients. By designing personalized documents, you can ensure a professional appearance while making the invoicing process more efficient. Whether you’re a freelancer or running a larger company, having control over the format of your financial documents can save time and reduce errors.
With the right tools, you can easily modify your billing forms to include important details like payment terms, discounts, and your business logo. This level of customization allows you to align the documents with your brand, making them more recognizable to clients. Moreover, creating a document that suits your specific needs can help streamline your operations, ensuring smooth transactions.
Learning to adapt your billing documents effectively is a valuable skill for any business owner. With a few simple adjustments, you can create professional forms that will enhance client satisfaction and help you stay organized.
How to Set Up Invoice Template in QuickBooks
Creating custom billing documents is a crucial step for managing transactions effectively. This process enables you to personalize forms, ensuring they reflect your business’s identity while including necessary payment information. By modifying your financial documents, you can optimize your workflow and reduce manual errors in your accounting tasks.
Steps to Begin Customizing Your Forms
Start by accessing the document customization options within your accounting platform. Follow these basic steps to begin designing your forms:
- Log into your account and navigate to the “Templates” section.
- Select “Create New” to begin designing a new billing form.
- Choose from various design options to find one that suits your business’s style.
- Adjust the layout and fields according to your needs, such as adding terms, payment options, or client details.
- Save your design for future use or to make adjustments later.
Personalizing Your Document
Once you’ve selected a base design, there are several areas you can customize:
- Logo and Branding: Add your company logo to the top of the document to enhance brand recognition.
- Fields and Data: Include necessary fields like client names, dates, and specific charges.
- Payment Terms: Clearly outline due dates and payment methods to avoid confusion.
- Discounts and Taxes: Adjust tax rates and discount fields as needed to reflect current regulations or offers.
By following these steps and customizing the layout and fields, you’ll have a fully functional document suited to your business’s needs.
Why Customizing Invoices Matters in QuickBooks
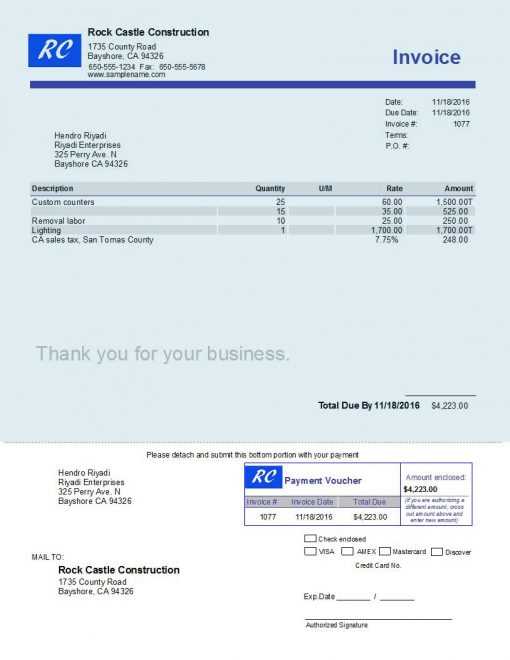
Personalizing your financial documents plays a key role in presenting a professional image and improving communication with clients. Customization allows you to make essential adjustments that reflect your business identity while ensuring the necessary information is clearly communicated. This not only enhances your credibility but also streamlines your billing process, making it more efficient and accurate.
Building a Strong Brand Identity
By customizing your forms, you create a consistent look that aligns with your brand. This includes incorporating your logo, business colors, and fonts, which help clients recognize your company immediately. A well-designed document reflects professionalism, which can positively impact client trust and retention.
Improving Efficiency and Accuracy
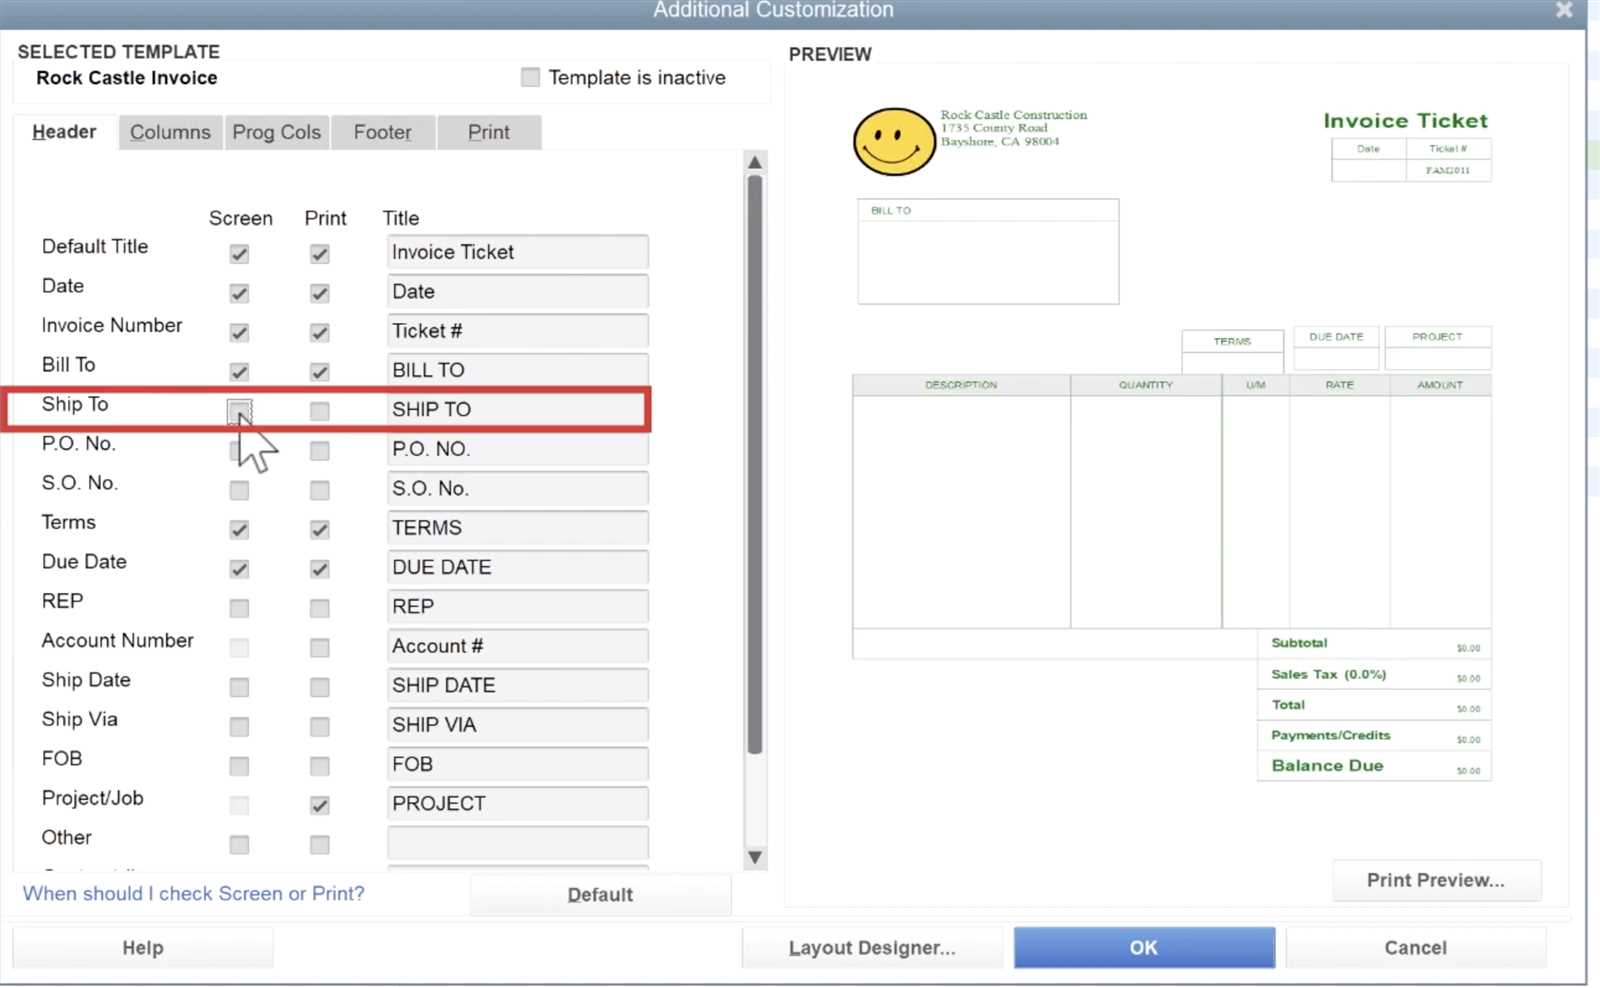
Adjusting the layout and content of your documents allows you to include only the most relevant information. This minimizes errors and ensures all necessary fields, such as payment terms and transaction details, are prominently displayed. The ability to customize also means that you can quickly adapt the form to meet specific client needs or changes in regulations, reducing the need for constant manual adjustments.
Customization is essential for optimizing both the visual appeal and functionality of your business documents, helping you to stay organized and professional in all your transactions.
Step-by-Step Guide to Creating Templates
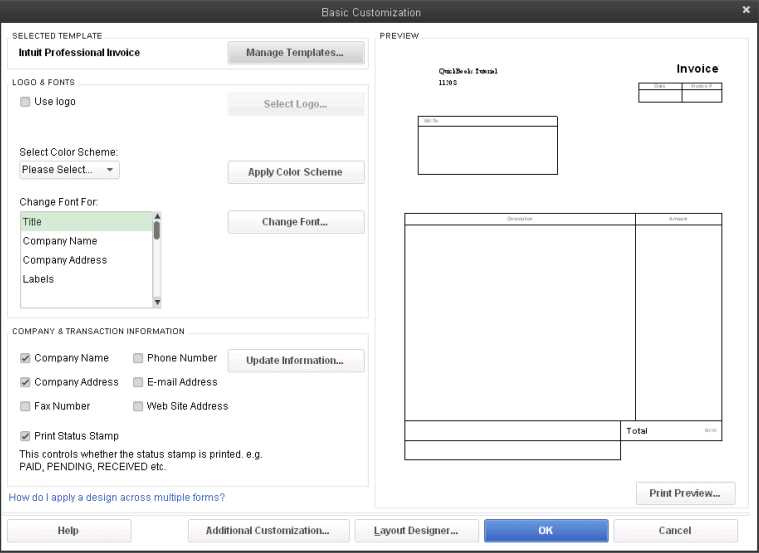
Creating personalized billing forms allows you to streamline your financial processes and ensure that your documents are tailored to your business needs. With a few simple steps, you can design a professional and functional form that fits your specific requirements, whether you’re managing client payments, sending receipts, or organizing records. This guide will walk you through the process of building a customized form from start to finish.
Begin by accessing the document creation section of your accounting software. Here, you can choose from several design options or start with a blank layout. You’ll then be able to add key elements such as your company’s logo, contact details, and payment terms. Adjusting these fields ensures that your document includes all the information clients need while maintaining a professional look.
Once you’ve selected a base design, focus on personalizing the layout. You can adjust the position of key fields, like dates, amounts, and payment methods, to match your preferences. After finalizing the design, save your form to use for future transactions. Customizing your documents in this way helps maintain consistency across all client communications and improves your overall workflow.
Choosing the Right Invoice Design for Your Business
Selecting the right design for your financial documents is an important step in ensuring that your communications with clients are both professional and efficient. The appearance of your billing forms not only reflects your brand but also affects how easily your clients can understand the information presented. A well-structured and visually appealing document can enhance client relationships and streamline payment processes.
When deciding on a design, it’s essential to consider factors such as your industry, brand image, and the type of information you typically include. For example, a service-based business may need a more straightforward design with clear breakdowns of hours worked, while a retail business might benefit from a layout highlighting product details and prices. Clarity and simplicity should always be prioritized to avoid confusion.
Another important aspect to consider is customization options. Your billing form should be adaptable to various scenarios, such as applying discounts or taxes. A flexible design allows you to adjust the format based on the specific needs of each transaction, helping you maintain consistency across all your documents.
Understanding QuickBooks Invoice Fields
Each document used for client transactions includes specific fields that help organize and present essential information clearly. These fields allow you to structure your form in a way that makes it easy for clients to understand the charges and payment details. Familiarizing yourself with the different fields is crucial for creating accurate, professional documents that cover all necessary details.
Among the key elements, you will typically find client information, including their name, contact details, and billing address. This ensures that the form is correctly attributed to the right recipient. Additionally, there are sections for the transaction details, where you can list services provided or products sold, with their respective prices, quantities, and any discounts or taxes applied.
Another vital field is the payment terms, which specifies when the payment is due and any penalties or discounts associated with early or late payments. Understanding how to customize and modify these fields helps ensure that your documents are not only clear but also legally binding and aligned with your business practices.
How to Add Your Business Logo to Invoices
Incorporating your business logo into your billing documents is an excellent way to enhance brand recognition and create a professional appearance. A logo not only helps clients easily identify your business but also contributes to a consistent and polished image across all your communications. Fortunately, adding your logo to your financial forms is a simple process that can be done in just a few steps.
First, ensure that your logo is in a compatible file format, such as PNG or JPEG, and has a high enough resolution to display clearly when printed or viewed electronically. Once you have the logo ready, you can upload it directly into your form design.
Here is a step-by-step guide to adding your logo:
| Step | Action |
|---|---|
| 1 | Open your document creation or editing interface. |
| 2 | Locate the section where you can insert your logo, usually found in the header area. |
| 3 | Select the option to upload or insert an image. |
| 4 | Upload the logo file from your computer or cloud storage. |
| 5 | Resize and position the logo within the header to fit your layout. |
| 6 | Save your changes and preview the document to ensure the logo displays correctly. |
By following these simple steps, you can easily add your logo to all of your business documents, helping to build a stronger connection with clients and enhancing your professional image.
Setting Payment Terms in QuickBooks Invoices
Establishing clear payment terms is essential for maintaining a smooth cash flow and preventing misunderstandings with clients. By specifying due dates, late fees, and available discounts, you create a transparent system that encourages timely payments and improves financial management. Customizing payment terms in your financial documents allows you to clearly communicate expectations, ensuring that clients know when and how to make their payments.
To set payment terms in your forms, follow these basic steps:
- Access the settings or customization section of your document editor.
- Locate the section for payment terms, which may be labeled differently depending on your software.
- Choose a standard term, such as “Net 30” (payment due within 30 days), or create custom terms based on your business needs.
- If necessary, adjust the wording to include specific due dates, late fees, or early payment discounts.
- Save your changes and apply the terms to future documents.
Additionally, you can set up automatic reminders for clients based on these terms, such as a reminder email when a payment is approaching or overdue. This helps reduce late payments and keeps your billing process organized and efficient.
By defining and clearly displaying payment terms, you set the stage for smoother transactions and better client relationships.
Adding Taxes and Discounts to Your Invoice Template
Including applicable taxes and offering discounts on your financial forms is crucial for accurate billing and maintaining transparency with clients. These elements not only reflect the correct amount due but also help avoid confusion and ensure that you are complying with local regulations. Properly setting up taxes and discounts ensures that your documents are complete and professional, helping clients easily understand their total charges.
Applying Taxes
To apply taxes, first determine the tax rate applicable to your products or services based on your location and business type. Then, add a tax field to your form where the appropriate rate will be calculated automatically. You can often set up multiple tax rates if your business operates in different regions or deals with different types of services. Be sure to label the tax section clearly, indicating the percentage and amount, so that clients can see exactly how their charges are calculated.
Adding Discounts
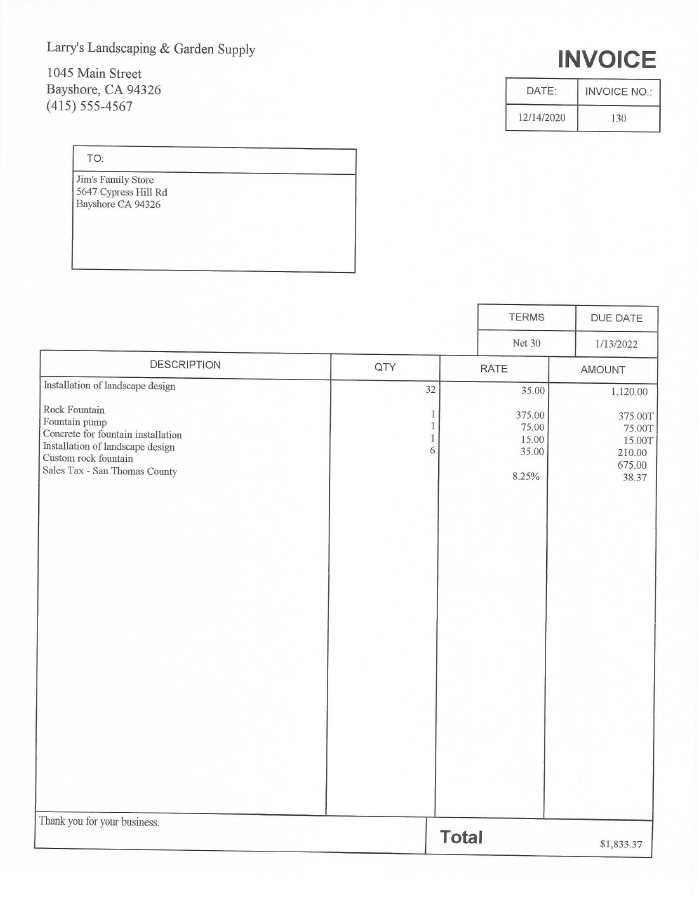
Discounts are an excellent way to incentivize early payments or reward loyal customers. To add a discount, simply include a field for a percentage or fixed amount off the total. You can offer a standard discount or create customized offers for specific clients or products. Just like with taxes, be sure to display the discount clearly on the document to ensure transparency and avoid misunderstandings.
By incorporating these features, you create an easy-to-understand, accurate billing process that fosters positive client relationships and ensures smooth transactions.
How to Create Recurring Invoices in QuickBooks
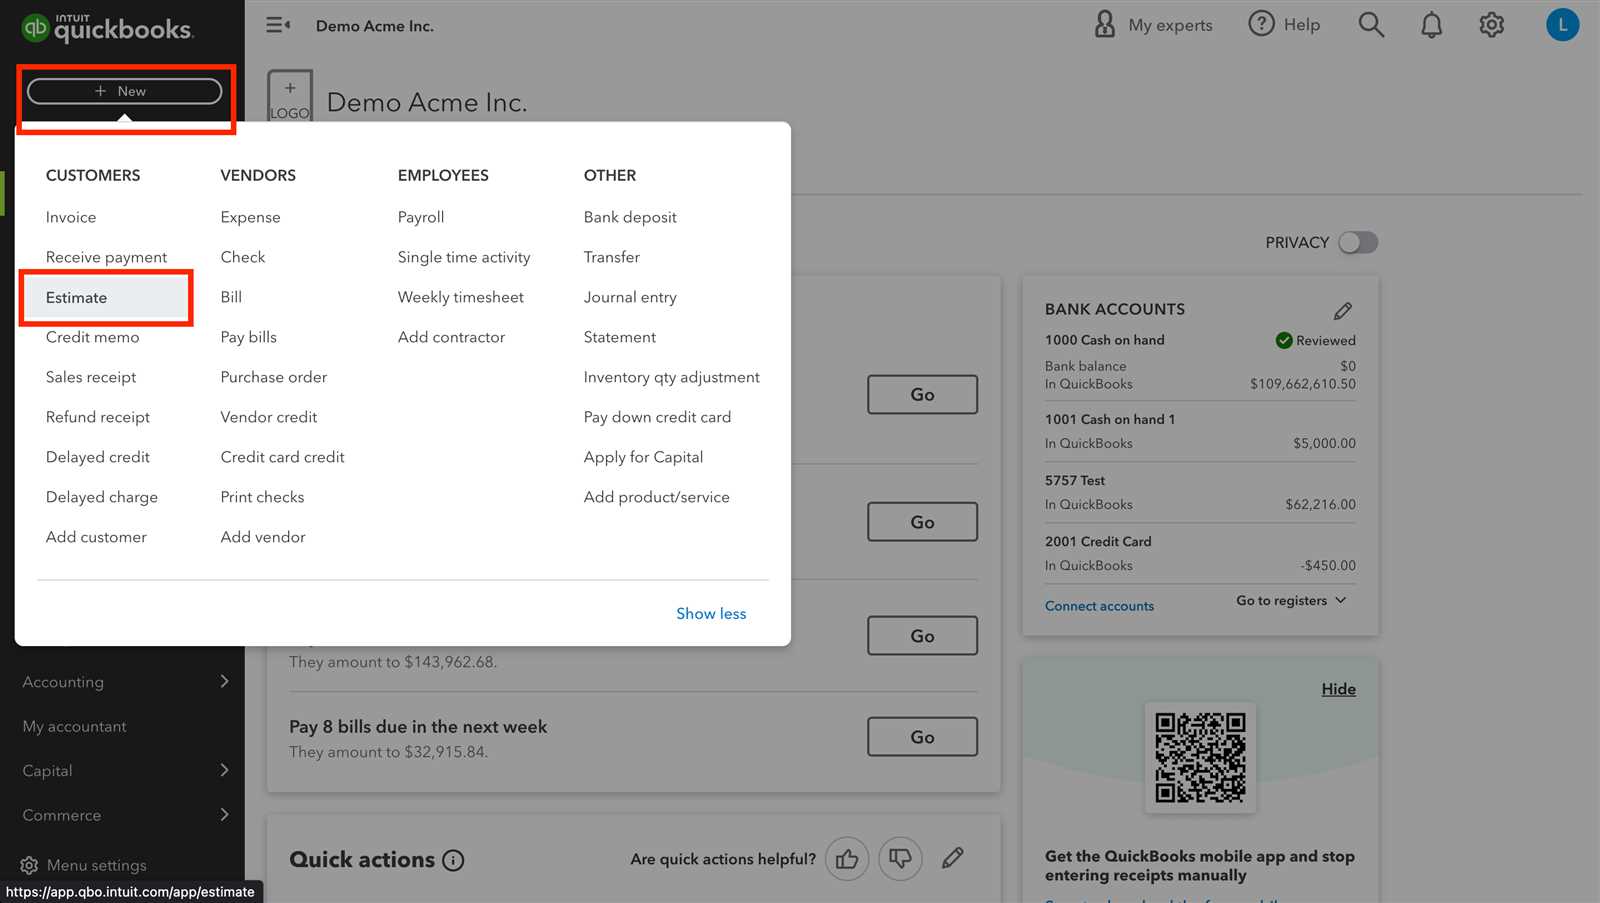
Automating regular billing for repeat clients or subscription-based services can save you significant time and effort. By setting up recurring charges, you ensure that your clients are billed consistently and on time, without needing to manually generate each document. This process can be easily managed with the right tools, allowing you to focus on other aspects of your business.
To create recurring transactions, start by setting up a template that includes all the relevant details for each cycle, such as pricing, services provided, and payment terms. Once the template is ready, you can schedule it to generate automatically at your desired frequency, whether it’s weekly, monthly, or annually.
Benefits of Recurring Billing:
- Consistency: Ensures clients are billed regularly without manual input.
- Time-Saving: Reduces administrative work by automating the process.
- Cash Flow Management: Helps maintain a steady cash flow by scheduling payments in advance.
Once your recurring billing schedule is set, you can easily make adjustments as needed, whether that’s changing the amount or adding new services. This flexible system ensures that your business remains organized, efficient, and professional in managing regular transactions.
Tips for Customizing Invoice Layouts
Tailoring your billing documents to reflect your business style is an important step in enhancing professionalism and ensuring clarity for your clients. A well-structured design not only makes the document visually appealing but also helps convey information efficiently. Customizing your layout allows you to prioritize important details, improve readability, and align your documents with your brand identity.
Prioritize Key Information
When designing your form, make sure the most critical information, such as the total amount due, due date, and client details, is easy to find. These elements should be prominently displayed, so clients can quickly understand their obligations. You can use bold text or larger font sizes for key details to draw attention where it’s needed most.
Brand Consistency
Ensure that the colors, fonts, and layout you choose align with your company’s branding. This includes using your logo, matching color schemes, and keeping the design consistent with your other marketing materials. A cohesive look reinforces your professional image and makes the documents feel more personalized for your clients.
By paying attention to these design details, you can create a billing document that is both functional and professional, enhancing your business’s reputation and improving the client experience.
How to Preview Your QuickBooks Invoice Template
Before finalizing your billing document design, it’s crucial to review how it will appear to your clients. Previewing the layout helps you spot any errors, adjust text placement, and ensure everything looks professional. A good preview can prevent costly mistakes and ensure your document is formatted exactly as you want it before sending it out.
Steps to Preview Your Document
Follow these steps to view how your customized document will appear when printed or sent electronically:
- Access the customization section of your document settings.
- Select the design you’ve created or modified.
- Click the “Preview” option to generate a view of the finished document.
- Review the layout for clarity, accuracy, and overall appearance.
- If necessary, make adjustments to fonts, fields, or alignment.
Key Areas to Check
When reviewing your design, focus on the following areas:
- Client Information: Ensure names, addresses, and contact details are correctly displayed.
- Total Amounts: Double-check that charges and taxes are calculated correctly.
- Branding Elements: Confirm your logo, colors, and font align with your brand identity.
- Spacing and Alignment: Make sure everything is aligned well and there are no awkward gaps.
Once you’re satisfied with the preview, save your changes and your document will be ready for use.
Saving and Using Multiple Invoice Templates
When managing different types of transactions or clients, it’s useful to have a variety of billing document layouts saved and ready for use. This allows you to apply the most appropriate format based on the needs of the situation, whether it’s for a one-time service, a subscription, or a complex project. Saving multiple designs ensures flexibility and efficiency in managing your billing process.
Steps to Save and Organize Different Designs
Follow these simple steps to save and keep multiple designs organized for future use:
- Create a new layout or modify an existing one to suit a particular purpose.
- Once satisfied with the layout, save it under a specific name that reflects its purpose, such as “Subscription Billing” or “One-Time Service”.
- Repeat this process for each different design you need.
- Store each layout in an easily accessible location for quick retrieval.
When to Use Different Layouts
Different situations may call for different designs. Here are some scenarios where multiple formats can be beneficial:
- Subscription-based services: Use a consistent format that reflects recurring charges and terms.
- One-time projects: Opt for a layout that highlights the specific project details and payment due.
- Discounts or promotions: Create a special layout that incorporates promotional offers or discounts for specific clients.
By saving and using a variety of layouts, you can ensure that each client receives a tailored document that suits their specific billing needs while streamlining your workflow.
Integrating Your Template with QuickBooks Online
To streamline your financial processes, integrating your custom billing format with your online accounting system is essential. This integration allows you to automatically apply your designed layout to transactions, saving time and reducing the risk of errors. Once connected, the system can easily generate documents based on your preferences, keeping everything consistent and professional.
Steps to Connect Your Custom Layout
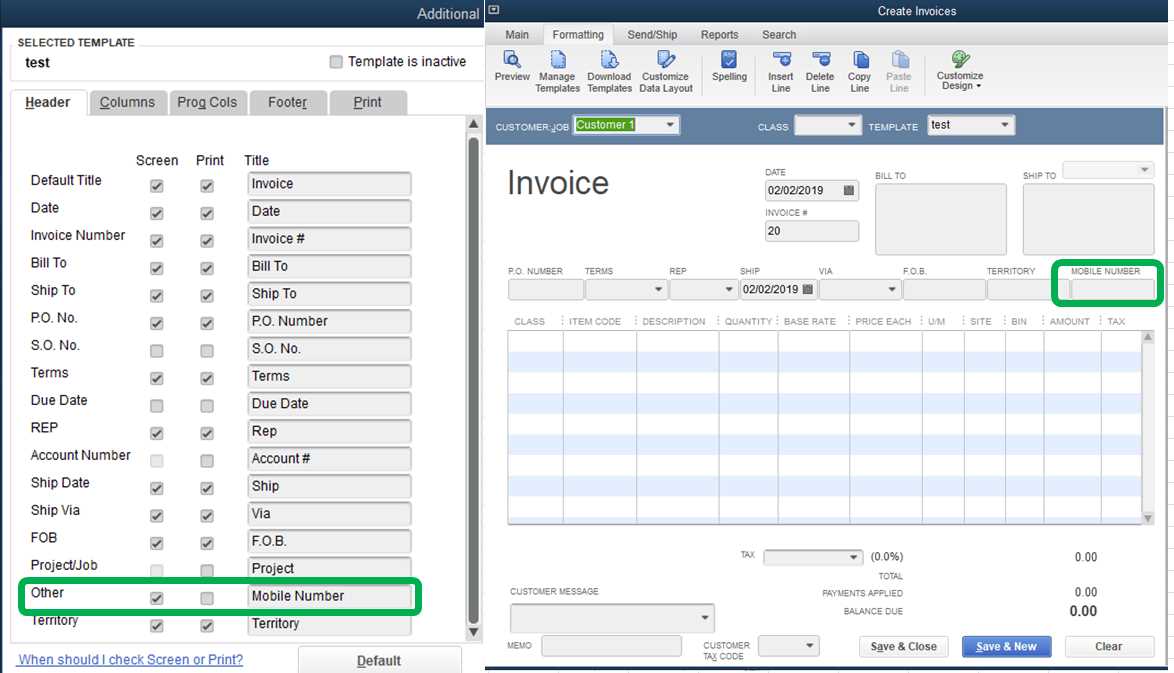
Follow these steps to integrate your customized billing layout with your online accounting system:
- Log into your online account and navigate to the settings area.
- Locate the section where document designs are managed.
- Select the layout you wish to use and click the “Integrate” or “Apply” button.
- Ensure that the selected format is set as the default for future documents.
- Test the integration by creating a new transaction and confirming that the correct design is applied.
Benefits of Integration
By connecting your customized layout to your online accounting software, you gain several advantages:
- Time Efficiency: Automatically apply your custom design to all generated documents, reducing manual entry.
- Consistency: Maintain a uniform look for all client-facing documents, improving professionalism.
- Accuracy: Reduce the chances of errors by automatically populating key information into your chosen design.
- Easy Access: Quickly retrieve and send documents directly from your accounting platform without switching between different programs.
Integrating your custom layout with your online system ensures that your billing process is streamlined, consistent, and efficient, leaving you more time to focus on other important aspects of your business.
How to Edit and Update Existing Invoice Templates
Maintaining flexibility in your billing documents is crucial for adapting to new business needs or customer preferences. Over time, you may want to modify the appearance or content of your saved layouts to ensure they align with your current brand or reflect updated pricing structures. Updating these designs allows you to stay professional and efficient with every transaction.
Steps to Modify and Refresh Your Layout
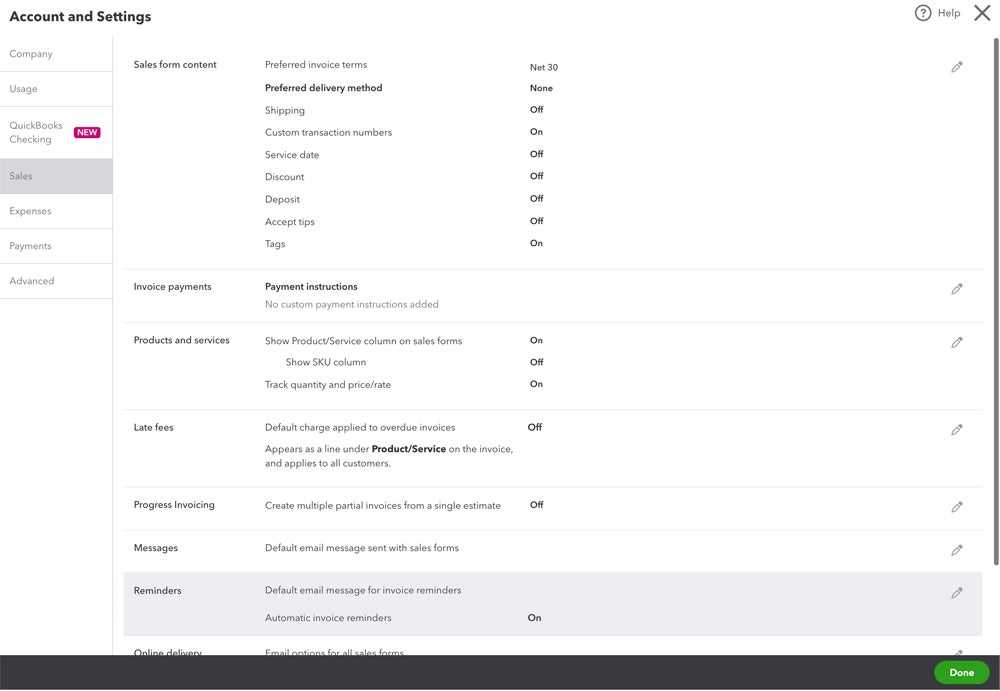
Follow these steps to make changes to your previously saved layouts:
- Log into your account and access the design settings section.
- Find the layout you wish to alter and select “Edit” or “Modify” from the options provided.
- Make the necessary adjustments, such as changing text, logos, or adding/removing fields to suit your current needs.
- Once you’re satisfied with the changes, save the updated version under a new name or overwrite the existing one.
- Test the updated design by generating a new document to ensure everything looks correct.
When to Update Your Layout
There are various situations where updating your document design may be necessary:
- Branding Changes: If you’ve updated your company logo or color scheme, you’ll want your documents to reflect these changes for consistency.
- Pricing Updates: Modify the layout to include new pricing, discounts, or payment terms that align with your business strategy.
- Client-Specific Requests: Customize layouts for different clients or industries to meet their specific needs, ensuring a personalized experience.
- Legal or Regulatory Updates: Ensure that your documents include any new legal disclaimers or tax information required by law.
Editing and refreshing your saved layouts ensures that your billing process remains up to date and professional while meeting evolving business requirements.
How to Use QuickBooks Invoice Templates for Different Clients
Customizing your billing documents for different customers can enhance professionalism and create a tailored experience. By adjusting your layouts for specific client needs, you can ensure that every interaction feels personal while maintaining consistency and efficiency. Whether you’re working with different industries, varying price structures, or special payment terms, utilizing diverse designs can simplify your billing process.
For businesses that serve a variety of clients, it’s essential to have flexible document designs that can be easily adapted for each. This allows you to offer personalized invoices that reflect the specific agreements and preferences of each customer, from large corporations to individual clients.
Personalizing Documents for Different Clients
To customize your billing documents for specific clients, follow these tips:
- Industry-Specific Designs: Tailor the layout to match the client’s industry. For example, a design for a creative agency may feature more vibrant colors and custom sections, while a more formal design may be appropriate for legal or corporate clients.
- Discounts and Promotions: Include any special discounts or promotional terms for repeat customers or specific client agreements. This can be easily incorporated into the layout for consistent communication.
- Client-Specific Payment Terms: Some clients may have different billing cycles or payment schedules. Customize the terms displayed on your document to reflect these preferences.
- Logo and Branding Customization: Use your client’s logo or specific branding if they request this on the billing document. This adds a personal touch and strengthens business relationships.
Switching Between Designs for Various Clients
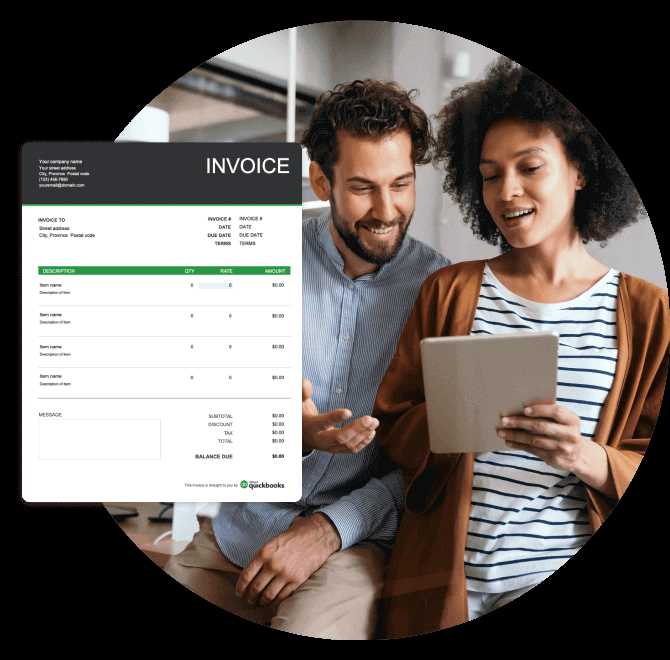
Most systems allow you to save multiple layouts, making it easy to switch between designs depending on the client. Here’s how you can streamline the process:
- Save distinct designs for each client or client group.
- When creating a new document, select the appropriate design template based on the client.
- Quickly modify and update the design if needed, to reflect any last-minute changes or client preferences.
By using these customized documents, you can strengthen your brand image while ensuring that each customer feels valued and well-served, without the need for repetitive adjustments each time you issue a bill.
Common Mistakes to Avoid When Setting Up Templates
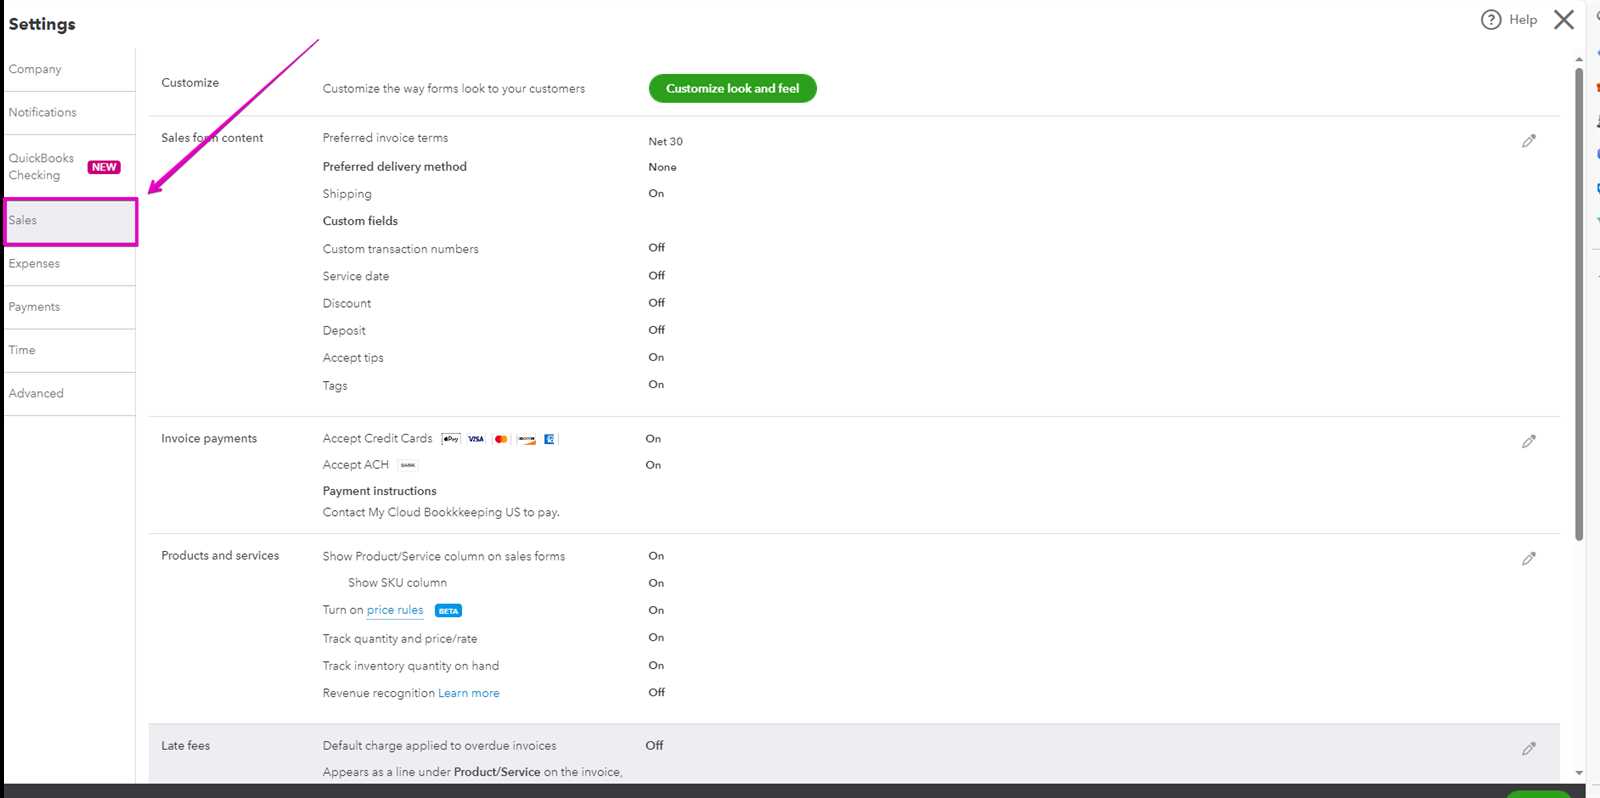
Creating a well-organized and professional document layout for your business can greatly streamline your billing process. However, there are several common pitfalls to avoid in order to ensure that your designs are functional, consistent, and effective. These mistakes can lead to errors in client communication, misunderstandings, or delays in payments. Being aware of these potential missteps will help you create documents that meet your business needs and maintain professionalism.
1. Ignoring Consistency Across Documents
One of the most critical aspects of professional communication is consistency. Failing to maintain a consistent layout or style across all documents can confuse clients and create an unprofessional appearance. Some key areas to focus on include:
- Logo Placement: Ensure that your business logo is consistently positioned across all documents.
- Fonts and Colors: Stick to a simple color scheme and font family to keep the design unified.
- Formatting of Fields: The placement and formatting of important details, like dates, amounts, and contact information, should be consistent.
2. Overloading the Layout with Information
It’s easy to get carried away with trying to include as much detail as possible, but cluttering your design can make it difficult for clients to quickly locate key information. Avoid the following:
- Excessive Text: Keep descriptions concise and avoid adding unnecessary details that may distract from the essential information.
- Too Many Design Elements: Overuse of images, colors, or patterns can detract from the professionalism of your layout.
- Irrelevant Data: Only include fields that are necessary for the client’s understanding and that are directly related to the transaction.
3. Failing to Test the Final Design
After making adjustments to your design, it’s crucial to test how it looks in real use. This step is often overlooked, but it can save you from major issues. Be sure to:
- Preview Your Documents: Always preview the layout to ensure all fields are correctly aligned and that no information is cut off.
- Check for Mobile Compatibility: Ensure that your design looks good not only on desktops but also on mobile devices, as many clients may access documents on the go.
- Test with Sample Data: Use test transactions to verify that all fields populate correctly with client-specific information.
By avoiding these common mistakes, you can create more