Xero Invoice Import CSV Template Guide
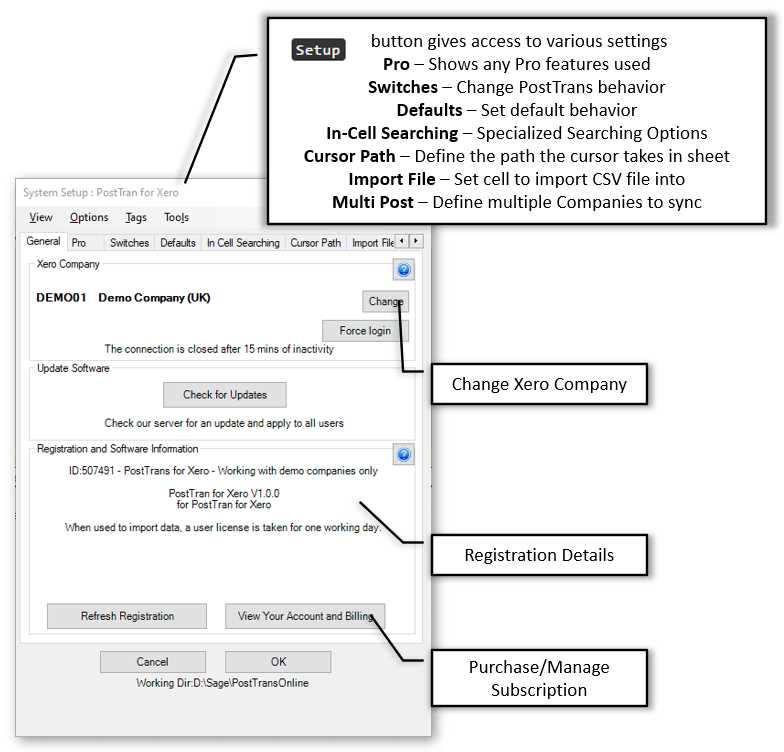
Managing financial transactions efficiently is crucial for businesses of all sizes. One of the most effective ways to handle large amounts of financial data is by utilizing structured file formats that allow seamless integration with accounting platforms. By organizing your records into a compatible structure, you can easily transfer and update your financial information in just a few steps.
Automating routine data entry tasks saves time, reduces the risk of human error, and ensures that your accounting software remains up-to-date. This approach is especially beneficial when dealing with bulk financial entries, allowing you to streamline operations and focus on other critical business functions.
Understanding the process behind preparing and uploading your data properly is essential. With the right tools and knowledge, you can ensure that all entries are correctly formatted, reducing the chances of mistakes and delays in your financial workflows. The key lies in understanding the specific requirements of your accounting system and tailoring your data accordingly for smooth uploads and accurate processing.
Understanding the Xero CSV Import Template
To effectively manage large sets of financial data, it is essential to structure your records in a way that accounting systems can easily process. One of the most efficient ways to do this is by using a pre-defined file format that ensures consistency and accuracy during the data transfer. This method allows you to automate the process, saving time and reducing the likelihood of errors in your financial records.
When preparing your data for upload, you must ensure that each field aligns with the expected format of the accounting software. The structured file must contain specific information in a particular order, allowing the system to recognize and map each piece of data correctly. Understanding how to organize and format this information is the key to a successful transfer, making it easier for your system to process entries and maintain up-to-date records.
Key Fields and Data Structure
The file is designed to accommodate various types of financial entries, such as payments, transactions, and other key data points. Each column in the file corresponds to a different category, such as dates, amounts, account names, and descriptions. Properly filling out these fields ensures that the system can map the information correctly to the appropriate sections in your accounting platform.
Ensuring Compatibility with Your Software
It’s crucial to check that the format you’re using is compatible with your accounting platform’s requirements. Different systems may have slightly varied specifications regarding how data should be organized. Carefully reviewing the guidelines and ensuring that your file matches these specifications will help prevent errors during the upload process and ensure smooth data integration.
What is a CSV Template for Xero?
A specific file format is often used to upload large volumes of financial data into accounting software. This format is designed to organize and structure information in a way that the system can easily interpret and process. The file contains rows and columns, with each cell representing a piece of data, such as amounts, dates, and account details. By following a predefined structure, businesses can quickly transfer their records without the need for manual data entry.
The purpose of this file format is to ensure that all financial information is correctly organized, reducing the likelihood of errors during the transfer process. When using this format, users can streamline the process of updating their records and focus on other important tasks. Proper understanding and use of the file’s structure is critical to ensuring that data is processed accurately.
How It Works
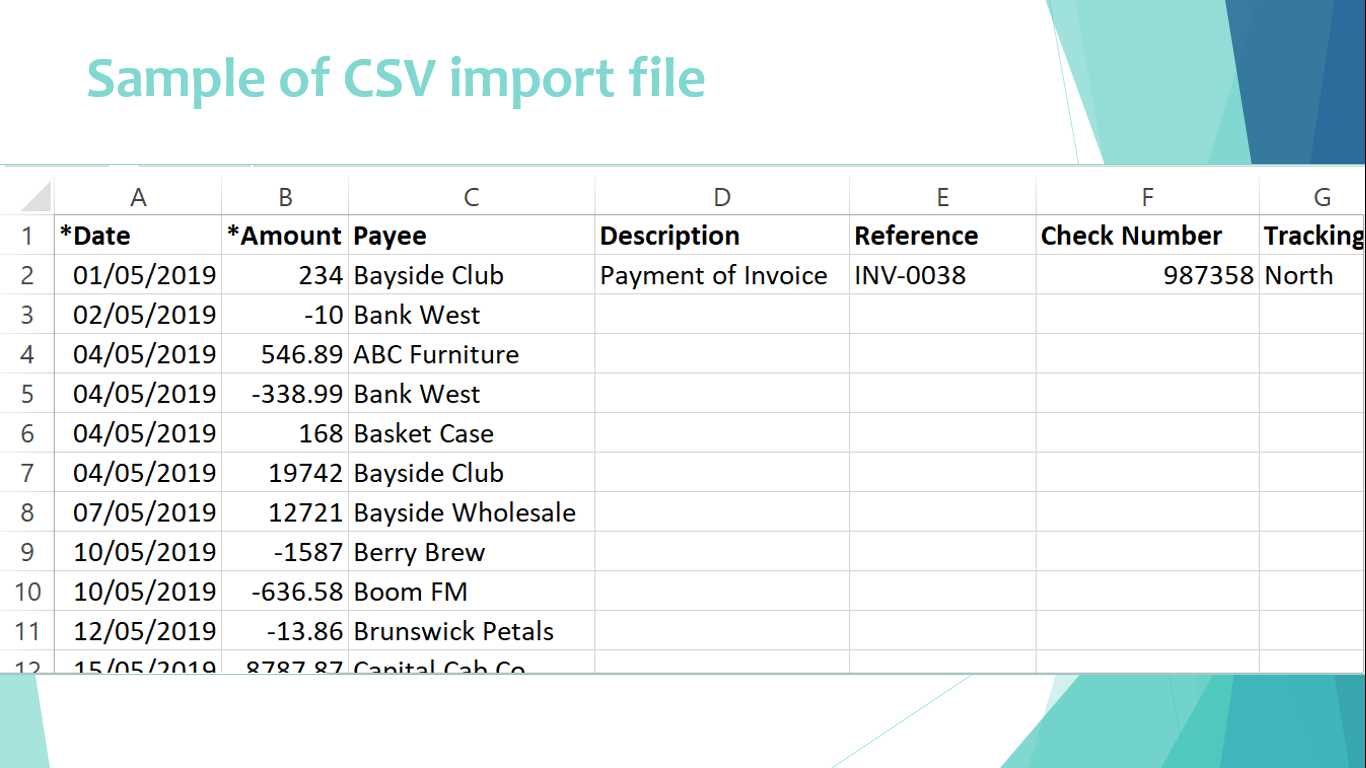
The file structure consists of several predefined fields that must be filled with the correct data. Each column corresponds to a specific category, such as date, description, amount, and other relevant details. By following the exact format, users can ensure that the system correctly maps each data point to its corresponding entry in the software.
Why It Matters
Using the right file format can greatly simplify the process of keeping records up-to-date. This method eliminates the need for manual data entry, which can be time-consuming and prone to errors. With the correct file structure, businesses can save valuable time and ensure that their financial data is accurate and synchronized across all systems.
Why Use CSV for Xero Invoice Imports?
Utilizing a structured file format for transferring financial data into accounting systems offers a number of significant advantages. By organizing large amounts of data in a standardized layout, businesses can save time, reduce errors, and improve the efficiency of their workflow. The use of this method allows users to quickly update their financial records without the need for manual data entry, which is both time-consuming and prone to mistakes.
Another key benefit of using this approach is that it enhances consistency and accuracy across multiple records. Since the data is entered in a specific format, it helps maintain uniformity, ensuring that every entry is correctly categorized and mapped to the right fields within the system. This level of organization makes it easier for accounting teams to manage large volumes of transactions without confusion or discrepancies.
Efficiency and Time Savings

One of the main reasons businesses choose to use this structured format is its ability to automate data handling. Instead of entering each transaction manually, the system can process multiple records at once, reducing the time required to update or enter new entries. This results in more time for other important tasks, helping to increase overall productivity.
Improved Accuracy and Reduced Errors
Manual data entry can often lead to mistakes, whether due to typos or misinterpretation of the information. By relying on a pre-structured file format, businesses can minimize the risk of human error. Each field in the file has a specific role, ensuring that all data is placed in the right section, which leads to fewer errors and a more accurate financial record.
Setting Up Your Xero Account for CSV Imports

Before transferring large sets of financial data into your accounting system, it’s important to ensure that your account is properly configured to handle the file format. Proper setup allows the system to accurately process the information you provide, ensuring smooth integration and minimal errors. This process involves a few key steps to make sure everything is ready for a successful data upload.
First, you’ll need to confirm that your account is linked to the correct financial categories, accounts, and settings. This ensures that any data you upload aligns with your existing structure. Once the setup is complete, the system will be ready to map incoming data to the appropriate fields without manual intervention.
Key Configuration Steps
Below is a general outline of the steps you need to follow when configuring your account for smooth data processing:
| Step | Description |
|---|---|
| Link Financial Accounts | Ensure all accounts in your system are set up to match the data structure you’re planning to upload, such as accounts for payments, receivables, and general ledgers. |
| Enable Data Mapping | Check that your system can recognize and map the incoming fields from your structured file to the correct sections of your accounting platform. |
| Review Permissions | Make sure that users who need to upload or manage data have the correct permissions to access and update financial records. |
| Test with Sample Data | Before uploading large amounts of data, conduct a test using a small batch to ensure that the format works as expected and that no errors occur. |
Following these steps ensures that your system is prepared to efficiently handle the data once it is uploaded, reducing the risk of mistakes or delays during the process.
How to Download the Xero Invoice CSV Template
To begin transferring your financial data into the system, the first step is to obtain the right file format. This file serves as the foundation for organizing and structuring your records, ensuring that all entries are properly formatted for seamless processing. Downloading the necessary file from the platform allows you to start filling in the required fields with your data, following the layout specified by the accounting software.
Follow these steps to download the appropriate file and begin preparing your records:
Step-by-Step Guide
- Log in to your accounting account using your credentials.
- Navigate to the section dedicated to financial transactions or data management.
- Look for the option to download a structured file format or data import guide.
- Select the appropriate file for your needs. There may be different formats available depending on the type of data you’re working with.
- Click on the download button to save the file to your device.
Additional Tips
- Ensure that you are downloading the correct version of the file for your system’s current configuration.
- If available, review any instructions or sample files provided to understand the proper format before starting your data entry.
- Save the file in a secure location for easy access when you are ready to input or upload your data.
Once you’ve downloaded the file, you’ll be ready to begin entering your financial information in the correct format, ensuring a smooth transfer into your accounting system.
Essential Fields in the Xero CSV Template
When preparing your financial records for upload, it’s important to ensure that each entry is correctly formatted and organized. The file used to transfer data into the accounting system consists of several key sections, each representing a different type of information. By filling out these sections correctly, you ensure that your data is processed accurately and efficiently.
Each column in the structured file corresponds to a specific data point, and it’s crucial to understand the role of each field to avoid errors during the upload process. Below are some of the essential fields that need to be filled out when working with the file format:
- Date – The date associated with the financial entry. This is vital for organizing records in chronological order and for accurate reporting.
- Description – A brief explanation of the transaction or item. This helps identify the purpose of each record.
- Amount – The monetary value of the transaction. Ensure that the correct currency and format are used to avoid discrepancies.
- Account Name – The specific account or category to which the transaction belongs. Proper categorization is essential for maintaining accurate financial records.
- Reference Number – A unique identifier for each entry. This is especially useful for tracking and cross-referencing data.
- Tax Rate – The applicable tax rate for the transaction, if any. This field is important for maintaining tax compliance and calculating the correct amounts.
Filling out these essential fields correctly ensures that your financial data is structured in a way that your accounting system can easily process. Properly formatted entries help reduce errors, prevent delays, and make financial recordkeeping more efficient.
Formatting the CSV File for Xero
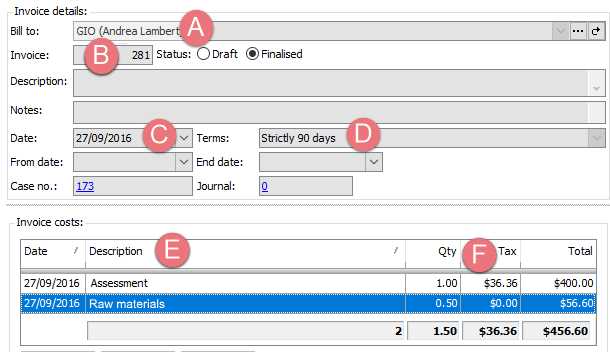
Properly formatting your file is crucial to ensuring that the data can be processed correctly by your accounting system. Each field needs to be organized in a specific way to align with the system’s requirements. By adhering to the correct structure, you minimize the chances of errors and delays during the upload process, ensuring that your financial records are accurately reflected in the system.
The formatting process involves arranging the data in columns and rows, each representing specific information like amounts, dates, and descriptions. Attention to detail is essential, as even a small mistake in formatting can result in failed uploads or misclassified entries. Below are the key formatting guidelines to follow:
Key Formatting Guidelines
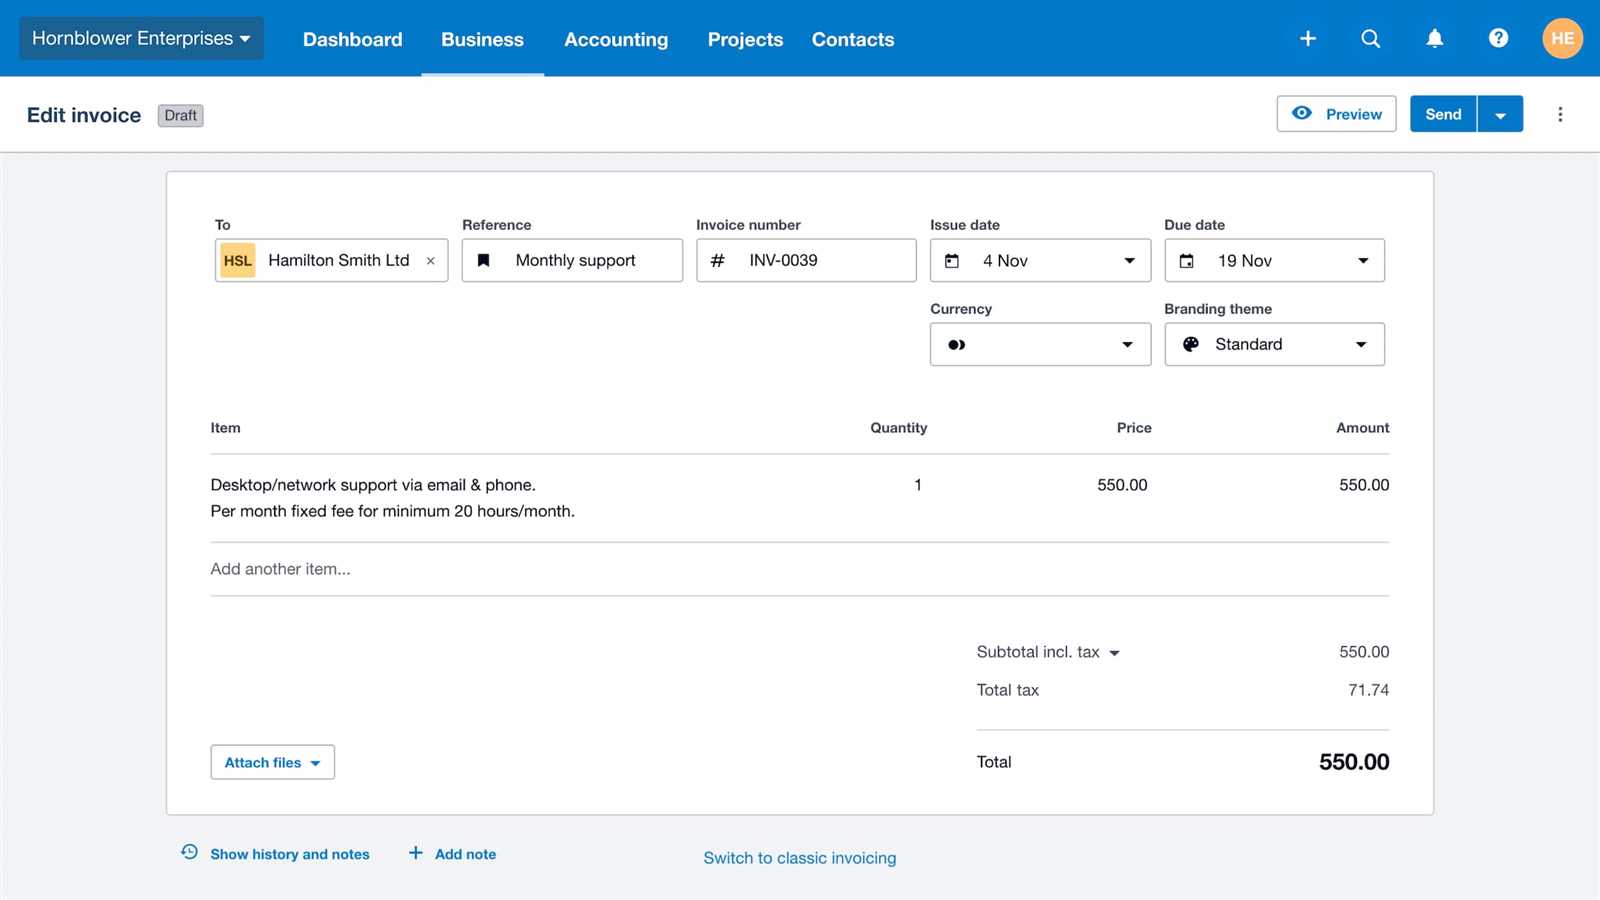
- File Type – Ensure the file is saved in the correct format, such as a comma-separated values (CSV) file, to guarantee compatibility with your accounting platform.
- Consistent Date Format – Use a consistent date format throughout the file, such as MM/DD/YYYY or DD/MM/YYYY, to avoid confusion or errors in data processing.
- Correct Decimal Places – Ensure that all numerical entries, such as amounts, use the correct number of decimal places. Typically, two decimal places are used for currency values.
- Clear Column Headers – Each column should have a clear, defined header that identifies the type of data it contains (e.g., “Amount”, “Date”, “Description”). This helps the system correctly map the data.
- Remove Extra Spaces – Ensure there are no extra spaces before or after values in each field, as this can cause issues when the data is processed.
- Ensure Proper Encoding – The file should be saved with UTF-8 encoding to prevent any issues with special characters or symbols.
Common Mistakes to Avoid
- Leaving mandatory fields empty, such as amounts or dates.
- Using inconsistent date formats or currency symbols that the system cannot recognize.
- Including hidden characters or extra spaces that can disrupt the data transfer process.
- Failing to double-check the accuracy of your entries before uploading.
By following these formatting guidelines, you can ensure that your data is structured correctly and ready for successful processing, minimizing errors and improving the overall efficiency of your financial workflows.
Common Errors When Importing CSV Files
When transferring data from an external file into your accounting system, errors can sometimes occur, leading to issues such as failed uploads or misclassified entries. These errors are often caused by incorrect formatting, missing information, or incompatible data types. Identifying these mistakes early can save time and prevent disruptions to your workflow. Below are some of the most common issues users face during the process of transferring data into their system.
- Missing Required Fields – One of the most frequent errors is forgetting to fill out essential fields like amounts, dates, or account names. If these fields are left blank, the system may fail to recognize the entry or could generate an error during the upload process.
- Incorrect Date Format – Using inconsistent date formats can cause confusion. For example, entering dates as MM/DD/YYYY in some rows and DD/MM/YYYY in others may lead to the system misinterpreting the entries or rejecting the file altogether.
- Incorrect Numeric Values – Formatting errors with numbers, such as using commas instead of periods for decimal points or entering values with too many or too few decimal places, can prevent the system from processing the data correctly.
- Inconsistent Column Headers – Mismatched or unclear column headers can lead to the system not recognizing the data or mapping it to the wrong fields. Each column should have a clear and consistent label that matches the required data type.
- Extra Spaces or Special Characters – Extra spaces before or after entries, as well as unrecognized special characters, can cause issues when uploading the data. It’s important to clean the file and remove any unnecessary characters that may disrupt the upload process.
- File Encoding Issues – Files saved with incorrect encoding (such as non-UTF-8) can cause problems with special characters or non-standard symbols, which can corrupt the data and prevent successful uploads.
By understanding and addressing these common errors, you can ensure a smoother and more efficient data transfer process. Always double-check your file before uploading, paying close attention to the formatting, consistency, and completeness of the data to avoid issues.
How to Correct CSV File Issues
When working with structured data files, errors can often arise that prevent smooth uploads or lead to inaccurate entries in your accounting system. Identifying and correcting these issues is key to ensuring that your data is processed correctly. Fortunately, most errors are easy to resolve with a few careful adjustments. Below are some common issues and solutions to help you fix problems quickly and efficiently.
Step-by-Step Guide to Fixing Common Issues
- Check for Missing Fields – Review your file to ensure that all mandatory fields, such as amounts, dates, and descriptions, are filled in. If any fields are empty, fill them in with the appropriate data. Missing required information is one of the most common causes of failed uploads.
- Correct Date Formats – Ensure that all dates are in a consistent format throughout the file. If your system expects dates in the MM/DD/YYYY format, check for any entries that deviate from this format and correct them. Consistency is key to avoiding processing errors.
- Fix Numeric Formatting – Make sure that all numerical values, especially amounts, are formatted correctly. Ensure that decimal places are consistent, using a period (.) for decimal separation and avoiding commas or other characters that might interfere with the data.
- Standardize Column Headers – Verify that your column headers are consistent with the system’s expected labels. If a column header is misspelled or unclear, it can prevent the system from properly mapping the data. Ensure that each column has the correct and clearly defined label.
- Remove Extra Spaces or Special Characters – Look for extra spaces before or after entries, as well as any special characters that are not recognized by the system. These can disrupt the upload process, so clean up the file by removing unnecessary characters.
- Verify File Encoding – Make sure your file is saved with the proper encoding, typically UTF-8. If the file is using a different encoding, special characters may not display correctly. Use your spreadsheet or text editor’s “Save As” feature to choose the correct encoding format.
Additional Tips
- Use Data Validation – Before uploading, use data validation features in your spreadsheet software to check for common errors, such as incorrect data types or inconsistent values.
- Test with Sample Data – If you’re unsure whether your file is correctly formatted, test it by uploading a small sample first. This can help you identify any issues before you process a large batch of data.
By following these steps and ensuring that your file is correctly formatted, you can quickly resolve most common errors and ensure that your financial data is accurately processed by the system.
Step-by-Step Guide to Importing Invoices
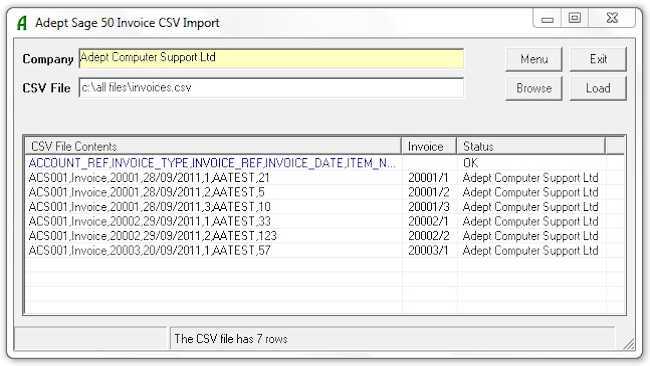
Transferring financial records into your accounting system can streamline your workflow and save valuable time. By following a clear, systematic approach, you can ensure that all data is properly formatted and uploaded into the system with minimal errors. Below is a step-by-step guide to help you successfully add your records, ensuring a smooth and efficient process.
Step-by-Step Process
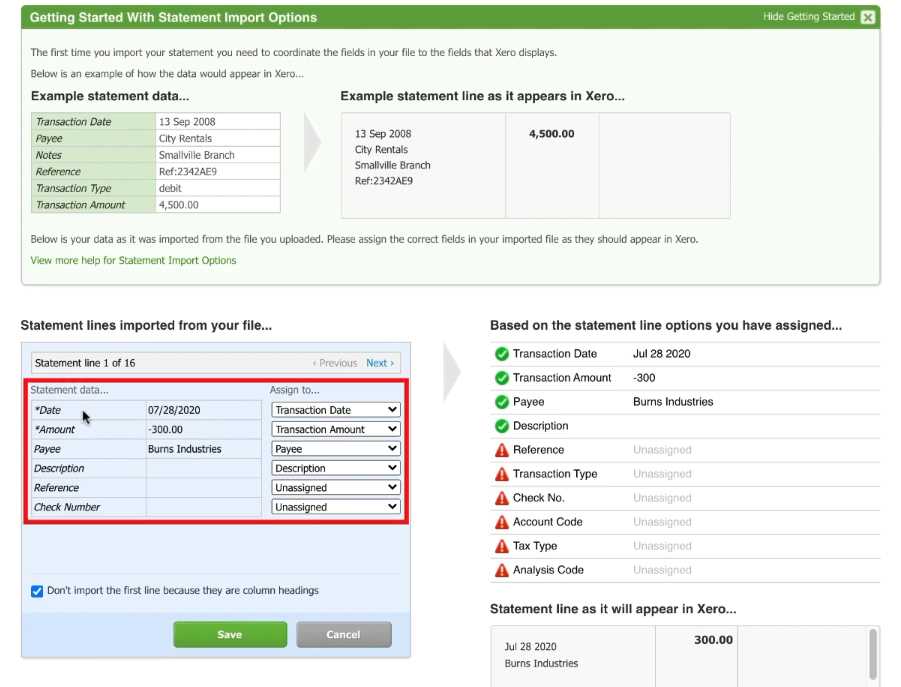
Follow these steps to ensure a smooth and successful transfer of your financial data:
| Step | Description |
|---|---|
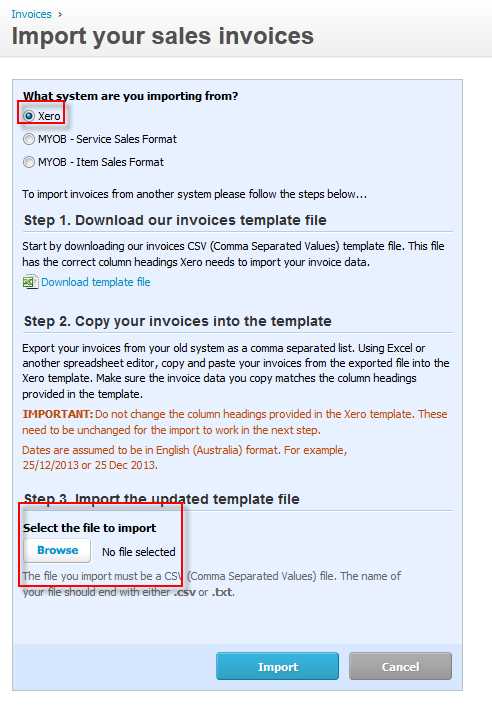
| Prepare Your File | Ensure that your data file is correctly formatted, with all required fields such as dates, amounts, descriptions, and account details filled in. Review the file for any formatting or data entry errors. |
| Login to Your Accounting System | Access your account using your credentials. Navigate to the section where you can add or update financial records. |
| Select the Upload Option | Locate the feature for uploading structured data. This is typically found in the financial transactions or data management area of your system. |
| Choose Your File | Select the prepared file from your computer. Make sure that the correct file is selected and ready for upload. |
| Map the Data | Ensure that the fields in your file are correctly mapped to the corresponding categories in the system. This helps the system interpret your data accurately. |
| Review the Data | Before finalizing the upload, review the data preview to ensure that all entries are correct and aligned with the proper categories. |
| Complete the Upload | Once you are confident that everything is correct, proceed with the upload process. Monitor for any errors or messages from the system that may indicate issues with the file. |
By following these simple steps, you can ensure that your financial data is successfully added to your system with minimal errors and maximum efficiency. Always double-check your data before uploading and utilize any system features designed to help with error detection and validation.
Best Practices for Invoice Data Organization
Organizing your financial records efficiently is crucial for maintaining accuracy, ensuring compliance, and speeding up workflows. A well-organized system helps prevent errors, facilitates easier tracking, and ensures that all data is readily available when needed. Adopting best practices for structuring and managing your transaction data will enhance the overall efficiency of your accounting processes and ensure smoother integration with your financial platform.
By following a few essential practices, you can keep your data well-structured, consistent, and easy to navigate. These best practices will not only help streamline the process of transferring data into your system but also improve overall data integrity and reduce the chances of errors.
Key Practices to Follow
- Use Consistent Data Formats – Ensure that all records follow a uniform format. For example, always use the same date format, currency symbols, and decimal precision for amounts. Consistency prevents confusion and errors during data processing.
- Organize by Categories – Break down your financial data into categories or groups that make sense for your business, such as payments, receipts, taxes, and accounts. Proper categorization ensures that entries are easy to track and reference.
- Use Clear Descriptions – Each transaction should have a brief but clear description that identifies its purpose. This will make it easier to locate specific entries when reviewing records or conducting audits.
- Keep Data Accurate and Complete – Double-check that all necessary fields are filled out completely and accurately. Incomplete or inaccurate entries can lead to delays or issues during the upload process and could result in incorrect reporting.
- Maintain a Standardized File Structure – If you are managing multiple files, ensure each follows the same structure, with consistent headers and column placement. This practice simplifies data handling and reduces the time spent on organizing or mapping the information later.
- Review and Clean Data Regularly – Before uploading or finalizing data, take time to review the file for any inconsistencies, unnecessary characters, or duplicates. Regular maintenance of your records keeps the data clean and ready for processing at any time.
Tools for Efficient Data Organization
- Data Validation Tools – Utilize built-in data validation features in spreadsheets to automatically check for errors such as invalid dates, incorrect numbers, or missing fields.
- Custom Templates – Create or use pre-designed templates that already follow the required structure and field formats. This helps streamline data entry and reduces the risk of mistakes.
- Automated Sorting and Filtering – Take advantage of automated sorting and filtering tools to organize your data by various criteria, such as date or account name. This makes it easier to manage and review large amounts of data.
By adopting these best practices, you can significantly improve the organization, accuracy, and efficiency of your financial recordkeeping, leading to smoother workflows and better decision-making within your accounting system.
Automating Invoice Imports with CSV Files
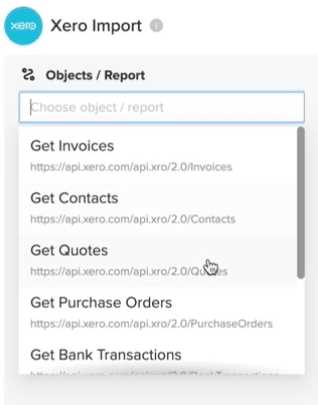
Streamlining your financial data entry process can save significant time and reduce human error. By automating the process of transferring transaction records from external files into your accounting system, you can ensure faster and more accurate data updates. Automation not only improves efficiency but also minimizes the manual effort required to input large amounts of data, which can be both time-consuming and error-prone.
Setting up an automated process for data uploads involves configuring your accounting system to accept and process files on a scheduled basis or when new records are added. Once this system is in place, you can let your software handle most of the data handling, with minimal oversight required. Below are some benefits and methods for automating your data entry process:
Benefits of Automation
- Time Savings – Automating the process eliminates the need for manual entry of each transaction, which can be time-consuming, especially for businesses that handle high volumes of data.
- Increased Accuracy – Automation reduces the risk of human error, ensuring that data is consistently transferred and recorded correctly. This leads to fewer mistakes in financial reporting.
- Faster Data Processing – Automated uploads can be completed in seconds or minutes, allowing you to get real-time updates in your system without having to wait for manual entries to be processed.
- Consistency – Automated workflows follow the same rules every time, ensuring that data is always structured and processed in the same way, which leads to more reliable and predictable results.
- Better Data Management – Automation tools often come with built-in validation, meaning that errors can be caught before they cause problems, leading to cleaner data and fewer corrections needed after the upload.
How to Set Up Automation
- Choose the Right Tools – Select software that offers built-in automation features for handling structured data uploads. Some systems provide native automation options, while others may require third-party tools or integrations.
- Define Your Workflow – Set up rules for how often and when your system should automatically upload new records. You ca
Tips for Efficient CSV Invoice Management
Managing financial records in bulk can be a challenging task, especially when dealing with large sets of data. However, with the right strategies and organization techniques, you can make the process of handling and transferring transaction details much more efficient. By ensuring your files are structured correctly and employing smart data management practices, you can save time and avoid common pitfalls that slow down your workflow.
Here are some practical tips to help you manage your transaction data more effectively:
Best Practices for Organizing and Managing Files
- Standardize Your Data Structure – Use a consistent file format for all records. This means ensuring that column headers, field formats, and overall data structure remain the same for every upload. Standardization helps prevent errors and confusion when processing large batches of information.
- Break Data Into Manageable Segments – If you’re handling a high volume of data, consider splitting it into smaller, more manageable files. This can help reduce errors during upload and allow you to focus on smaller chunks at a time, making troubleshooting easier if something goes wrong.
- Keep Records of Uploaded Files – Maintain a separate log of all files that have been successfully uploaded. This ensures that you can track what has been processed and identify any missing records or discrepancies more easily.
- Use Descriptive File Names – When saving files, use clear, descriptive file names that include dates or other key identifiers. This helps you quickly locate and distinguish files, especially when working with multiple batches of data over time.
Improving Data Accuracy and Efficiency
- Double-Check Required Fields – Ensure that all essential fields, such as dates, amounts, and account names, are filled in accurately. Missing or incorrect data can result in failed uploads and cause delays in processing.
- Utilize Data Validation – Before submitting your files, use validation tools to check for common issues such as missing fields, incorrect date formats, or invalid characters. This will help prevent errors that could affect the accuracy of your data.
- Regularly Clean Your Files – Regularly audit and clean your data to remove duplicates, outdated information, or unnecessary entries. This will help main
How to Handle Multiple Invoices in One File
Managing multiple records within a single document can be tricky, especially when dealing with large sets of transactions. However, organizing several entries in one file is often necessary for efficiency, particularly when you need to upload or process many records simultaneously. The key to handling multiple records effectively is ensuring that the file is well-structured, organized, and easy to navigate. With the right approach, you can manage multiple entries without compromising on accuracy or efficiency.
Here are some essential steps and tips for managing and organizing multiple records within a single file:
Step-by-Step Guide for Organizing Multiple Entries
- Use a Consistent Structure for Each Entry – Each entry within the file should follow the same layout with consistent column headers. For example, include fields such as date, amount, description, and account details for each transaction. This uniformity helps the system process all records correctly and reduces errors during data handling.
- Separate Each Entry Clearly – Ensure that each transaction is on its own row, with all relevant information filled out completely. This separation makes it easier to review and edit individual entries without confusion, especially when dealing with large files.
- Label and Group Similar Entries – If you are working with different types of records, consider grouping similar entries together under specific labels or categories. For example, you might categorize by payment type, date, or account name. This grouping can help you better manage your records and identify specific sets of transactions more easily.
Tips for Optimizing Data Accuracy and Efficiency
- Check for Duplicates – Before finalizing your file, review it for duplicate records. Duplicates can lead to errors during processing, so it’s essential to remove any redundant entries to maintain data integrity.
- Ensure Correct Formatting – Consistency in formatting is critical. Make sure that dates, amounts, and other numerical fields are formatted correctly throughout the file. This reduces the risk of errors during the upload process and ensures that the data is interpreted accurately by the system.
- Validate Data Before Uploading – Use validation tools to check your data for errors such as missing fields or invalid characters. Catching these issues before uploading saves time and prevents costly mistakes in the processing stage.
Dealing with Large Files
- Split Large F
Customizing the CSV Template
Customizing a file format for financial data allows you to tailor it to your specific needs, making it easier to manage and process large sets of records. Adapting the structure to fit your business’s unique requirements can streamline workflows, improve data accuracy, and enhance the overall efficiency of your accounting system. Whether you need to adjust column headings, add specific fields, or rearrange the layout, customizing your file can help optimize your data handling process.
Below are some useful steps and tips for personalizing your file structure to ensure it works seamlessly with your system:
Steps for Customizing Your Data File
- Define the Required Fields – Start by identifying which fields are essential for your business operations. This might include customer information, transaction dates, amounts, or unique references. Ensure that these fields are clearly defined and placed in an order that makes sense for your workflow.
- Modify Column Headers – Depending on your accounting system, you may need to modify column headers to match the required format. Adjusting headers ensures that data is mapped correctly during processing and eliminates any confusion when interpreting the information.
- Rearrange Data Fields – If the standard file format doesn’t align with your business’s reporting structure, rearrange the fields as needed. Prioritize key information that needs to be processed first and ensure related data is grouped together for easier analysis.
- Add Custom Fields – If your business requires additional data points that are not included in the standard layout, add custom fields to capture this information. For example, you may want to track sales regions, department codes, or specific tax rates, depending on your needs.
Tips for Ensuring Smooth Customization
- Consistency is Key – Ensure that all changes to the file structure are consistent across all records. Inconsistent field names or missing data can lead to errors during processing, so it’s important to maintain a uniform format throughout.
- Test Changes Thoroughly – Before finalizing your custom file, conduct a test upload to check for any issues with the new layout. This will help identify any mismatches or errors before they affect the entire batch of records.
- Use a Template as a Reference – If you’re unfamiliar with the customization process, start with an existing example. Many systems provide a standard sample file that you can use as a reference to guide your customizations and ensure the layout is compatible with your system.
Customizing your data file can sig
Integrating Your Accounting System with Other Tools
Integrating your financial management platform with other accounting and business tools can significantly enhance efficiency, streamline workflows, and improve overall data accuracy. By connecting various software systems, you can automate the exchange of financial data, reduce the risk of manual errors, and ensure that your records are always up-to-date across all platforms. Whether you need to sync payment processing, track inventory, or manage client relationships, seamless integration can save you time and effort.
Here are some important steps and tips for successfully integrating your accounting system with other tools:
Key Benefits of Integration
- Automated Data Flow – Integration allows for the automatic transfer of data between systems. This eliminates the need for manual entry, reduces the risk of mistakes, and ensures that your records are always synchronized.
- Real-Time Updates – With integration, you can get real-time updates across your tools. For example, when a transaction is entered in one system, it is automatically reflected in your accounting software, keeping all data consistent.
- Improved Reporting – Integrated systems can pull data from multiple sources, providing a more complete picture of your financial status. This enables more accurate and comprehensive reporting, helping you make better-informed decisions.
- Time and Cost Savings – Automating tasks that would otherwise be done manually can save time and reduce operational costs. By minimizing the need for human intervention, you free up resources for other areas of your business.
Steps for Integrating Your Accounting Platform

- Identify Your Integration Needs – Determine which other tools you want to connect with your accounting system. This could include payment gateways, project management software, CRM platforms, or inventory management systems. Clearly outline your objectives to ensure the integration meets your specific needs.
- Choose the Right Integration Method – Depending on the software, integrations can often be achieved through API connections, third-party middleware, or built-in integration features. Research the available options and choose the best fit for your business’s setup.
- Test the Integration – Before fully committing to the integration, conduct thorough testing to ensure that data flows correctly between systems. This includes checking for discrepancies, formatting issues, or data loss during the transfer process.
- Set Up Automated Workflows – Once your systems are connected, configure automated workflows to handle routine tasks, such as syncing transaction data, generating reports, or sending alerts. This will help maximize the efficiency of the integration.
Best Practices for Seamless Integration
- Choose Compatible Tools – Ensure that the tools you plan to integrate with your accounting system are compatible and support the necessary data formats. Compatibility is key to a smooth integration process.
- Keep Software Up-to-Date – Regularly update both your accounting software and any integrated tools to maintain compatibility and security. Software vendors often release updates that improve integration capabilities and address potential issues.
- Monitor and Optimize – Once your systems are integrated, monitor their performance and make adjustments as necessary. Regular optimization ensures that the integration continues to operate efficiently as your business grows and evolves.
By integrating your accounting system with other business tools, you can create a more unified, automated workflow that reduces errors, saves time, and enhances your financial management. Whether you’re linking payment platforms or connecting customer relationship tools, effective integration plays a crucial role in simplifying your
How to Verify Successful CSV Imports
After processing a bulk data file into your accounting system, it’s essential to confirm that all information has been successfully transferred and is accurately reflected. Verifying the success of your data entry is crucial to prevent errors, misalignments, or incomplete records that could affect your financial management. A systematic approach to validation ensures that your records are intact and consistent with the original data, helping you avoid costly mistakes.
Below are key steps and strategies for verifying successful file imports:
Steps to Verify Data Integrity
- Check for Error Messages – Most systems will provide feedback in the form of error logs or messages if something goes wrong during the upload process. Review these logs carefully to ensure that there are no issues preventing the successful transfer of data.
- Verify Record Counts – Compare the number of records in the original file with the number of entries processed in the system. If they don’t match, there may have been an issue with the upload. Ensuring consistency in record counts is one of the easiest ways to quickly spot discrepancies.
- Review Sample Entries – Manually check a few records to confirm that the data has been mapped correctly. Look for missing or misplaced fields, and ensure that all information, such as dates, amounts, and customer details, are accurately entered.
- Cross-Reference with Source Documents – For an additional layer of verification, cross-reference the imported data with your source documents, such as spreadsheets or paper records. This ensures that no data was lost or altered during the transfer process.
Tools for Verifying Successful Uploads
In many cases, accounting software comes equipped with built-in tools or dashboards that can help you track and confirm successful data uploads. Here are some common tools to use:
Verification Tool Description Import Logs Review logs that provide detailed information about the import process, including any errors encountered and the number of records successfully processed. Data Preview Many platforms offer a data preview feature before finalizing the upload. Use this tool to spot any formatting issues or missing information before completing the process. Reconciliation Tools Reconciliation tools can compare your imported data with previous Maintaining Accurate Records After Importing
After transferring data into your system, maintaining its accuracy is crucial for long-term business operations. While the initial import process may seem straightforward, it’s essential to ensure that the information stays up-to-date, correct, and properly organized. Regular reviews and updates are necessary to avoid discrepancies that could affect reporting, decision-making, and overall financial health.
Here are some strategies to keep your records accurate and consistent over time:
Strategies for Ongoing Data Accuracy
- Regular Reconciliation – Consistently reconciling the imported data with other financial records or external documents is key to ensuring that no errors or discrepancies have occurred during the data transfer. This process helps identify issues early and allows for prompt corrections.
- Automate Updates – Use automation tools where possible to reduce the risk of human error. Setting up automatic data updates for recurring transactions or changes in customer details ensures that the information in your system remains accurate without requiring manual intervention.
- Establish Data Entry Standards – To maintain consistency, establish clear guidelines for how data should be entered into the system. This can include specific formats for dates, amounts, or customer names, helping to prevent inconsistencies that could cause issues down the line.
Regular Audits and Quality Control
- Perform Routine Audits – Conducting periodic audits of your records ensures that all information is accurate and properly organized. These audits can be done monthly, quarterly, or annually depending on the volume of data and the complexity of your operations.
- Cross-Check Data Against Source Documents – To verify the integrity of your data, compare the imported records with original source documents. This will help you confirm that the data hasn’t been altered or omitted during the transfer process.
- Set Up Alerts for Inconsistencies – Many systems allow you to configure alerts that notify you of discrepancies, such as missing or incorrect entries. These alerts can act as an early warning system, allowing you to address issues before they become larger problems.
By following these practices, you can ensure that your records remain accurate and well-organized long after the initial data transfer. Maintaining consistency and accuracy is an ongoing process that requires attention and regular updates, but the effort will pay off in more reliable financial reporting and smoother business operations.