How to Create Invoice Template in QuickBooks Desktop
Setting up a professional document for billing purposes is essential for any business looking to streamline financial transactions. Customizing these documents can help enhance the brand identity and ensure clarity in the information provided to clients. With the right tools, creating a document that meets specific business needs becomes a simple and effective task.
Personalizing these forms offers more than just aesthetic improvements. Adjusting details such as layout, company details, and payment terms ensures that your records align with your business style and customer expectations. This step-by-step guide will walk you through the process of tailoring a professional billing document to suit your specific requirements.
How to Create Invoice Template in QuickBooks Desktop
Designing a custom document for billing in your accounting software allows you to present information in a way that suits your business needs. Tailoring the structure and layout of the form is a straightforward process, enabling you to craft a personalized layout with ease. This flexibility helps ensure that your financial communications reflect your brand while remaining functional and professional.
Accessing the Template Editor
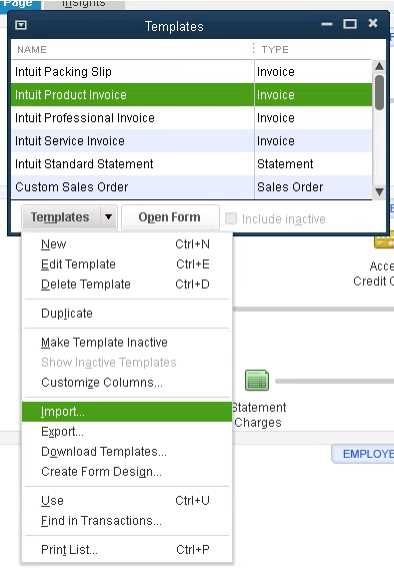
The first step is to open the software and navigate to the section where you can modify your documents. Typically, this can be found under the “Lists” menu. From there, you can access the “Templates” option, which allows you to manage and adjust the format. It’s here that you’ll be able to start modifying the existing designs or create a completely new version from scratch.
Customizing Your Document
Once you’re inside the editor, you’ll have the option to adjust various elements. Start by adding your company’s logo and contact information to the header. Then, customize the layout to ensure that all necessary fields, such as product descriptions, payment terms, and due dates, are clearly visible. You can also modify font styles, colors, and sizes to better suit your brand’s visual identity.
Understanding QuickBooks Invoice Templates
Customizable billing documents play a key role in streamlining financial transactions and maintaining professionalism. These documents are designed to meet the unique needs of businesses, allowing for personalized adjustments that align with branding and operational requirements. Understanding the core functionality of these editable forms can help maximize their effectiveness in your day-to-day financial processes.
In essence, these forms allow you to insert specific details such as client information, payment terms, product or service descriptions, and taxes. They are structured in a way that makes it easy to manage recurring entries and save time. Through customization, you ensure that your documents not only look professional but also reflect your business’s identity and make the payment process clear for clients.
Why Customize Your Invoice Template
Personalizing your billing documents offers numerous advantages that go beyond aesthetic appeal. Customization ensures that your business communication aligns with your brand’s identity, making it more professional and efficient. By modifying these forms, you can present information clearly and in a way that suits your unique operational needs.
Benefits of Customization
Customizing your document helps in several key areas:
- Branding: Including your company’s logo, colors, and fonts helps reinforce your brand’s image.
- Clarity: Tailoring the layout ensures that the most important details are easy to find and understand.
- Professionalism: A personalized design conveys that you care about details and maintain a high level of professionalism.
- Efficiency: Creating custom fields and adjusting the layout saves time, especially when dealing with regular clients or repeat transactions.
Improved Client Experience
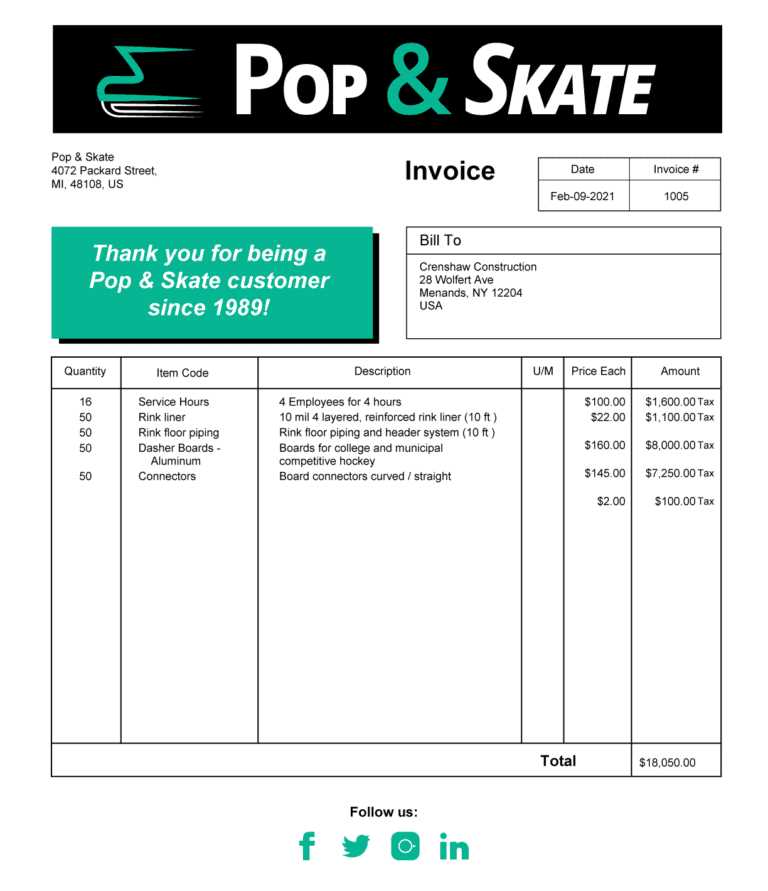
Personalized billing documents help improve the client experience by ensuring all relevant information is presented in a clear, organized manner. Clients will appreciate having an easy-to-read document that includes all the details they need to process payments without confusion. A well-organized document builds trust and enhances your business reputation.
Step-by-Step Guide to Create an Invoice
Designing a professional document for billing purposes involves several key steps to ensure the end result is both functional and visually appealing. By following a simple process, you can easily generate a customized document that meets your business needs while presenting a professional image to clients. This guide will walk you through each stage of the process to help you build an efficient and personalized billing form.
Starting the Process
The first step is to open your accounting software and navigate to the section for managing forms. From here, you can either choose to modify an existing design or start a new one from scratch. Once you’ve selected your preferred starting point, you’ll begin adding your essential information, such as company name, address, and contact details. This helps ensure that your document reflects your brand’s identity right from the start.
Customizing the Layout
Next, you’ll adjust the layout to suit your needs. Begin by organizing the sections of the document, placing fields for product or service descriptions, quantities, pricing, and payment terms in easy-to-read locations. You can modify fonts, colors, and add any additional fields, such as taxes or discounts. Once you’ve set up the layout, review it to make sure all relevant details are included and clearly visible to your clients.
Choosing the Right Template Style
Selecting the appropriate style for your billing document is crucial for ensuring it aligns with your brand identity and business needs. The right layout not only makes the document more professional but also helps to communicate key details more clearly to your clients. By considering various factors, you can choose a design that best represents your company and suits your financial processes.
Factors to Consider
When selecting a style, keep the following aspects in mind:
- Brand Identity: The design should reflect your business’s visual identity. This includes using your logo, colors, and fonts to create a consistent experience for your clients.
- Functionality: Ensure the layout makes it easy to include essential information such as service details, amounts, and payment terms without overcrowding the page.
- Professionalism: A clean, organized design conveys professionalism and helps build trust with clients. Avoid cluttered or overly complicated formats.
- Readability: The style should prioritize readability. Use a format that highlights key sections, such as contact information, amounts, and due dates, ensuring they stand out to the reader.
Popular Style Options
Consider these common styles when choosing your document layout:
- Modern: Clean lines and minimalist design often appeal to businesses aiming for a contemporary, professional look.
- Classic: Traditional layouts with well-defined sections and clear fonts work well for industries that value formality.
- Creative: A more personalized approach, with the use of custom graphics or unique fonts, is ideal for businesses that want to stand out visually.
How to Insert Your Logo
Including your business logo in billing documents is an essential step in creating a cohesive brand identity. By adding your logo, you ensure that your forms not only convey professional information but also reflect your company’s image, making it more recognizable and trustworthy to clients. This process is simple and can be customized to fit your document’s layout perfectly.
Steps to Add Your Logo
Follow these steps to insert your logo into your document:
- Prepare the Image: Ensure your logo is in a suitable file format, such as PNG or JPEG, with a high resolution for clarity.
- Access the Editor: Navigate to the section where you can modify the document’s layout.
- Insert the Image: Use the insert image feature, typically found in the header or layout customization options.
- Adjust Size and Position: Resize the logo as needed to fit within the designated area, and position it where it’s most visible, typically in the top-left corner.
Positioning Your Logo for Maximum Impact
Strategic placement of your logo enhances the overall professionalism of your document. Consider these tips:
- Top-left corner: A standard placement that draws attention right away.
- Centered at the top: Ideal for a balanced and formal design.
- Header area: Ensure the logo does not overwhelm the content, maintaining a clean layout.
Setting Payment Terms and Due Dates
Establishing clear payment terms and specifying due dates are critical components in ensuring smooth financial transactions with clients. By defining when payment is expected and outlining any discounts or late fees, you create transparency and help manage cash flow effectively. This section will guide you through adding these important details to your billing forms.
Choosing Payment Terms
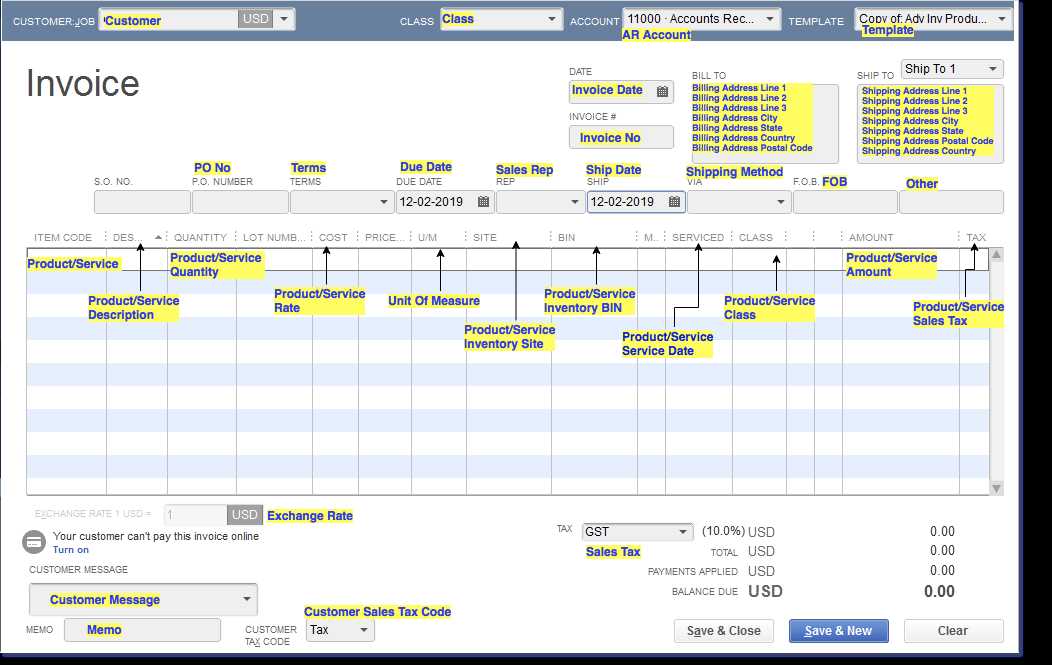
Payment terms indicate the time frame within which a client is expected to pay. Some common options include:
- Net 30: Payment is due within 30 days from the date of the document.
- Due on Receipt: Payment is due immediately after the client receives the document.
- Net 15: Payment is due within 15 days of the document date.
- Custom Terms: You can define your own terms based on your business needs, such as offering a discount for early payment.
Including Due Dates
Once you’ve defined the payment terms, it’s important to clearly state the due date. Typically, the due date is calculated based on the payment terms. Including it prominently on the document helps avoid confusion. You can display it near the total amount due or in a section that outlines payment expectations clearly.
Customizing Invoice Layout and Design
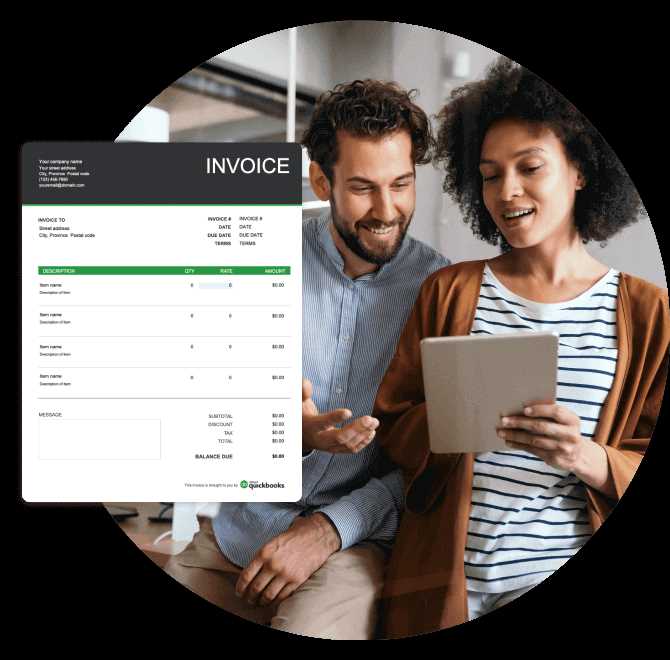
Personalizing the structure and visual elements of your billing documents is an important step in ensuring they are both functional and visually appealing. By adjusting the layout and design, you can create a document that reflects your business’s brand identity, enhances readability, and improves the client’s experience. This process involves organizing key information in a clean, clear manner while incorporating elements like color schemes, fonts, and logos.
Adjusting the Layout
The layout of your document should prioritize clarity and ease of use. Key sections should be arranged in a logical order, with important details standing out. Here are some tips for customizing your layout:
- Headings and Subheadings: Use bold or larger font sizes to differentiate important sections like client information, service details, and total amounts.
- Alignment: Ensure the text is aligned properly, with totals and payment details centered for emphasis.
- Spacing: Use sufficient spacing between sections to avoid a cluttered appearance.
Design Elements
In addition to layout, design elements such as fonts, colors, and branding visuals help create a professional look. Consider the following options when customizing your design:
- Font Style: Choose easy-to-read fonts, ensuring consistency throughout the document.
- Color Scheme: Use your company’s colors to reinforce branding, but avoid overly bright or distracting colors that may reduce readability.
- Logo Placement: Include your company’s logo in a prominent position, typically at the top of the document, to reinforce brand recognition.
Using a Table for Itemization
Tables are a great tool for clearly listing services or products along with their corresponding prices. Here’s an example of how to structure a simple table for this purpose:
| Item | Description | Quantity | Price | Total |
|---|---|---|---|---|
| Product A | High-quality item | 2 | $50 | $100 |
| Product B | Another essential item | 3 | $30 | $90 |
Using tables not only organizes your information but also makes it easy for clients to understand the charges
Adding Tax Information to Invoices
Incorporating tax details into your billing documents is essential for maintaining transparency and ensuring compliance with local tax laws. By clearly displaying applicable taxes on each bill, you provide clients with a comprehensive breakdown of their charges, which helps prevent misunderstandings and ensures accurate payments. This section will guide you through adding tax-related information effectively.
Identifying the Relevant Tax Rates
Before adding tax information, it’s important to determine the applicable tax rates for your services or products. These rates can vary based on factors such as location and type of goods or services provided. To ensure accuracy, consult with local authorities or accounting professionals to verify the correct rates. Once identified, you can integrate them into your documents.
Displaying Tax Information Clearly
Once you’ve determined the tax rates, it’s essential to display them prominently on the billing document. Here are some guidelines for adding tax details:
- Tax Line: Create a separate line item for taxes in the summary section of the bill.
- Clear Breakdown: Include a description, tax rate, and amount being charged for tax separately from the total cost of goods or services.
- Multiple Taxes: If multiple tax rates apply, list each one clearly with its corresponding amount to avoid confusion.
By following these steps, you ensure that clients are fully aware of any taxes they are required to pay, making the transaction process smoother and more transparent.
Including Product and Service Details
Providing detailed descriptions of the goods or services rendered is essential for clarity and transparency in any financial document. By listing items clearly, clients can easily verify the products or services they are being charged for, which helps avoid confusion and ensures accurate payments. This section will guide you on how to properly include these details on your documents.
Describing Products and Services
Each product or service should be described accurately to avoid misunderstandings. It’s important to include relevant details such as:
- Item Name: Clearly state the name of the product or service.
- Description: Provide a brief description or specifications, such as size, model, or features.
- Quantity: Specify the number of items or the amount of service provided.
- Unit Price: Include the price per item or per hour for services.
Itemizing Costs for Clarity
Itemizing costs helps break down the total amount into manageable pieces, making it easier for clients to understand what they are paying for. Here’s how you can structure the pricing:
- Unit Cost: Display the cost for each unit or hour of service separately.
- Total Cost: Include the total for each product or service, calculated by multiplying the unit price by the quantity.
- Discounts: If applicable, show any discounts given on specific items or services.
By listing detailed product and service information, clients gain a full understanding of the charges, leading to smoother transactions and greater satisfaction.
How to Add Shipping Charges
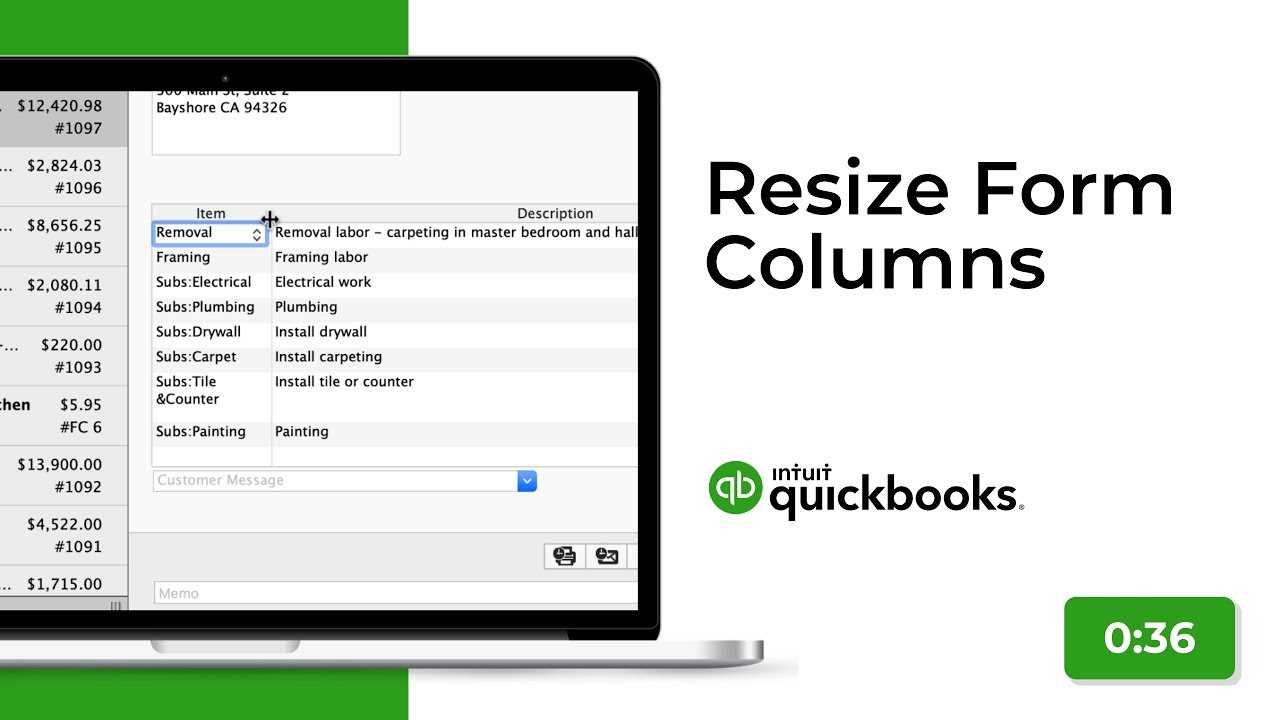
Including shipping fees on your financial documents is an important step to ensure accurate billing for the delivery of goods. These charges are often necessary for covering transportation and handling costs, and they should be presented clearly to avoid confusion. This section explains how to include shipping fees in your financial documents.
To add shipping costs effectively, follow these steps:
- Separate Line Item: Add a distinct line for shipping charges, ensuring it is separate from the cost of goods or services.
- Clearly State Charges: Mention the shipping cost explicitly, including any additional fees for expedited or special deliveries.
- Include Relevant Information: If needed, provide further details such as the shipping method, estimated delivery date, or any specific conditions related to the charges.
By clearly identifying shipping costs, you help ensure that clients are fully informed of all charges, leading to a transparent and smooth transaction process.
Customizing Fonts and Colors
Tailoring the appearance of your financial documents with personalized fonts and color schemes can enhance their visual appeal and reinforce your brand identity. Adjusting these elements ensures that your documents align with your business’s style while maintaining readability and professionalism. This section will guide you through customizing these aspects effectively.
Choosing the Right Fonts
Font selection plays a critical role in readability and setting the tone of your documents. When choosing fonts, consider the following:
- Readability: Choose clear, legible fonts for easy reading. Popular choices include Arial, Times New Roman, and Calibri.
- Professionalism: Avoid overly decorative fonts that may distract from the main content.
- Consistency: Use consistent fonts across your documents to maintain a cohesive and professional appearance.
Applying Custom Colors
Color usage can have a significant impact on the overall look of your documents. Customizing colors allows you to match your business’s branding or emphasize important sections. Here’s what to consider:
- Branding: Use your brand’s colors for headings, borders, and highlights to create a unified look.
- Contrast: Ensure good contrast between text and background colors to make the content easily readable.
- Subtle Hues: Use muted or neutral colors for most text, reserving brighter hues for highlights or call-to-action sections.
By customizing the fonts and colors of your documents, you can create professional, on-brand materials that make a lasting impression while ensuring clarity and ease of use for your clients.
Saving and Applying Your Custom Template
Once you’ve designed your document to fit your business needs, saving and applying your custom design is the next essential step. This ensures that your adjustments are preserved for future use and can be easily applied to any new documents you need to generate. By saving your custom layout, you streamline your workflow and maintain consistency across all your communications.
Saving Your Custom Design
To save your personalized layout, follow these steps:
- Access the Save Option: After completing the customization, find the option to save your design, usually under the “Save As” or “Save Template” menu.
- Choose a Name: Assign a unique and recognizable name to your design for easy identification later.
- Confirm Your Settings: Double-check your adjustments before finalizing the save to ensure everything is captured correctly.
Applying Your Custom Design
Once saved, applying your custom layout to new documents is simple. Here’s how you can do it:
- Open the Document: Start by opening the document that requires the custom format.
- Select the Saved Design: In the document editor, navigate to the option to apply a saved design, then select your custom layout from the list of available options.
- Review and Adjust: After applying, review the document to ensure all elements appear as intended. Make any final tweaks if necessary.
By saving and applying your custom design, you ensure your branding and layout preferences are always at hand, making the process of generating professional documents more efficient and consistent.
How to Preview Your Invoice Template
Previewing your layout before finalizing ensures that all your customizations look just as you expect. This step helps to identify any discrepancies, such as misaligned fields or design issues, allowing you to make necessary adjustments before the document is finalized and sent out. It’s an essential part of the process to ensure a polished, professional result.
Steps to Preview Your Design
To view your design in its final form before applying or using it, follow these steps:
- Open the Document: Begin by accessing the document or layout that you want to preview.
- Locate the Preview Option: Look for a “Preview” or “Print Preview” option in the menu or settings.
- Check the Appearance: Review the layout, ensuring that all elements–such as text fields, logos, and tables–are correctly positioned and displayed.
- Make Adjustments if Necessary: If something doesn’t look right, go back to the design editor to adjust elements until the preview matches your expectations.
What to Look for in a Preview
During the preview stage, focus on the following key areas to ensure everything is correct:
- Alignment: Ensure that text, logos, and fields are aligned properly to avoid any misplacements that could affect the document’s professionalism.
- Text Size and Readability: Verify that text is legible and appropriately sized for readability, especially for important information such as payment details or business terms.
- Design Consistency: Make sure the overall design matches your brand’s colors, fonts, and layout preferences.
By previewing your layout, you guarantee that your document is ready to impress your clients, reflecting your business’s professionalism and attention to detail.
Tips for Printing and Sending Invoices
After designing and finalizing your document, it’s crucial to ensure that it reaches your clients in the most professional and efficient way possible. Whether you choose to print physical copies or send digital versions, following best practices for distribution will help maintain a professional image and avoid delays in payment.
Printing Tips
For those who prefer to send physical copies, here are some tips to ensure the print version looks sharp and professional:
- Choose High-Quality Paper: Use thick, high-quality paper that represents your business well and ensures durability during transit.
- Ensure Proper Margins: Make sure the document has adequate margins on all sides to avoid text being cut off during printing.
- Use a Good Printer: Use a printer with high resolution for clear and crisp text and images. Inkjet or laser printers are ideal for professional-quality prints.
- Print in Color: If your layout includes logos or other graphic elements, printing in color ensures the document looks polished and professional.
Sending Tips
If you are sending your document electronically, consider the following practices for optimal delivery:
- Choose the Right File Format: Save the file in a widely accepted format, such as PDF, to ensure it can be easily opened by the recipient.
- Use Professional Email: Send the document from a business email address to ensure it appears legitimate and trustworthy.
- Include a Personal Message: In the body of your email, include a polite note reminding your client of the document and any relevant payment terms.
- Follow Up: After sending, follow up with the client to confirm receipt and clarify any questions they might have regarding the document.
By adhering to these tips, you can enhance your communication with clients, ensuring that your documents are received in a professional manner and that payments are processed promptly.
Updating and Managing Invoice Templates
Once you have designed and implemented your document format, it is important to ensure that it remains up to date with any changes to your business or client needs. Regularly maintaining and adjusting your layout helps ensure consistency, clarity, and accuracy in your financial communications.
Updating Your Document Format
Changes to your document can occur for various reasons, such as business rebranding or updates to legal requirements. Here are some key areas to focus on when updating:
- Company Details: Ensure that your business name, address, and contact information are accurate and up-to-date.
- Logo and Branding: If you undergo a rebranding or update your logo, make sure it is reflected in your documents.
- Tax Information: Update any tax rates or legal disclaimers that may change due to new tax laws or regulations.
- Payment Terms: If you change your payment policies, adjust due dates or payment methods accordingly.
Managing Multiple Formats
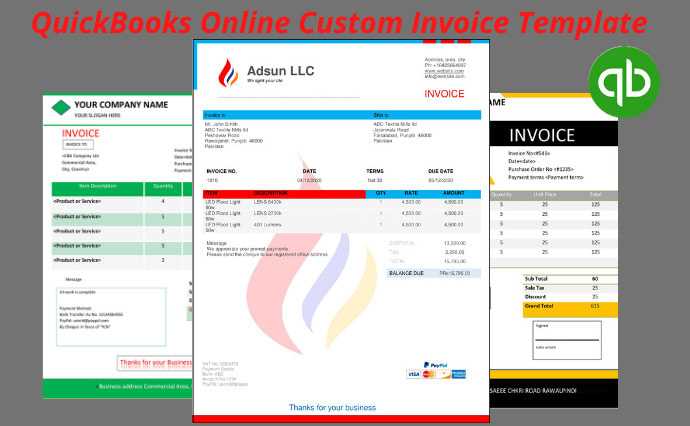
If your business offers various products or services, you may need to create different versions of your document to reflect each situation. Managing multiple layouts can streamline your process and help you stay organized:
- Create Variations: Have different formats for different client types (e.g., wholesale vs. retail) or project types.
- Store Versions: Keep a library of past versions to track changes over time, ensuring you always use the most appropriate format for each client.
- Test New Versions: Before using a new version extensively, do a test run with a few clients to ensure the changes display correctly and are easy to understand.
Maintaining and regularly reviewing your layout will ensure that all essential information is communicated clearly and that your document continues to serve both your business and your clients effectively.