How to Change the Default Invoice Template in QuickBooks
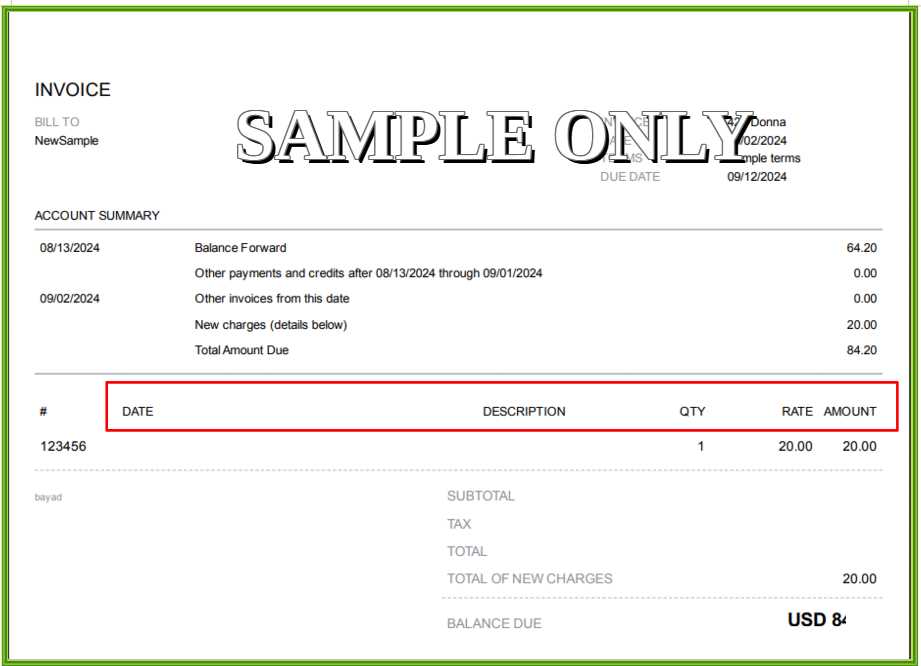
Personalizing your business’s billing documents can improve both professionalism and efficiency. By adjusting the layout, design, and content, you can ensure that every communication with your clients reflects your brand’s identity and meets specific business needs. This flexibility allows you to create a seamless experience for both you and your customers, ensuring that invoices are not only functional but also aligned with your business style.
Whether you’re looking to update the structure of your paperwork, incorporate your logo, or adjust the presentation of your charges, the process of customizing your billing forms can be done in just a few steps. Once set up, these customizations can help make your documents stand out and ensure that they are clear and professional, saving time and reducing errors.
Understanding how to modify these documents is essential for any business owner who wants to streamline their accounting process. In this guide, we’ll walk you through simple methods to enhance your billing forms and set a new standard for your business communications.
How to Customize Invoice Templates in QuickBooks
Customizing your billing documents in QuickBooks allows you to create a more personalized and professional appearance for your business. By adjusting various elements, such as fonts, colors, and layout, you can ensure that every document sent to clients reflects your brand’s identity and meets your specific needs. This process can help you maintain consistency across all communications while enhancing the customer experience.
Here’s a step-by-step guide on how to modify your business documents in QuickBooks:
| Step | Description |
|---|---|
| 1. Access the Settings | Navigate to the gear icon in the top right corner and select the “Custom Forms” option from the settings menu. |
| 2. Choose the Form to Edit | Select the document type you want to personalize, such as a billing statement or payment request. |
| 3. Open the Editor | Click the “Edit” button next to the form you’ve chosen to begin modifying the layout and design. |
| 4. Modify Layout and Design | In the editor, adjust the structure, colors, and text placement to match your business’s branding. |
| 5. Save Your Customization | Once you’re satisfied with your adjustments, click “Save” to store your new design. |
Once you have made these changes, your business documents will automatically reflect the new design for future transactions. You can also preview the modified form to ensure it meets your expectations before finalizing the adjustments.
Understanding QuickBooks Invoice Templates
In any accounting system, it’s essential to have tools that help generate clear, professional documents for clients. In QuickBooks, these documents are pre-designed but can be customized to fit specific business needs. Understanding the structure and customization options of these forms allows you to tailor them to your preferences and enhance your brand identity.
These forms typically include all the key information needed to complete a transaction, such as customer details, items sold, amounts due, and payment instructions. However, the design and layout can vary, and QuickBooks offers several options to adjust their appearance and functionality. Below, we’ll explore how these documents are structured and what features are available for customization.
Key Features of Business Documents
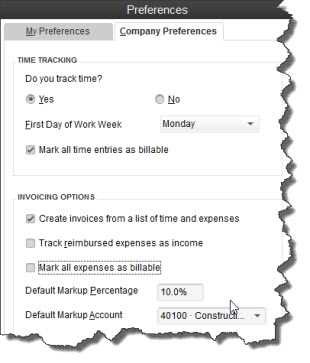
- Customer Details: Automatically populated fields with client information, such as name, address, and contact details.
- Itemized List: A breakdown of products or services sold, including descriptions, quantities, and prices.
- Amounts Due: Total amount owed, including taxes, discounts, and shipping charges.
- Payment Terms: Payment due date, methods, and late fees if applicable.
Customization Options
- Logo Insertion: Add your business logo for a more professional appearance.
- Font & Color Adjustments: Change the fonts, colors, and overall design to match your brand.
- Layout Changes: Rearrange sections to better suit your needs, such as moving the payment instructions or item descriptions.
- Additional Information: Include custom fields for any extra data you need, such as terms and conditions or a personalized message.
By understanding these key elements and how to adjust them, you can ensure your documents look professional and are aligned with your business needs. QuickBooks provides a user-friendly way to make these customizations, even if you don’t have prior design experience.
Steps to Change Default Template
Modifying the layout and appearance of your business documents is a straightforward process that can be done in just a few steps. By adjusting the document design, you can ensure that all future transactions match your desired style and meet your business requirements. Below is a simple guide to help you modify the appearance of your forms quickly and easily.
Follow these steps to adjust your document format:
| Step | Description |
|---|---|
| 1. Access Settings | Click the gear icon in the top-right corner of the screen to open the settings menu. |
| 2. Select Custom Forms | From the settings menu, navigate to the “Custom Forms” section to manage your document settings. |
| 3. Choose the Form to Edit | Select the document type that you wish to modify, such as an estimate, payment request, or statement. |
| 4. Open Editor | Click the “Edit” button next to the selected document to access the customization tools. |
| 5. Make Adjustments | Customize the layout by changing the fonts, colors, and structure according to your preferences. |
| 6. Save Your Changes | After making the necessary adjustments, save your changes to apply them to future documents. |
Once you’ve followed these steps, your modified design will be set as the standard format for all new transactions. This ensures that all future documents automatically use the updated format without the need for manual adjustments each time.
Why Change Your Invoice Template?
Customizing your billing documents can have a significant impact on both the professionalism and functionality of your business operations. By adjusting the design, layout, and content of your forms, you can improve the clarity of your communication with clients and enhance their experience when reviewing charges. This not only helps in fostering trust but can also streamline your internal processes.
Aligning with Your Brand: One of the main reasons to adjust your document layout is to align it with your company’s branding. Having a consistent design across all customer-facing materials–from contracts to invoices–helps reinforce your identity and gives your business a more polished, cohesive look.
Improving Clarity: Clear and well-organized documents ensure that customers understand the charges, terms, and payment instructions. An intuitive structure can help reduce confusion and prevent payment delays. Adjusting the order of information or highlighting key points can make a significant difference in how easily your clients interpret the details.
Efficiency and Consistency: Customizing the layout ensures that you don’t need to manually format every form you send out. Once you set up your preferred style, all future documents will follow the same design, saving time and maintaining consistency across your communications. This automation helps reduce errors and keeps everything running smoothly.
In conclusion, modifying the design of your business documents can have several benefits, from improving brand recognition to increasing customer satisfaction. By making the necessary adjustments, you not only streamline your billing process but also create a more professional appearance for your company.
Choosing the Right Invoice Style
Selecting the right design for your billing documents is crucial for ensuring clarity, professionalism, and alignment with your business needs. The style of your forms can impact how clients perceive your brand and how easily they can understand the charges. A well-chosen design not only improves the overall appearance but also helps streamline the transaction process, making it easier for both you and your customers.
Here are some important factors to consider when selecting the right style for your forms:
- Brand Identity: Your business style should be reflected in the design. Choose a layout that matches your logo, colors, and overall brand aesthetics. This consistency reinforces your professional image.
- Clarity and Simplicity: A clean, organized layout helps clients easily understand the details. Make sure the most important information, such as amounts due and payment instructions, is easy to locate.
- Functionality: Some designs may better suit your specific needs. For example, a service-based business might prioritize space for descriptions, while a retail business may require more emphasis on itemized lists and prices.
- Customer Preferences: Think about how your clients interact with the forms. If you frequently deal with large organizations, a more formal and detailed design may be appropriate. For small businesses, a simple and concise format could work better.
- Mobile Compatibility: Ensure the design looks good across all devices. More clients are accessing documents on mobile devices, so a responsive layout is important to ensure it’s readable on smaller screens.
By carefully considering these factors, you can select a design that meets both your business needs and your customers’ expectations. A thoughtful layout improves not only the appearance of your forms but also their functionality, making the entire process smoother and more professional.
Benefits of Customizing Invoice Design
Tailoring the design of your billing documents offers several advantages that can enhance both the professionalism of your business and the clarity of your communications. By adjusting the appearance and structure to meet your needs, you not only improve the presentation but also streamline the overall process for your clients. Below are some key benefits of customizing your business forms.
Improved Professional Image
A custom design ensures that your documents reflect your brand’s identity. When your business documents align with your company’s logo, colors, and overall style, it creates a cohesive and professional image. This consistency builds trust with clients and demonstrates attention to detail.
Increased Efficiency
Customizing the layout allows you to organize the information in a way that makes it easier for both you and your clients to understand. This can save time when preparing documents and reduce the likelihood of errors or misunderstandings. A clean, easy-to-read design speeds up the payment process and improves your cash flow.
| Benefit | Description |
|---|---|
| Brand Recognition | Documents that reflect your company’s branding help reinforce your identity and increase brand visibility. |
| Better Communication | A well-organized layout ensures clients can quickly identify key information, reducing confusion and preventing errors. |
| Client Satisfaction | A professional, easy-to-understand format makes it easier for customers to process and pay your bills, leading to a better overall experience. |
| Time Savings | Automating your document design eliminates the need for manual formatting, saving time on each transaction. |
Customizing your documents isn’t just about appearance; it’s also about creating a smoother, more efficient process for your business. By taking advantage of the design features available, you can improve client interactions and increase the professionalism of your operations.
How to Save Customized Templates
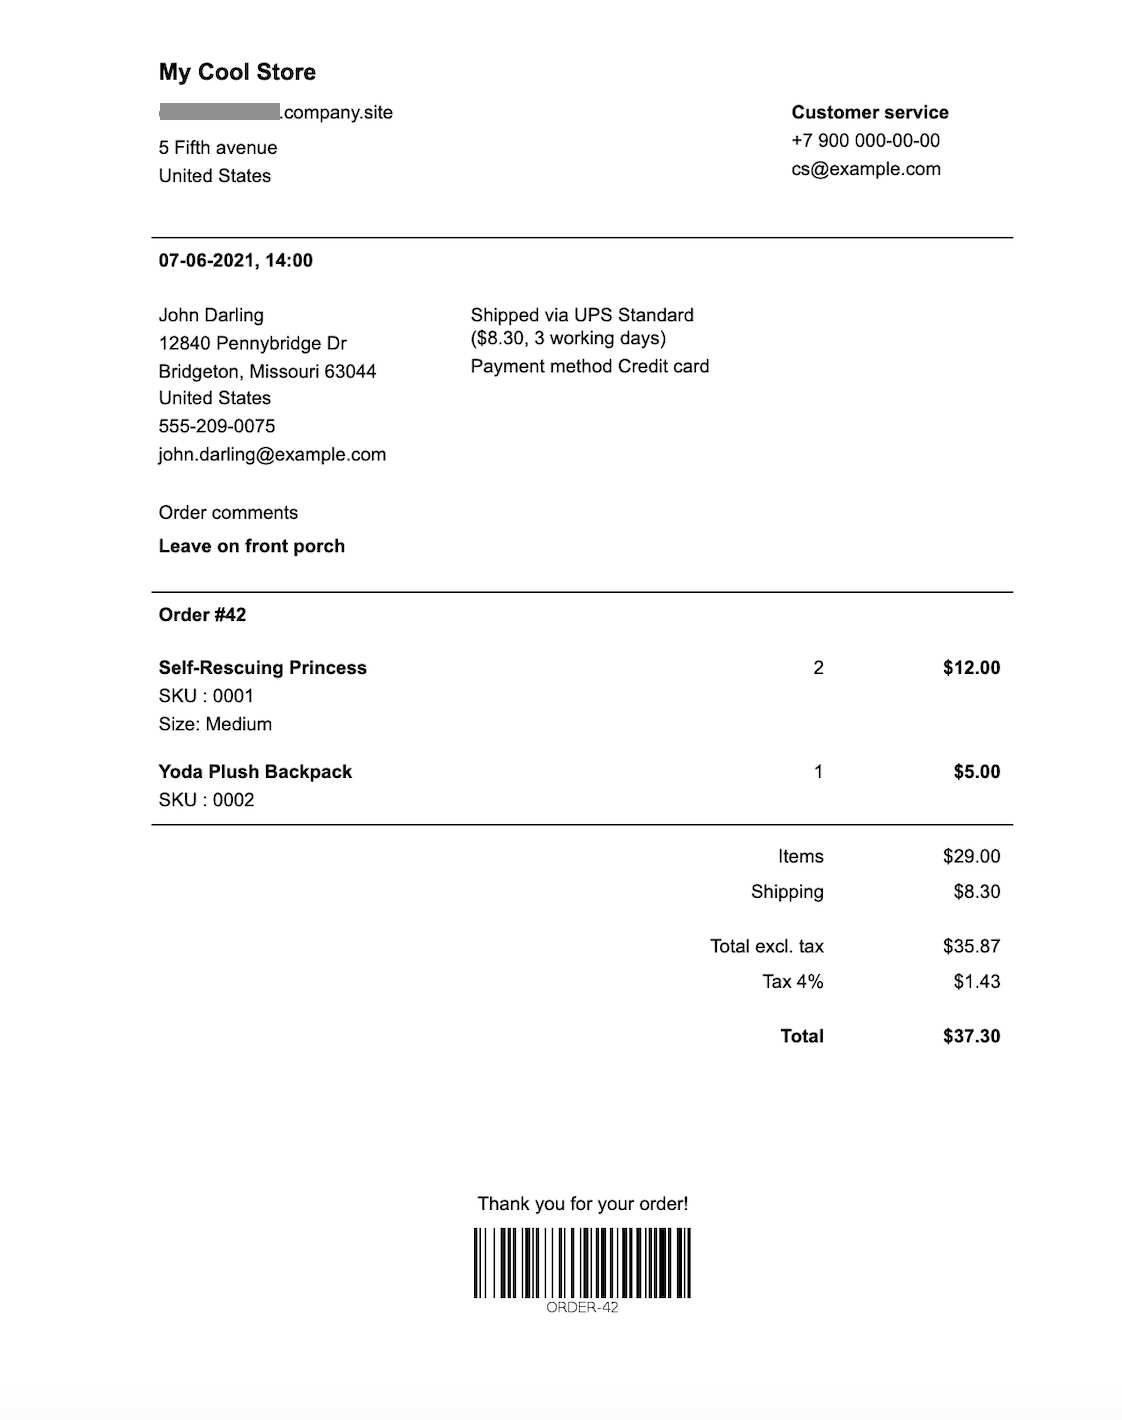
Once you’ve personalized the design and layout of your business documents, it’s important to save your changes so that you can use them again for future transactions. By saving your custom design, you ensure that each new document automatically reflects your updated format, eliminating the need for manual adjustments every time. Here’s how you can save your customized layout in just a few simple steps.
Steps to Save Your Custom Design
- Access the Editing Tool: Navigate to the settings menu and select the section where you can manage your business documents. Choose the design you’ve been working on to open the editing interface.
- Review Your Changes: Before saving, make sure all adjustments are made to your satisfaction. Double-check elements like the layout, fonts, colors, and any added fields.
- Click Save: Once you’re happy with the design, look for the “Save” button, usually located at the top or bottom of the editor. Clicking this will save your changes as the new format for future documents.
- Assign as Default: If you want this style to be used for all future transactions, ensure that the option to set it as the preferred format is selected before saving.
Managing Saved Designs
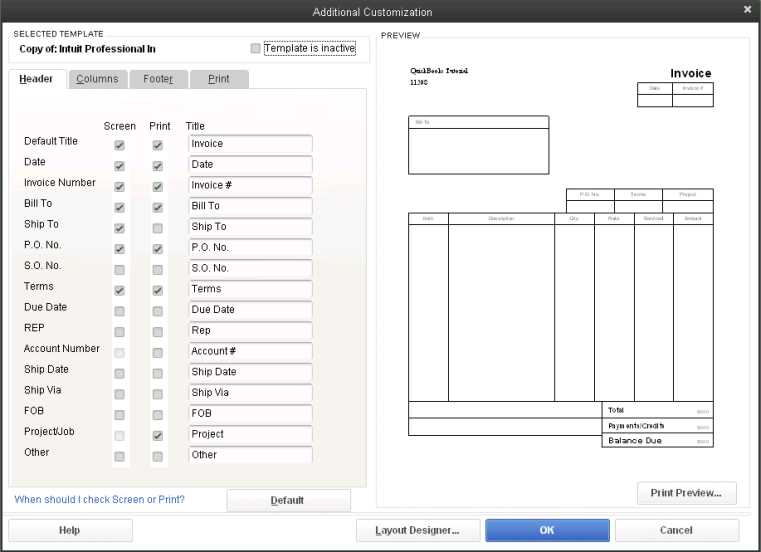
- Renaming: If needed, you can rename your customized design to make it easier to identify in the future.
- Multiple Versions: You can save multiple variations of your designs for different types of transactions (e.g., estimates, payment requests) and switch between them as needed.
- Preview: Always preview your saved design before using it for client-facing documents to ensure everything looks as expected.
By following these steps, you can save and efficiently manage your customized documents, ensuring that your business materials are always consistent and professional.
QuickBooks Invoice Template Editor Overview
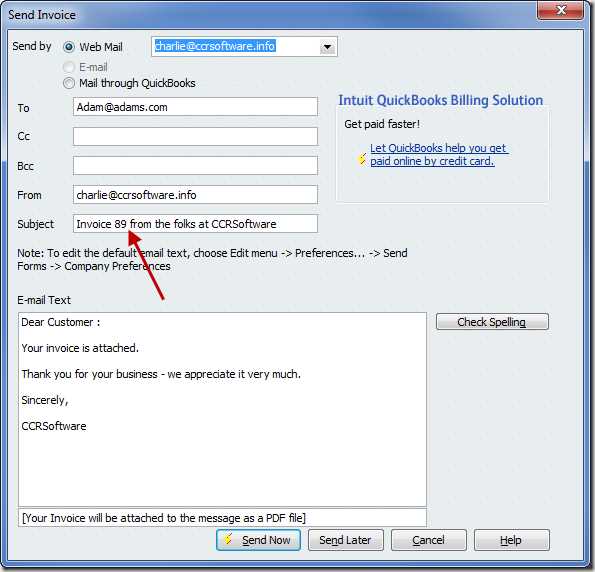
The editor tool within your accounting software allows you to modify the design and layout of the business documents you send to clients. It offers a range of customization options that help you create professional, branded forms tailored to your business needs. Whether you’re adjusting text, rearranging sections, or adding elements like your company logo, the editor makes the process easy and intuitive.
Key Features of the Editing Tool
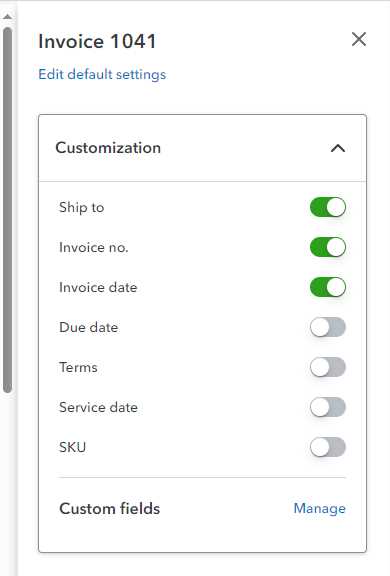
- Drag-and-Drop Interface: Easily move sections around to reorganize the layout, such as shifting customer details or item descriptions.
- Font and Color Controls: Adjust text size, font style, and color to match your business branding.
- Custom Fields: Add or remove fields to capture the specific information you need for each document, such as terms or project numbers.
- Logo Placement: Insert your company logo to enhance the document’s appearance and reinforce your brand’s identity.
- Section Visibility: Control which sections are visible on the document, allowing you to customize the amount of information displayed based on your needs.
How to Use the Editor
- Access the Editor: From the settings menu, select the section for customizing business documents and click on the design you want to modify.
- Edit the Layout: Use the available options to adjust the arrangement of various sections, such as moving the total amount to a more prominent position or highlighting payment terms.
- Apply Customization: After making adjustments, use the “Preview” function to see how the document will appear once finalized. Ensure all elements look professional and clear.
- Save Changes: Once satisfied, save the customized design, which will be automatically applied to all future documents.
Using the editing tool, you can create professional documents that are consistent with your branding and ensure that all essential information is clearly presented. This editor is designed to be intuitive, offering flexibility without requiring any technical expertise.
Advanced Customization Features in QuickBooks
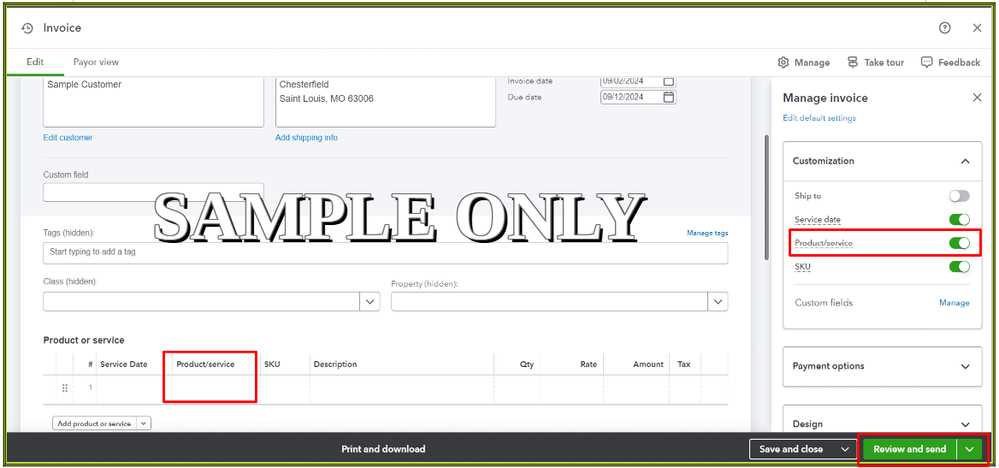
For those looking to take their business documents to the next level, there are several advanced customization options available. These features offer greater flexibility, allowing you to create highly personalized forms that suit specific business needs. Whether you’re adding custom fields, adjusting the layout to match a unique format, or integrating more complex elements, these tools provide enhanced control over your documents’ appearance and functionality.
Key Advanced Customization Features
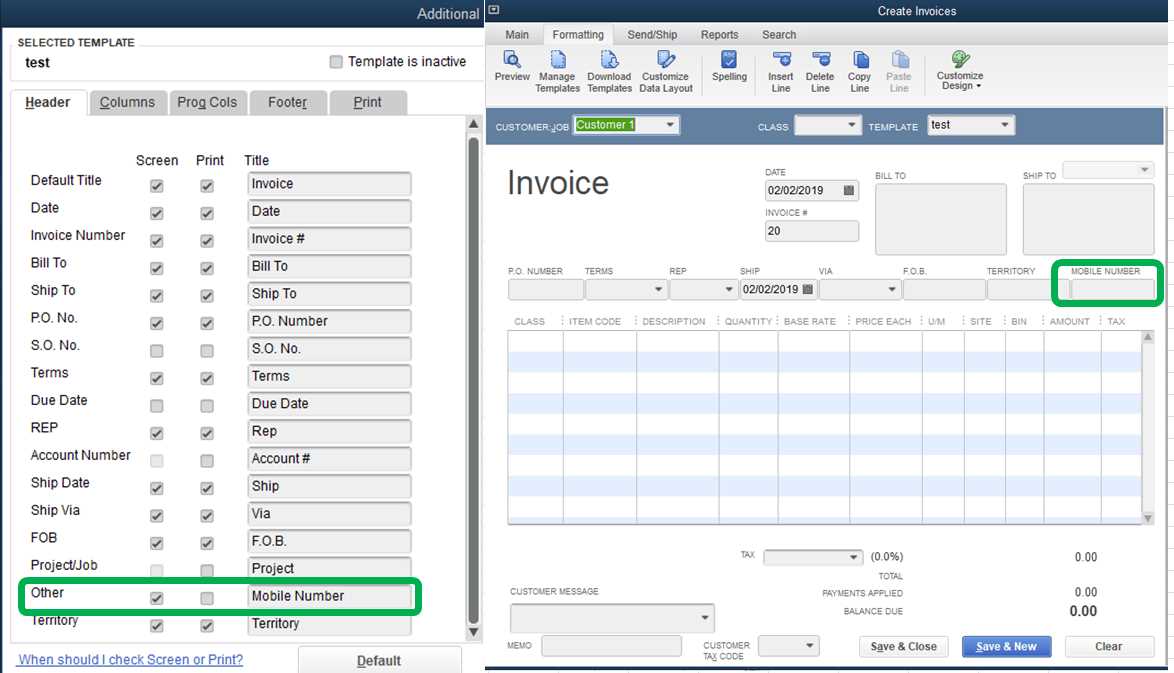
- Custom Field Creation: Add your own fields to capture unique data, such as job numbers, discounts, or specific client instructions, ensuring every document includes the information you need.
- Conditional Formatting: Apply rules that change the appearance of certain parts of the document depending on conditions, like highlighting overdue amounts or showing specific messages based on payment terms.
- Customizable Terms and Messages: Personalize payment terms, notes, or thank you messages to clients. You can also include legal disclaimers or custom tax information based on your business requirements.
- Multi-currency Support: For international businesses, customize your forms to display amounts in multiple currencies, making it easier to work with clients across borders.
- Advanced Layout Adjustments: Reorganize entire sections of the document, such as moving the customer’s contact information to a different area or changing the order in which items are listed.
How to Use Advanced Features
- Access Customization Settings: Navigate to the settings or customization section of your software and select the document type you wish to edit.
- Explore Advanced Options: In the editor, find the “Advanced” or “Custom Fields” section to unlock more options for personalization, such as adding custom fields or applying conditional rules.
- Test and Preview: After making adjustments, always use the preview option to ensure the document layout appears as intended and that all added fields and conditions work correctly.
- Save and Apply: Once you’re satisfied with the advanced customization, save your design and set it as the template for future transactions.
Thes
Adding Your Business Logo to Invoices
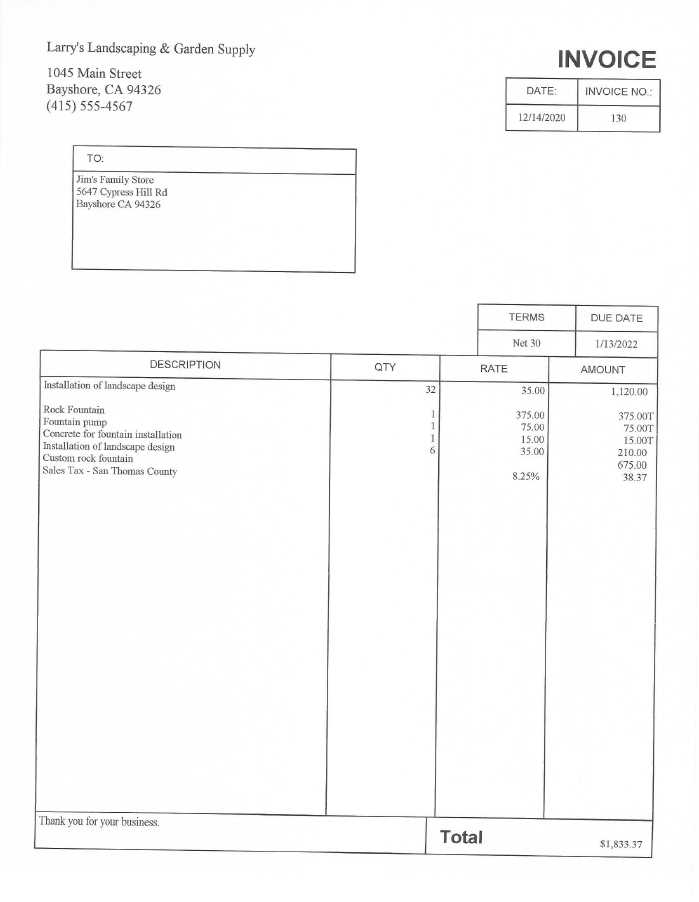
Incorporating your business logo into customer-facing documents is an essential step in establishing a professional image and reinforcing your brand identity. A logo on your business forms not only makes them visually appealing but also helps increase brand recognition. By adding your logo to each document you send, you create a cohesive and polished look that enhances the customer experience.
Steps to Add Your Logo
- Prepare the Logo: Ensure that your logo is high-quality and in an appropriate file format, such as PNG or JPEG. It’s important that the image is clear and looks professional when displayed on a document.
- Access the Customization Settings: Navigate to the settings menu and open the section where you manage document layouts and designs.
- Select the Logo Placement: Once in the customization editor, find the option to upload or insert your logo. You will typically be given options to place the logo in different areas, such as the top-left, top-center, or top-right corner.
- Upload Your Logo: Click the option to upload your logo from your computer, and select the image file you’ve prepared. Ensure that the logo fits within the allotted space without being too large or too small.
- Adjust the Size: If needed, adjust the size of the logo to make sure it’s proportional to the document and doesn’t overpower the text or other sections.
- Save Your Changes: After positioning and resizing the logo to your liking, save your custom design to apply it to all future documents.
Benefits of Adding Your Logo
- Brand Consistency: Including your logo across all customer-facing documents reinforces your brand’s identity and creates a consistent visual presence.
- Professional Appearance: A well-placed logo makes your documents appear more polished and trustworthy, which can lead to stronger client relationships.
- Enhanced Recognition: Repeated exposure to your logo on different forms helps customers remember your business and feel more connected to your brand.
By adding your logo to your documents, you create a more professional and cohesive image for your business. It’s a simple yet effective way to stand out and reinforce your brand with every communication you send.
How to Adjust Invoice Layouts
Adjusting the layout of your business forms is an essential step in ensuring that all critical information is displayed clearly and in a way that suits your needs. Whether you want to emphasize specific sections or improve the overall flow of your documents, altering the layout can make a significant difference. Customizing the arrangement of various elements like text fields, item lists, and payment terms allows you to create a more organized and visually appealing design.
Here’s how you can adjust the layout to suit your specific requirements:
Steps to Adjust the Layout
- Access the Layout Settings: Navigate to the section of your software where you can modify the design of your business documents.
- Choose the Section to Edit: Select the section of the document you wish to adjust. This could include the header, item description area, or the footer where payment terms are listed.
- Reorganize Elements: Drag and drop the sections to new positions within the document. For example, you might want to place customer information at the top or move the total amount to a more prominent position for better visibility.
- Adjust Field Sizes: Resize certain fields to accommodate additional text or make the document look more balanced. For instance, you can increase the space for item descriptions or make the payment details larger and easier to read.
- Preview and Save: Once you’ve made the changes, use the preview option to see how the layout looks before finalizing it. After confirming everything is in place, save the layout for future use.
Benefits of Layout Adjustments
| Benefit | Description |
|---|---|
| Improved Organization | Reorganizing sections ensures that the most important information is easily accessible and reduces clutter. |
| Enhanced Readability | A well-structured layout helps clients quickly understand the details, leading to fewer misunderstandings. |
| Better Visual Appeal | Adjusting the design elements creates a cleaner, more professional appearance, which enhances your brand image. |
| Increased Efficiency | By tailoring the layout, you create a format that works best for your business, making it easier and faster to prepare documents. |
By adjusting the layout of your documents, you ensure they are tailored to your business’s specific needs while improving both functionality and aesthetics. This simple yet impactful adjustment can streamline your workflow and make your documents
Previewing Your Custom Invoice Template
Before finalizing any design changes, it’s crucial to preview your custom business documents to ensure that everything looks as expected. A preview allows you to see how the layout will appear once sent to clients, giving you a chance to catch any errors or formatting issues. This step ensures that your document is both professional and clear, with all the necessary details in the right places.
By previewing your custom design, you can make sure that the arrangement, fonts, and any added elements like logos or text fields are correctly positioned and formatted. It also helps verify that the document’s content, such as item descriptions or payment terms, fits within the designated areas and is easy to read.
Here’s how you can preview your customized business documents:
- Access the Document Settings: Navigate to the section where you’ve made your design changes and select the option to preview your document.
- View the Document Layout: Once in the preview mode, review the entire layout, checking the placement of all sections like customer details, item descriptions, and totals.
- Check for Errors: Look for any alignment issues, font inconsistencies, or text that doesn’t fit properly within the fields. Ensure that all the necessary details are visible and easy to understand.
- Test with Sample Data: Some preview tools allow you to enter sample data to see how the document will look with actual content. Use this feature to get a real-world sense of how it will appear to clients.
- Make Adjustments if Needed: If you spot any issues during the preview, return to the editing mode to make the necessary changes. Once you’re satisfied, save the updated version.
Previewing your customized document helps ensure that the final product is professional and error-free. It’s an essential step in confirming that your forms reflect your brand accurately and communicate all important information clearly to your clients.
Setting a New Default Invoice Format
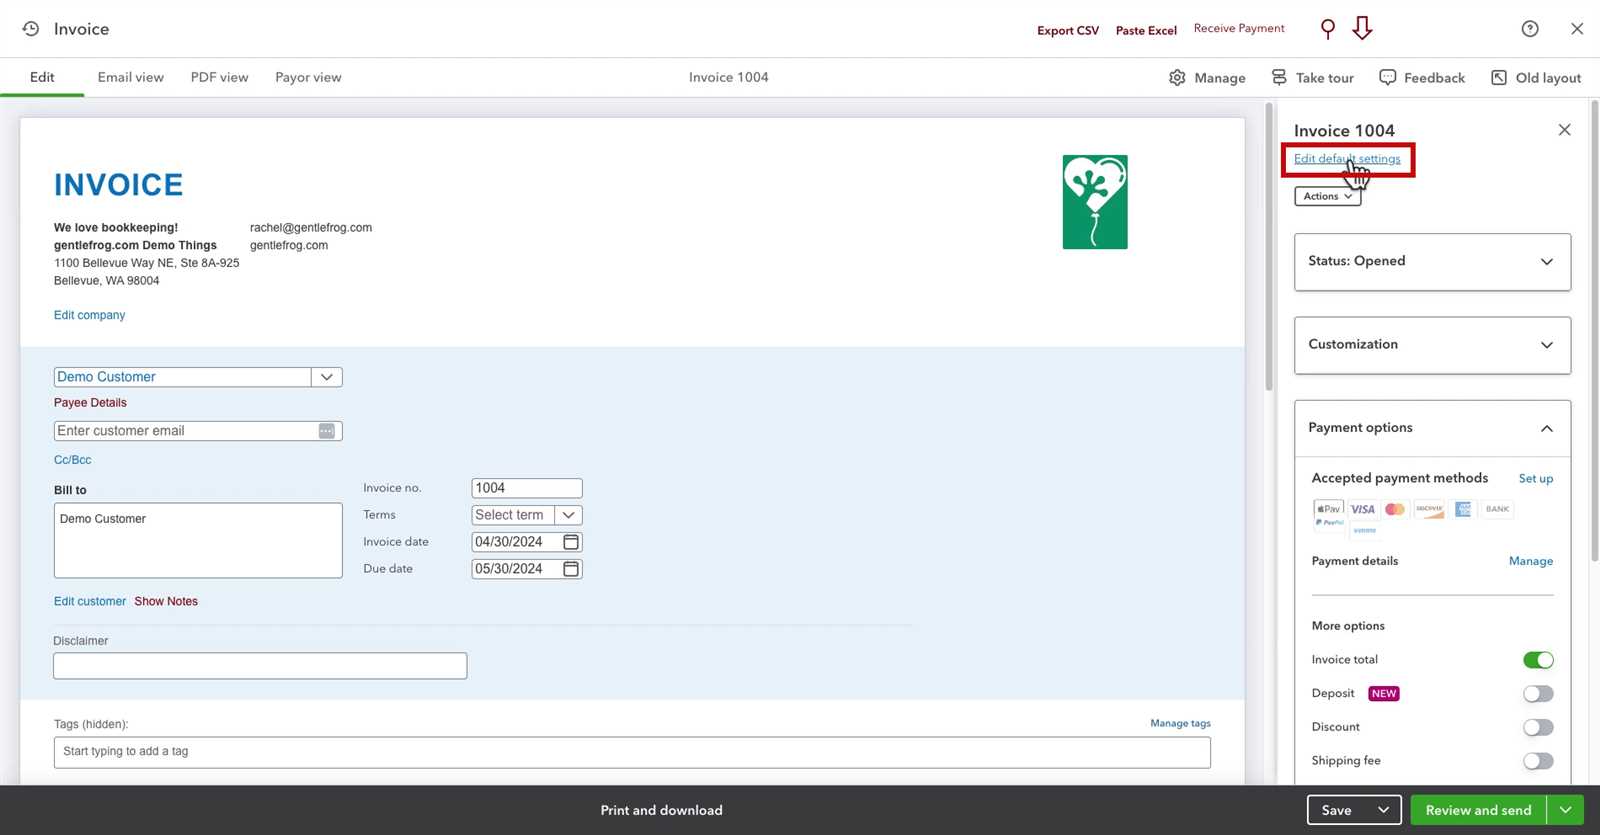
Once you’ve created a custom design for your business documents, it’s important to set it as the preferred format for all future transactions. This step ensures that every document generated automatically reflects your updated style, saving you time and ensuring consistency across all communications. By setting a new format, you streamline the process of generating professional forms without needing to adjust the design each time.
Here’s how you can make your newly customized design the standard for all future transactions:
Steps to Set a New Format
- Access the Customization Settings: Go to the section of your software where you manage document designs and formats.
- Select the New Design: Choose the format you’ve customized from the list of available options. Make sure it’s the one you want to use moving forward.
- Set as Preferred Format: Look for an option like “Set as default” or “Use for future transactions.” Selecting this will ensure that all new documents will automatically adopt your chosen design.
- Save Changes: After selecting the new format, save the changes to apply it across your system. The new design will now be used for all upcoming client communications.
Things to Keep in Mind
- Multiple Formats: If you work with various types of documents, you can set different formats for different transaction types. For instance, you might have one format for estimates and another for payment requests.
- Preview Before Finalizing: Always preview your document after setting the new design to ensure it looks as expected and that all sections are properly aligned.
- Customization Flexibility: You can always revisit the design and make additional adjustments later. Setting a new format doesn’t lock you into a permanent choice–you can change it whenever needed.
By setting a new standard format, you simplify the process of generating documents and maintain consistency, ensuring that every communication you send reflects your brand and professionalism.
Managing Multiple Invoice Templates
Running a business often requires different types of documents for various purposes. Whether it’s for estimates, payment requests, or receipts, having the ability to create and manage several formats for your transactions can save time and increase efficiency. Instead of relying on a single format, you can tailor each design to suit the specific needs of different types of communication with clients.
Managing multiple formats allows you to switch between different designs depending on the situation, ensuring that each document type is formatted appropriately. It also provides flexibility, enabling you to customize each format to match specific customer requirements or business processes.
Steps to Manage Multiple Formats
- Create Various Formats: Start by creating several document layouts tailored to different purposes–such as a formal payment request or a simple sales receipt.
- Label Each Format: Make sure each format is clearly labeled so that you can easily distinguish between them. You can use names that describe the purpose, like “Estimate,” “Payment Request,” or “Receipt.”
- Access the Format Management Section: Go to the section of your software where you can view and edit your saved designs. Here, you’ll be able to manage and switch between different formats.
- Apply Specific Formats: When generating a document, choose the format that best suits the situation. For example, if you’re sending an estimate, select the “Estimate” design, or for a formal request, select the “Payment Request” format.
- Edit When Necessary: If any of the formats need updating, return to the editor to make changes and save the updated version for future use.
Benefits of Managing Multiple Designs
- Increased Flexibility: Tailor each document to its specific purpose, ensuring that each one meets the needs of your clients or business processes.
- Improved Efficiency: Quickly switch between different formats without having to manually adjust each document, saving you time and effort.
- Professional Appearance: Different document types often require different layouts. Managing multiple designs allows you to ensure that each type looks polished and professional, fitting its context perfectly.
By effectively managing multiple formats, you can streamline your workflow, ensure consistent branding, and provide a more professional experience for your clients. With the flexibility to choose the right design for each situation, you’ll be able to create documents that truly reflect your business’s ne
Fixing Issues with Default Template
Sometimes, the layout or design of your business documents may not appear as expected, causing issues with readability, alignment, or missing information. These problems can be frustrating, especially when you rely on these documents for professional communication. Fortunately, most issues related to document formats can be easily fixed with a few adjustments to the settings or the design itself.
Whether it’s incorrect positioning of fields, text overlapping, or formatting errors, there are several steps you can take to troubleshoot and resolve these issues. By carefully reviewing and tweaking the settings, you can restore your documents to their intended look and functionality.
Common Issues and How to Fix Them
- Misaligned Fields: If certain sections, such as customer details or totals, are not aligning correctly, check the layout settings. Adjust the positioning of each field to ensure proper alignment and readability.
- Missing Information: Sometimes certain fields, like item descriptions or payment terms, may not display correctly. Ensure that the fields are properly mapped to their respective data sources, and verify that all necessary information is being populated.
- Overlapping Text: If text is overflowing into adjacent areas, adjust the text box size or font size. Reduce the font size or expand the text area to accommodate longer descriptions or terms.
- Incorrect Logo or Image Placement: If your logo or other images appear out of place, revisit the image settings. Reposition the image or adjust its size to ensure it fits within the allocated space without distorting the overall layout.
- Inconsistent Formatting: If the document looks inconsistent in terms of font style, size, or color, revisit the style settings. Ensure that fonts and colors are uniform throughout the document to maintain a professional appearance.
Steps to Resolve Layout Issues
- Review the Design Settings: Start by accessing the section where you manage document layouts. Carefully review each area of the document for any inconsistencies or misalignments.
- Use the Preview Option: Always preview your document after making adjustments to see how the changes look in real-time. This will help you catch any errors before finalizing the format.
- Save and Apply Changes: Once y
Best Practices for Professional Invoices
Creating professional-looking documents is essential for maintaining a positive image with clients and ensuring smooth financial transactions. The way you present your business documents can have a significant impact on how your clients perceive your business and your level of professionalism. Whether you’re sending a payment request, estimate, or receipt, adhering to best practices ensures clarity, reduces the chances of disputes, and reflects your brand’s quality.
To create polished and effective documents, it’s important to focus on key elements such as layout, readability, and consistency. By following these best practices, you can ensure that your documents not only look professional but also deliver the necessary information in a clear and organized manner.
Key Elements of a Professional Document
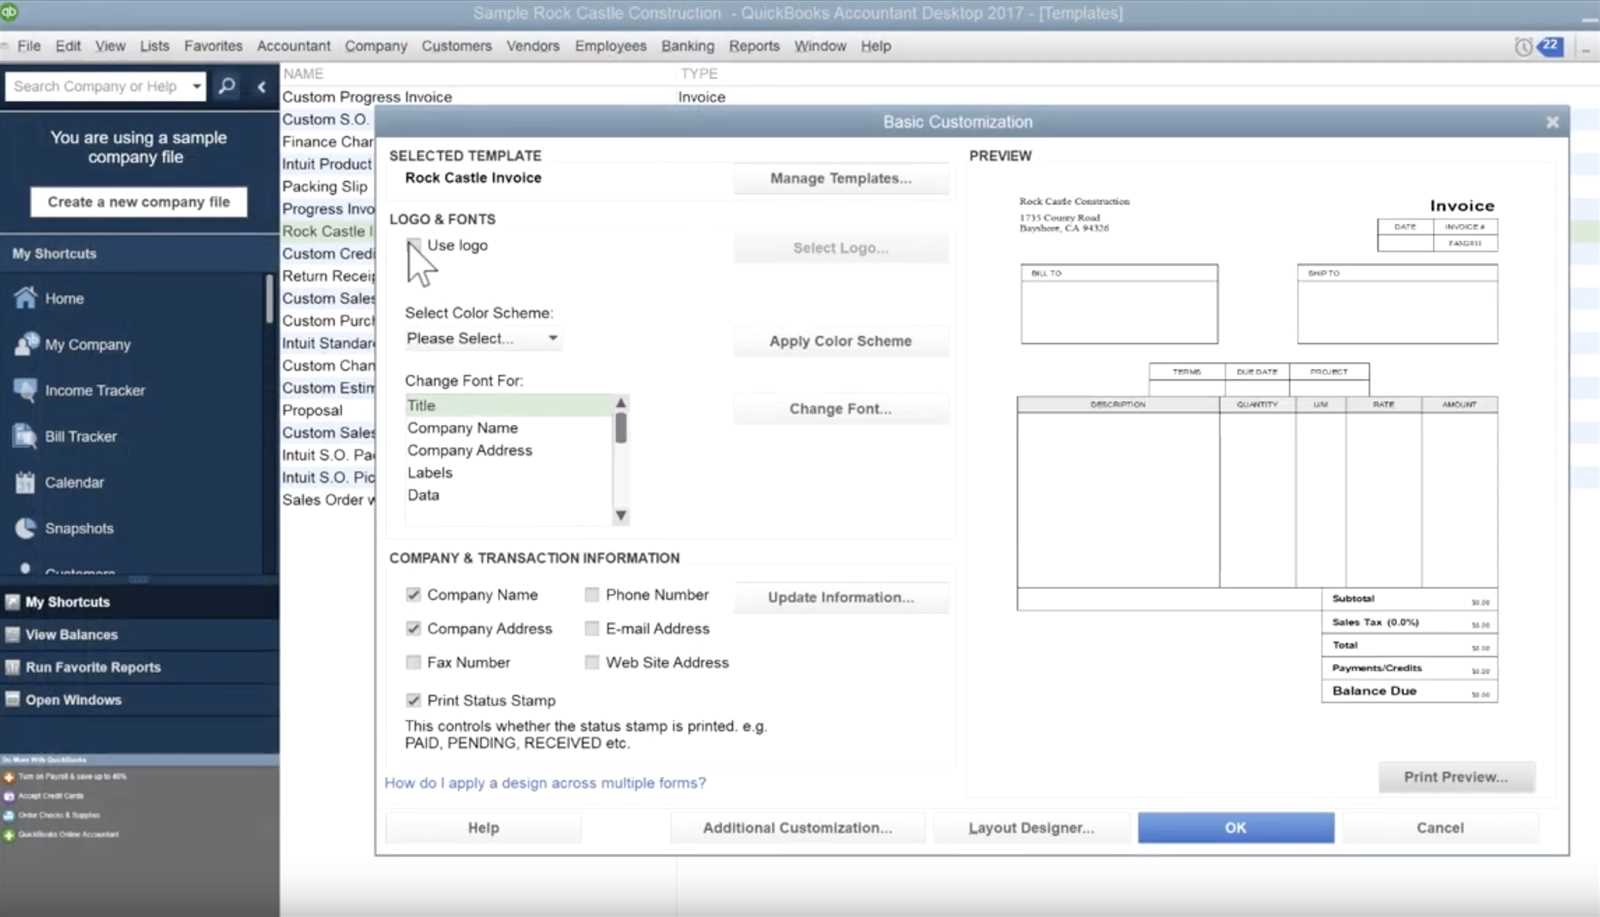
- Clear and Concise Information: Ensure that all the key details are easy to read and understand. Include your business name, client’s name, payment terms, and any relevant item descriptions without overloading the document with unnecessary information.
- Consistent Branding: Incorporate your company’s logo, color scheme, and font choices to maintain a consistent brand identity. This helps reinforce your business’s professionalism and recognition.
- Readable Layout: The document should be well-organized, with distinct sections for client information, services provided, and payment details. Avoid clutter and make sure there’s enough white space for easy reading.
- Clear Payment Terms: Always state the payment due date, late fees, and acceptable payment methods. This helps set clear expectations with your clients and avoids confusion later on.
Additional Tips for Professional Documents
- Use High-Quality Fonts: Choose a clean and professional font that is easy to read. Avoid using too many different fonts or overly decorative ones that may appear unprofessional.
- Maintain Accurate Calculations: Ensure that all figures are correct and that taxes, discounts, or any other adjustments are clearly explained. Double-check your math to avoid any errors that could lead to client confusion.
- Include Contact Information: Make sure your business’s contact details are visible, including email, phone number, and website. This makes it easier for clients to get in touch if they have questions.
By following these guidelines, you can create documents that not only look professional but also foster trust and clarity between you and your clients. A well-designed document serves as a reflection of your business and helps you maintain a high level of professionalism in all your client interactions.
Tips for Consistent Branding in QuickBooks
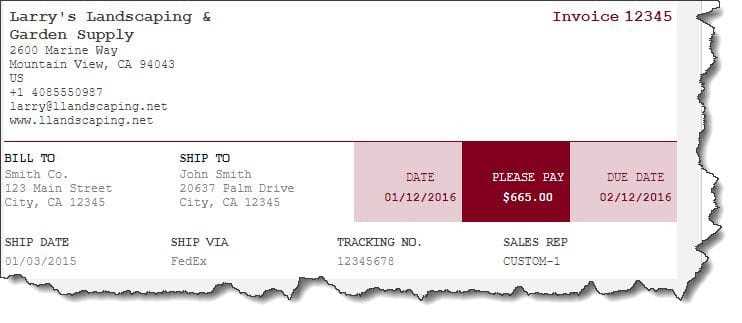
Establishing a strong, consistent brand identity is crucial for any business, and one of the key areas where this can be achieved is in your financial documents. Every interaction with a client, whether it’s through payment requests, receipts, or estimates, is an opportunity to reinforce your company’s brand. A consistent design across all documents helps build trust and recognition, making your business appear more professional and reliable.
Incorporating branding elements such as logos, colors, and fonts into your business documents not only makes them visually appealing but also communicates your company’s values and identity. To ensure that your branding remains consistent, it’s important to set up and maintain these elements across all documents in a way that is cohesive and recognizable.
Key Branding Elements to Focus On
- Logo Placement: Your company logo should be prominently displayed at the top of every document. This helps clients quickly recognize your business and creates a professional appearance.
- Color Scheme: Use your brand’s colors consistently throughout the document. Ensure that your color palette is applied to headings, borders, and any other design elements to create a cohesive look.
- Typography: Choose fonts that match your brand’s style. Consistent font usage across documents ensures a professional and unified visual identity. Avoid using too many different fonts, which can distract from your branding.
- Company Information: Make sure your business name, contact details, and website address are clearly visible. This reinforces your brand and ensures that clients can easily reach you when needed.
Practical Steps to Ensure Consistency
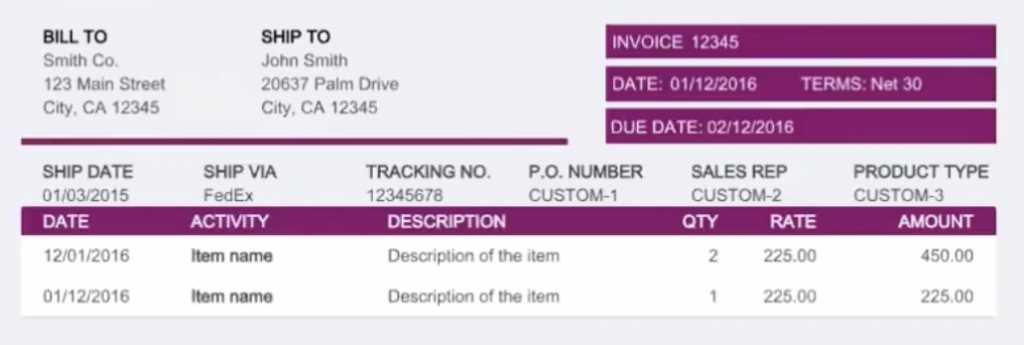
- Set Up Custom Design Templates: Create a custom layout that includes your branding elements. Once created, apply this layout to all your business documents to ensure consistency.
- Review Document Formatting: Regularly check that your business documents are in line with your branding guidelines. Look for any elements that may have changed over time and make necessary adjustments.
- Use a Brand Style Guide: Develop a style guide that outlines your brand’s fonts, colors, logos, and other visual elements. This guide can help ensure that anyone creating or editing business documents follows the same standards.
- Preview Before Sending: Always preview documents before sending them to clients. This ensures that all your branding elements are in place and that the final product looks polished.
By focusing on these elements, you can ensure that all your business documents present a consistent, professional image to your clients. Consistent branding builds credibility and reinforces y