How to Create an Invoice Template in QuickBooks Desktop
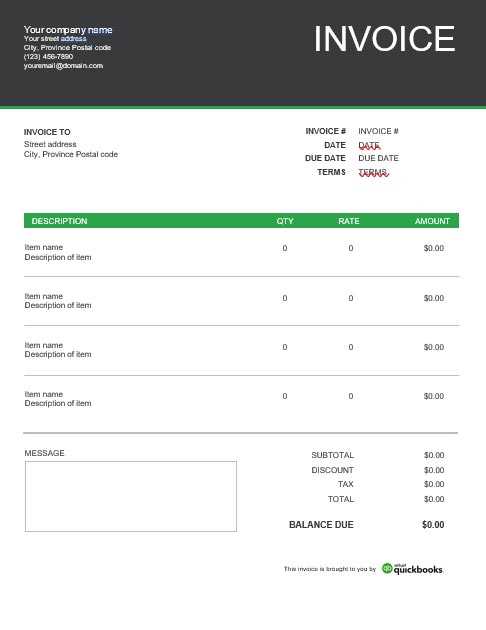
In today’s fast-paced business world, having a streamlined method for generating accurate and professional-looking bills is essential. Customizing your billing documents allows you to present your business in a polished manner while ensuring that all necessary information is clearly displayed. This process not only improves the client experience but also simplifies the management of financial records.
With the right tools, you can easily adjust the layout, style, and content of your documents to fit your business needs. By making these adjustments, you’ll be able to save time and avoid repetitive tasks. Whether you’re working with customers or handling internal reporting, mastering this aspect of your workflow is crucial for maintaining efficiency and professionalism in all transactions.
How to Set Up QuickBooks Desktop
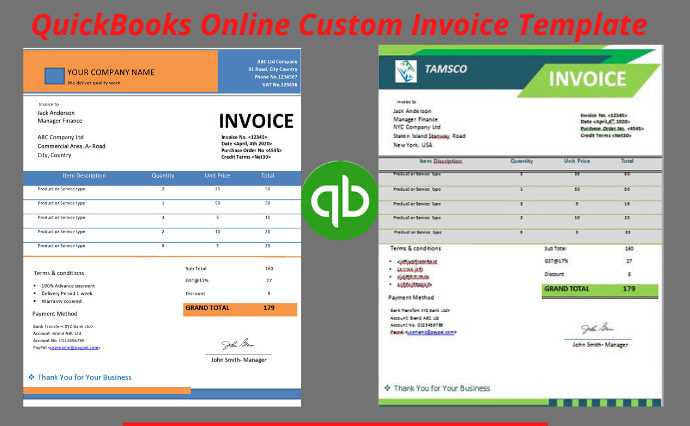
Getting your accounting software ready for use is the first step toward streamlining your financial management tasks. Proper configuration ensures that you can efficiently track and manage all aspects of your business’s financial transactions, from payments to reports. In this section, we’ll guide you through the setup process to make sure you can get started with ease.
Step-by-Step Setup Guide
Before diving into any advanced functions, it’s important to first configure the core settings of your software. Follow these steps to complete the initial setup:
- Download and install the software on your system.
- Open the program and select your business type to get personalized recommendations.
- Enter your company details such as name, address, and contact information.
- Set up your fiscal year, including tax settings and preferred currency.
Configuring Basic Preferences
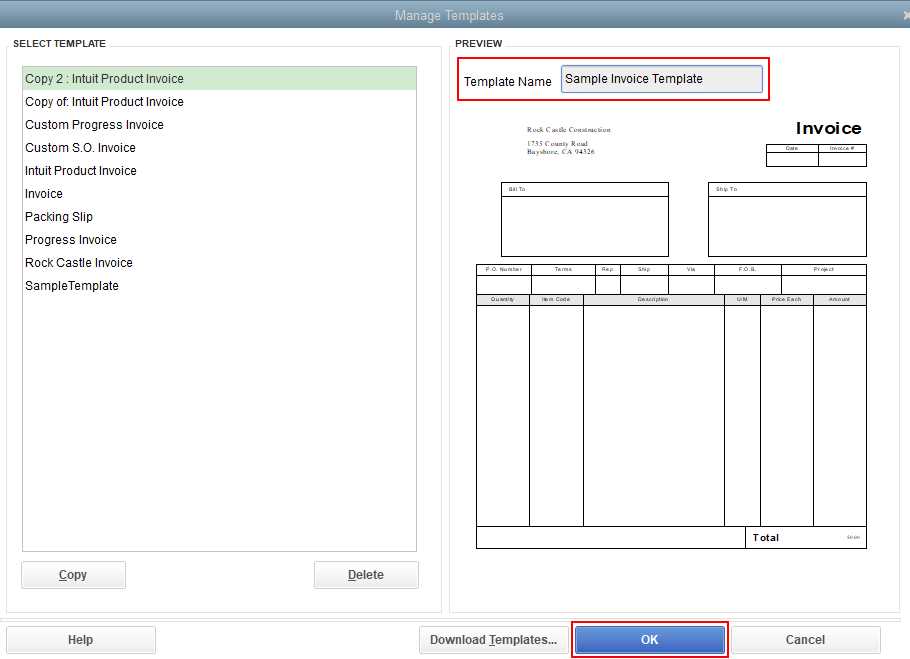
After the initial installation, adjust preferences to tailor the software to your workflow. These adjustments will allow you to personalize your experience and optimize how information is processed.
- Choose your preferred method of reporting (e.g., cash or accrual basis).
- Set up your chart of accounts to track income, expenses, assets, and liabilities.
- Define user roles if multiple team members need access, specifying permissions for each user.
By completing these steps, you’ll have a strong foundation for managing your financial data efficiently and accurately. Once your basic setup is done, you can move on to more advanced features to automate and customize your workflows further.
Understanding Invoice Templates in QuickBooks
Customizing your billing documents allows you to maintain consistency across all transactions while reflecting your brand’s identity. The software offers various ways to adjust the appearance and structure of your financial forms, ensuring they meet your business needs. In this section, we’ll explore how these customization features can help you streamline your billing process and present a professional image to your clients.
How Custom Forms Work
The system provides several pre-designed formats that can be adapted to suit your preferences. These forms allow you to specify the layout, colors, fonts, and the type of information displayed. By adjusting these elements, you ensure that each document aligns with your company’s standards and provides all necessary details in a clear and professional manner.
- Modify field placements for better readability.
- Add or remove specific information, such as customer notes or payment terms.
- Include custom branding elements, like logos and business contact details.
Why Customization Matters
Tailoring your financial documents is crucial for ensuring clarity and professionalism. Customizing the design helps your clients easily understand the billing details and fosters trust in your business operations. Moreover, personalized forms reduce the risk of mistakes and ensure that all required fields are consistently included.
- Enhances the customer experience with clear, branded documents.
- Ensures consistency in all forms generated across transactions.
- Improves tracking and organizing with easy-to-read formats.
By mastering the customization options available, you ensure that your financial documents reflect your business style while maintaining a high level of accuracy and professionalism.
Benefits of Customizing Invoice Templates
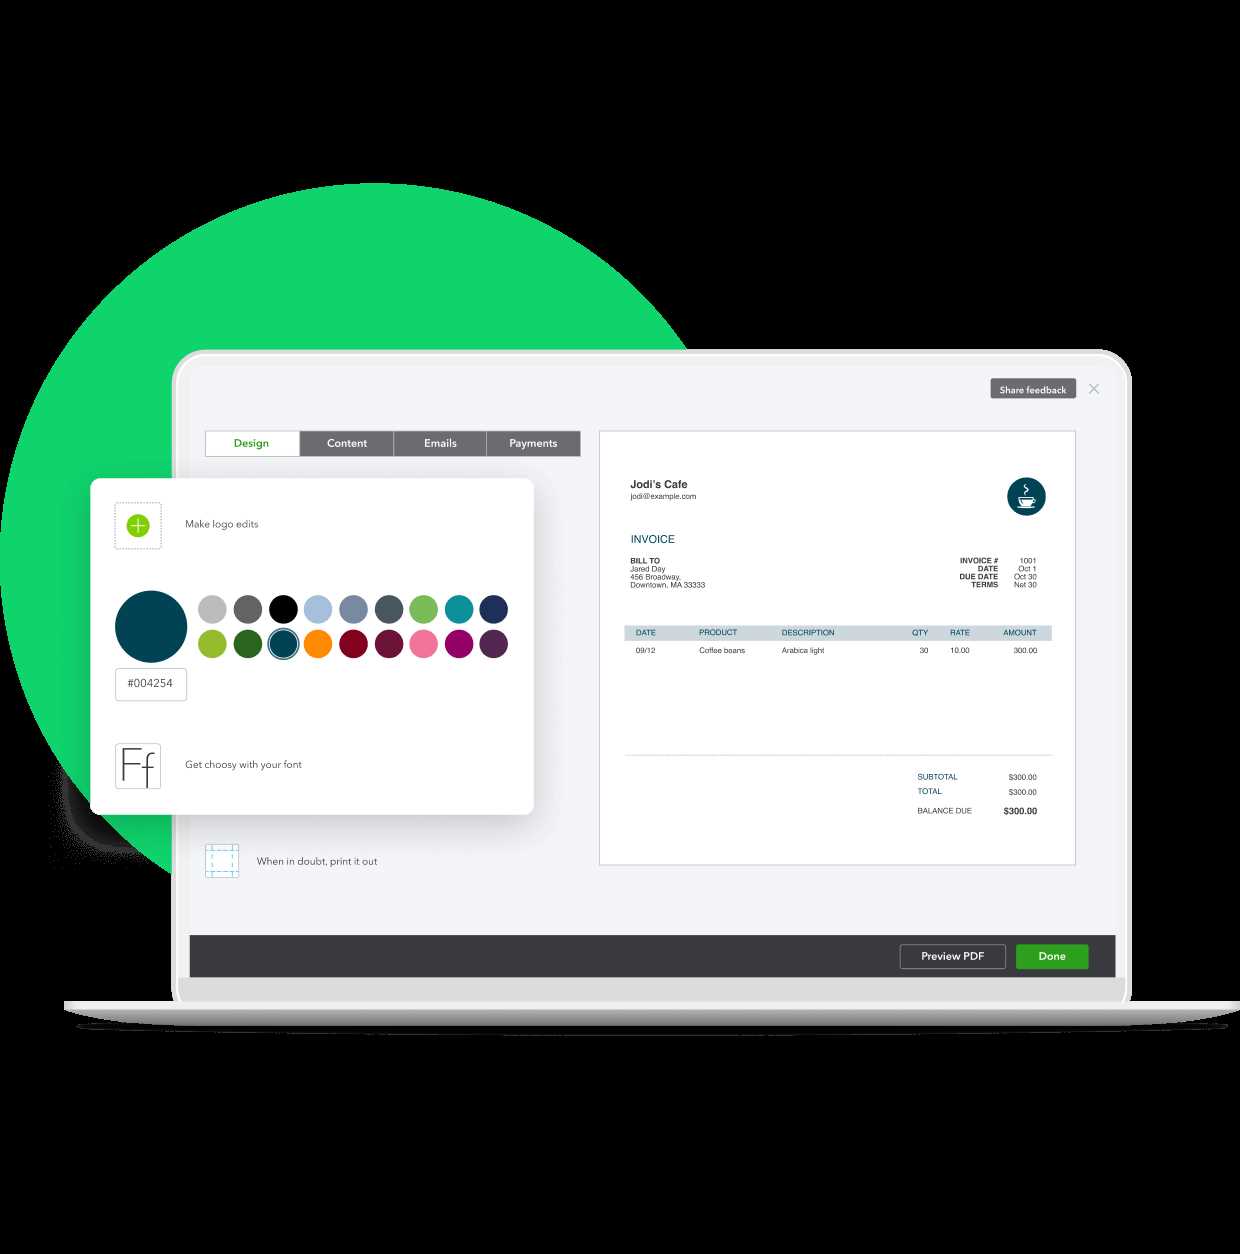
Personalizing your billing documents not only enhances the appearance but also offers practical advantages that can help improve overall business operations. By adapting the layout and content to fit your specific needs, you can ensure that each document is not only visually appealing but also functional, efficient, and aligned with your business goals. The ability to customize can lead to better organization, more accurate records, and stronger client relationships.
Enhancing Professionalism and Branding
When you customize your financial documents, you have the opportunity to reflect your brand’s identity. Incorporating your company logo, color scheme, and fonts creates a cohesive look across all client-facing materials. This attention to detail helps reinforce professionalism and builds trust with clients.
- Strengthens brand recognition with consistent design elements.
- Projects a more polished, professional image to customers.
- Helps differentiate your business from competitors.
Improved Efficiency and Accuracy
Customizing your forms allows you to streamline your workflow and reduce the likelihood of errors. You can pre-fill specific fields, such as payment terms or discounts, saving time on each transaction. Additionally, this ensures that all necessary information is included and clearly presented, helping both you and your clients avoid confusion.
- Speeds up the billing process by eliminating repetitive tasks.
- Reduces the risk of missing or incorrect information.
- Improves organization by maintaining a consistent layout.
In summary, tailoring your billing documents can significantly improve both your internal processes and your customer relationships. The ability to customize not only enhances the clarity and efficiency of your records but also reinforces your brand’s professionalism.
Getting Started with QuickBooks Desktop
To begin using accounting software effectively, it’s essential to understand the initial setup and configuration. This initial phase helps lay the groundwork for managing finances, organizing transactions, and automating key business processes. Properly setting up your system ensures that all features are tailored to your business needs and will save you time in the long run.
Installation and Initial Setup
First, you’ll need to install the software on your computer. This process is straightforward and guides you through the necessary steps. Once installed, you can begin by entering company details and setting up your preferred configurations. This includes defining your fiscal year, tax settings, and other core information specific to your business.
- Download the software from the official website.
- Follow the prompts to install it on your computer.
- Enter basic company details like name, address, and contact information.
- Set your accounting preferences, such as tax rates and currency.
Setting Up Your Business Profile
After installation, it’s time to define your business structure within the software. This includes setting up your chart of accounts, choosing reporting methods, and entering your initial balances. These steps will allow the system to generate accurate financial reports and track all income, expenses, and liabilities accordingly.
- Set up a chart of accounts to organize your financial records.
- Choose your accounting method (cash or accrual basis).
- Enter initial balances for a seamless transition into the new system.
In summary, getting started with the software requires careful attention to detail. By following the setup process step-by-step, you’ll ensure that your system is optimized for your business and ready to handle all your accounting needs.
Choosing the Right Invoice Layout
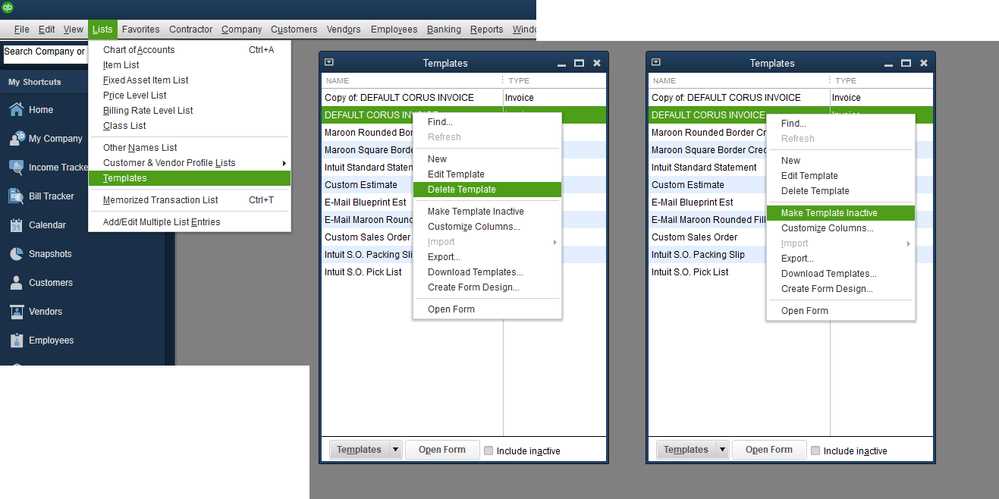
When preparing billing documents, selecting an appropriate layout is crucial for ensuring clarity and efficiency. The layout not only impacts the visual appeal of the document but also plays a role in how easily the recipient can read and understand the information. A well-structured format can streamline the payment process and reduce the chances of confusion or errors.
Factors to Consider When Choosing a Layout
Several factors should influence your choice of design when organizing your financial documents. These include the complexity of your transactions, your branding preferences, and the amount of information you need to display. It’s important to strike a balance between professionalism and simplicity, ensuring that key details are easy to locate while maintaining a clean, organized appearance.
- Consider the type of business you operate and what information needs to be highlighted.
- Ensure that all essential fields (e.g., amounts, dates, descriptions) are clearly marked.
- Choose a layout that aligns with your brand’s image for consistency.
Pre-designed Layouts vs Customization
While the software offers a variety of pre-designed formats, sometimes customization is necessary to meet specific business needs. If your operations require unique fields, such as project names or custom payment terms, adjusting the format can provide the flexibility needed. On the other hand, using a pre-built design is faster and often sufficient for businesses with standard requirements.
- Pre-designed layouts are ideal for businesses with straightforward billing needs.
- Customizing the format is best for businesses that require a personalized structure or additional fields.
In conclusion, choosing the right layout is an essential step in ensuring your billing documents are effective, professional, and easy to understand. Consider your business needs and the preferences of your clients to make the best decision for your workflow.
Steps to Design a New Billing Document
Designing a new financial form is a straightforward process that allows you to customize the layout and content to match your business’s specific needs. This process helps ensure that each document is tailored for clarity, efficiency, and professionalism. The following steps will guide you through the procedure to set up a new format that suits your company’s workflow and style.
Starting the Design Process
To begin, you’ll need to access the section of the software where you can manage document layouts. From there, you can either select an existing format to modify or choose the option to start from scratch. Once you decide on the base structure, you’ll be able to customize it with the necessary fields and details required for your business.
- Navigate to the section for document design or management.
- Select the option to add a new layout or modify an existing one.
- Choose a base design that matches your preferences or begin with a blank layout.
Customizing the Document Fields
Once you’ve selected a starting point, it’s time to tailor the fields and sections that will appear on your form. You can adjust the positioning of text, add or remove specific fields, and change fonts or colors to match your branding. Make sure to include essential elements such as item descriptions, totals, payment terms, and any other details your clients need to know.
- Adjust the placement of key fields such as customer name, product details, and amounts.
- Add custom fields if needed, such as discounts, taxes, or special instructions.
- Ensure that your branding elements, such as logos and contact information, are clearly visible.
In summary, the process of designing a new billing form involves selecting a base layout, customizing the necessary fields, and ensuring the final design meets your business requirements. By following these steps, you can produce a professional and efficient document that aligns with your company’s needs.
Customizing Invoice Fields and Information
Tailoring the fields and content on your billing documents is essential for ensuring that all necessary information is included and presented clearly. Customization allows you to highlight specific details relevant to your business or clients, ensuring that each document meets your unique requirements. From adjusting field names to adding or removing specific sections, these changes help improve both readability and functionality.
Choosing the Right Fields to Display
Different businesses have varying needs when it comes to the information included in billing documents. The software offers flexibility, allowing you to choose which fields appear, such as descriptions, quantities, prices, and more. By selecting the most relevant fields, you ensure that the document communicates all essential details while maintaining a clean and organized layout.
| Field | Description |
|---|---|
| Customer Information | Name, address, and contact details of the client. |
| Product or Service Description | Details of the items or services being billed. |
| Quantity and Price | The number of units and the rate for each product or service. |
| Total Amount | The final amount due, including taxes or discounts. |
| Payment Terms | Any special terms related to payment deadlines or conditions. |
Adding Custom Fields
For businesses that require additional information, the system allows you to add custom fields. This might include fields for specific notes, discount codes, order numbers, or unique terms relevant to your industry. Customizing these fields ensures that all the relevant details are clearly communicated to your clients and that no information is overlooked.
- Include special instructions or promotional codes for clients.
- Add unique fields for project numbers or tracking codes.
- Modify existing fields to better fit your specific needs (e.g., “Payment Method” instead of “Payment Terms”).
In conclusion, customizing the fields and details on your billing documents is a simple yet effectiv
Adding Your Logo to the Invoice
Incorporating your company logo into your billing documents helps establish a professional and cohesive brand image. Including your logo not only makes your forms look more polished but also reinforces brand recognition with your clients. This simple step ensures that every document you send reflects your business’s identity, making it easier for clients to identify your communications.
Why Adding a Logo is Important
Having a logo on your financial documents serves several important purposes. It enhances the overall look and feel of your forms, giving them a more official appearance. Additionally, it strengthens your brand’s presence and promotes consistency across all customer-facing materials.
- Improves the professional appearance of your documents.
- Increases brand recognition with clients.
- Helps clients quickly identify your business from a stack of documents.
How to Add Your Logo
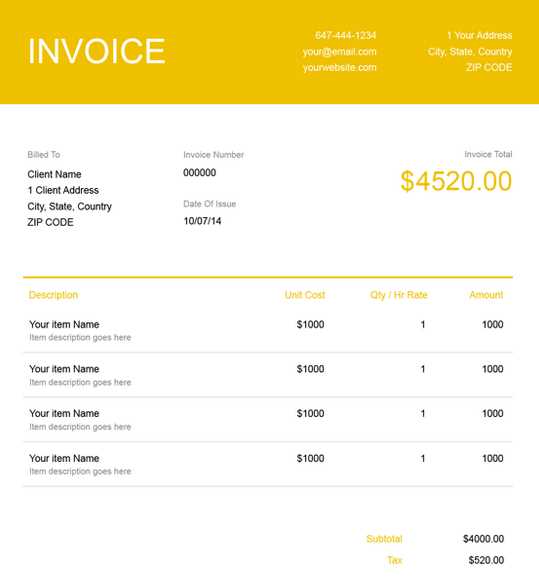
Adding a logo to your forms is a simple process that involves uploading the image file into the system and positioning it on the document. Most software allows you to choose the size and placement, ensuring that the logo appears exactly where you want it without overwhelming the content.
- Navigate to the document design section of the software.
- Select the option to add or edit your logo.
- Upload the logo file from your computer in an appropriate format (such as JPG, PNG, or GIF).
- Resize and adjust the placement of the l
Setting Default Invoice Preferences
Configuring default settings for your billing documents ensures that every form generated follows your company’s standards without needing to manually adjust details each time. These preferences allow you to streamline your workflow by pre-setting key information such as payment terms, tax rates, and other essential details. By setting defaults, you ensure consistency and save time, particularly when dealing with frequent transactions or standard procedures.
Essential Default Settings to Configure
When setting up your default preferences, there are several key aspects to consider that will help maintain uniformity and prevent errors. These settings can be adjusted to fit the nature of your business, ensuring that all generated documents include the appropriate information for each transaction.
Setting Description Payment Terms Define the standard payment deadlines for your clients (e.g., Net 30, Due on Receipt). Tax Rates Set your preferred tax rates for different regions or types of goods/services. Currency Choose the default currency for transactions if you work internationally. Discounts Set up default discounts or promotional offers that can be automatically applied. Adjusting and Saving Your Preferences
Once you’ve selected the appropriate settings, it’s important to save your preferences to ensure they are applied automatically to future documents. Most software allows you to adjust these settings at any time, so you can tailor them to specific client needs or changing business conditions. By setting the defaults early on, you can avoid having to manually enter this information for every new transaction.
- Access the preferences or settings section in the software.
- Modify the fields for payment terms, tax rates, and other relevant details.
- Save your changes to apply them to all future documents.
In conclusion, setting default preferences for your billing documents helps ensure efficiency and consistency across all transactions. By automating repetitive tasks like payment terms and tax rates, you can focus more on the core aspects of your bu
How to Save Your Custom Template
Once you’ve tailored your financial documents to fit your specific business needs, it’s crucial to save your customized layout so that you can easily reuse it for future transactions. Saving your personalized design ensures that all of the adjustments you’ve made–such as field placements, custom branding, and default settings–are preserved and available at the click of a button. This process eliminates the need to redo changes every time you generate a document.
Steps to Save Your Custom Design
After making all the necessary changes to your layout, saving your custom design is a simple process. You can usually save the new configuration under a unique name to easily identify it for future use. This helps in managing multiple designs if your business requires different formats for various types of transactions.
Step Description Finish Customization Ensure all the desired changes are made to the document’s layout, including text fields, logos, and branding. Save Layout Select the option to save your design, typically found in the “Save” or “Save As” menu. Name Your Design Give your new design a unique name so you can easily identify it later. Confirm Changes Review the layout one last time to make sure everything is correctly set up before saving it. Managing and Reusing Saved Designs
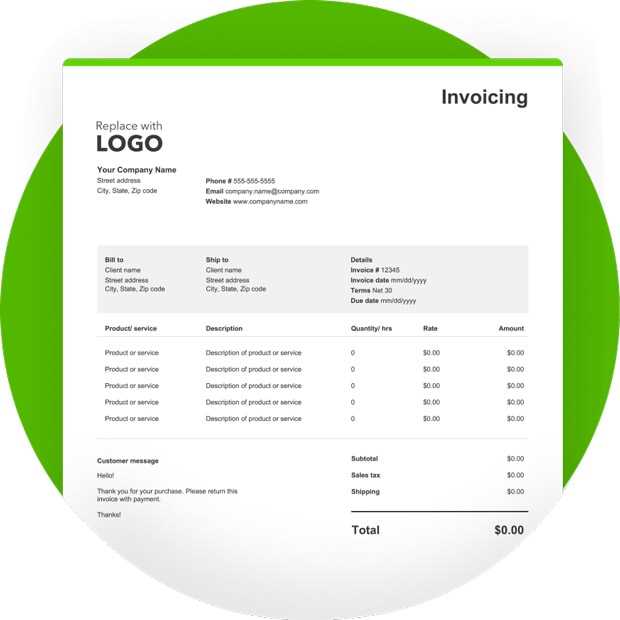
Once your design is saved, you can manage it through the system’s layout management tools. This allows you to switch between different designs or even update saved layouts if your business needs change. Additionally, by saving multiple designs, you can create different layouts for specific purposes, such as one for standard transactions and another for special projects or
Previewing Your Invoice Template
Before finalizing your customized layout for billing documents, it’s essential to preview how it will appear when generated. A preview allows you to check that all the elements are correctly positioned, the information is displayed clearly, and the overall design meets your expectations. This step ensures that no details are overlooked, and the document looks professional before being sent to your clients.
Why Previewing Matters
Previewing helps you identify potential issues such as misplaced text, missing fields, or misaligned elements. It also provides an opportunity to review the formatting and branding, ensuring that your company’s image is represented consistently. By previewing the layout, you can make adjustments before finalizing the design, saving you time and effort in the long run.
- Ensure all fields are displaying the correct information.
- Check for any formatting issues such as font sizes, margins, or text alignment.
- Verify that your branding elements, like logos or colors, are correctly applied.
How to Preview Your Design
Most software provides a simple preview function that allows you to see a mock-up of your document before it is finalized. This feature can be accessed from the design or settings menu, and typically shows how the document will appear with actual data filled in. Make sure to review every section thoroughly, from client details to product descriptions, to confirm that everything looks correct.
- Navigate to the layout or design section of the software.
- Click on the “Preview” button to view a sample of your billing document.
- Review the document carefully, checking for any errors or formatting issues.
- If needed, make changes to the layout and preview again until you’re satisfied with the result.
In summary, previewing your custom layout is a crucial step in ensuring that your billing documents are clear, accurate, and professional. By taking the time to check the final design, you can ensure that your clients receive a polished and well-organized document every time.
Editing an Existing Invoice Template
Modifying an already existing document layout allows you to make adjustments as your business needs change or to correct any errors that may have been overlooked initially. Whether you need to update the design, adjust the fields, or add new information, the process of editing ensures that your documents remain relevant and up-to-date. This flexibility allows you to easily adapt your layout without starting from scratch.
When you need to make changes, the software typically provides an option to access and edit saved designs. By revisiting the design section, you can select the layout you wish to modify and make the necessary updates. This is an efficient way to ensure your documents reflect any new policies, products, or business changes, while maintaining consistency in your communication with clients.
Editing an existing design can be done in a few simple steps. It is important to review each section thoroughly to ensure that any modifications made are accurate and properly displayed in the final document.
- Navigate to the layout or design section where your current document formats are stored.
- Select the layout you wish to edit from the list of available designs.
- Make necessary adjustments, such as modifying text fields, changing font styles, or adding new elements.
- Save the edited version with the same or a new name to avoid confusion.
- Preview the updated document to ensure the changes were applied correctly.
In summary, editing an existing layout allows you to maintain up-to-date and relevant documents without having to recreate everything from scratch. By making adjustments as needed, you can ensure your financial documents reflect your business’s current needs and standards, all while maintaining a professional and consistent appearance.
How to Use Your Invoice Template
Once you have designed and saved your customized document layout, using it for new transactions is a simple process. The layout you’ve created serves as a blueprint for generating future financial documents, allowing you to quickly populate them with relevant details and send them to clients. Knowing how to efficiently apply your saved design can save time and ensure consistency across all communications.
To use your custom layout, you simply need to select it when generating a new document. This ensures that all fields, branding, and formatting are already in place, and you only need to fill in the specific details related to the transaction. The design will automatically be applied, and you can then review the content before sending it out.
Steps to Apply Your Custom Layout
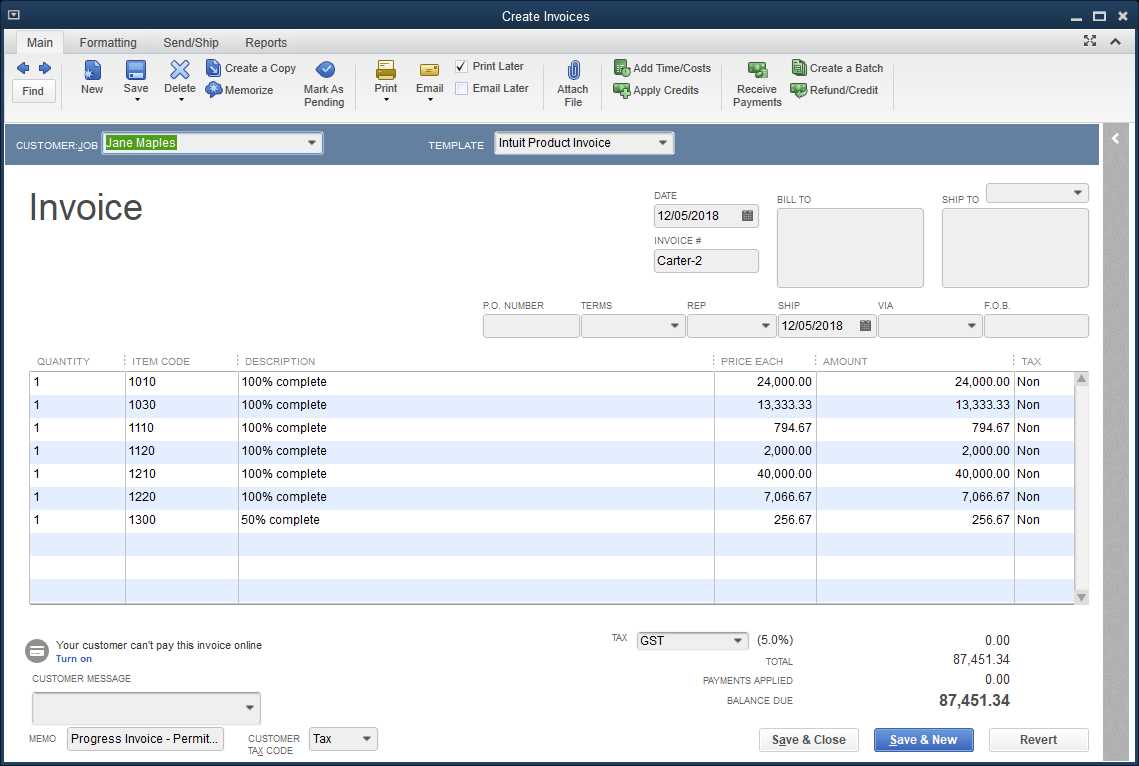
When you’re ready to generate a document, follow these steps to apply your customized design and create a finished document ready for distribution.
- Open the document creation section in your software.
- Select the saved layout from the list of available designs.
- Enter the specific details for the transaction, such as client information, items, and pricing.
- Review the document to ensure all information is accurate and formatted correctly.
- Save or print the document, and send it to the client via your preferred method.
Customizing for Specific Transactions
If you need to make minor adjustments for a particular transaction–such as adding a discount, changing payment terms, or including additional information–you can easily do so after applying your saved design. The layout will remain intact, and you can modify the specific fields as needed without affecting the overall structure.
- Update any transaction-specific fields, such as pricing, terms, or notes.
- Make sure the updated information is clearly displayed in the right sections of the document.
In summary, using your saved layout is an efficient way to maintain consistency in your financial documentation. By selecting the custom design for each new transaction, you can ensure that your documents look professional and include all necessary information without the need to start from scratch each time.
Common Mistakes to Avoid When Creating Invoices
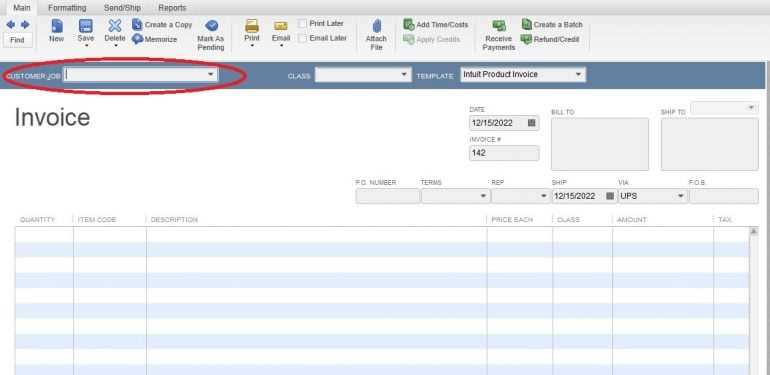
When generating financial documents for your business, it’s important to ensure accuracy and consistency. Even small errors can lead to misunderstandings, payment delays, or confusion with clients. Recognizing common mistakes and taking steps to avoid them can streamline your billing process and maintain professionalism. Here are some frequent pitfalls to watch out for when preparing and sending out financial documents.
1. Incorrect Client Information
One of the most common mistakes is entering incorrect or outdated client details. This could include the wrong billing address, phone number, or email address. If clients receive documents with inaccurate information, it can delay payment or cause confusion.
- Double-check the client’s name, address, and contact details before finalizing the document.
- Make sure that the correct account or reference number is included to avoid miscommunications.
2. Missing or Incorrect Payment Terms
Another mistake is neglecting to include clear payment terms or providing incorrect terms that don’t align with your agreement with the client. Payment deadlines, discounts for early payments, or late fees should all be clearly outlined to avoid confusion later on.
- Clearly state the due date, any discounts offered, and penalties for late payments.
- Ensure that the payment methods (bank transfer, credit card, etc.) are specified correctly.
3. Lack of Itemized Details
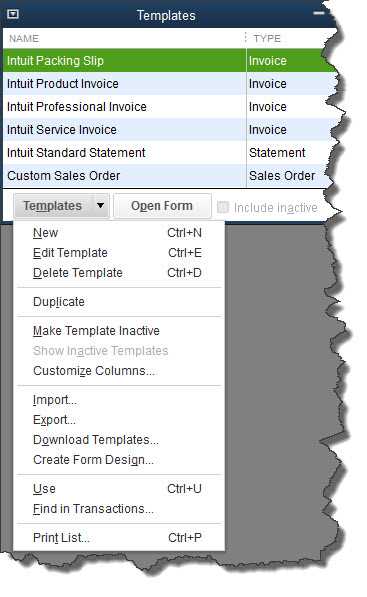
Failing to break down the services or products provided is a mistake that can lead to confusion or disputes. Clients expect to see a clear list of what they are being charged for, with descriptions, quantities, and individual prices. Without this information, clients may question the charges or delay payment.
- Include a detailed breakdown of all goods or services provided, with quantities and individual prices.
- Ensure the descriptions are accurate and match what was agreed upon during the transaction.
4. Poor Formatting and Layout
The visual appeal of your document can affect how it is perceived. A cluttered, hard-to-read layout can make it difficult for your clients to quickly understand the information. Consistency in fonts, spacing, and overall design is crucial to ensuring a professional appearance.
- Use a clean, easy-to-read layout with clear headings for each section.
- Ensure that the document is properly spaced and well-organized to highlight important information.
5. Forgetting to Include Taxes and Other Charges
Many businesses forget to include applicable taxes, shipping fees, or other charges in their billing documents. Failing to include these can lead to discrepancies and may result in clients not paying the full amount owed.
- Always double-check if taxes or additional fees are required and include them clearly in the document.
- Provide a breakdown of these extra charges so clients can see the total amount they are being asked to pay.
6. Not Reviewing Before Sending
Rushing through the document preparation process can lead to simple mistakes such as missing numbers or incorrect information. Taking the time to review the document carefully before sending it to the client can prevent costly errors.
- Always double-check all sections of the document, from client information to amounts and terms.
- Ensure everything is accurate before hitting send to avoid having to make corrections later.
In summary, avoiding these common mistakes will help ensure that your financial documents are clear, accurate, and professional. By taking the time to carefully review your documents and include all necessary information, you can maintain strong relationships with your clients and encourage timely payments.
Integrating Payment Options into Invoices
Offering flexible payment options directly within your billing documents can streamline the payment process and make it more convenient for your clients. By clearly presenting various payment methods, you allow clients to choose the option that best suits their preferences, which can encourage quicker payments and reduce the likelihood of delayed transactions. Integrating payment options into your documents not only improves customer experience but also ensures a smoother financial workflow for your business.
Types of Payment Methods to Include
There are several common payment methods that businesses can offer on their financial documents. Each method should be clearly outlined so that clients know how to proceed with their payments. Some of the most popular options to include are:
- Bank Transfers: Provide your business bank account details to allow clients to transfer funds directly.
- Credit/Debit Cards: Include payment gateway links or instructions on how clients can pay with their credit or debit cards online.
- Online Payment Platforms: Many businesses integrate services like PayPal, Stripe, or other platforms for quick online payments.
- Checks: If applicable, include instructions for clients wishing to send a paper check as payment.
How to Effectively Display Payment Options
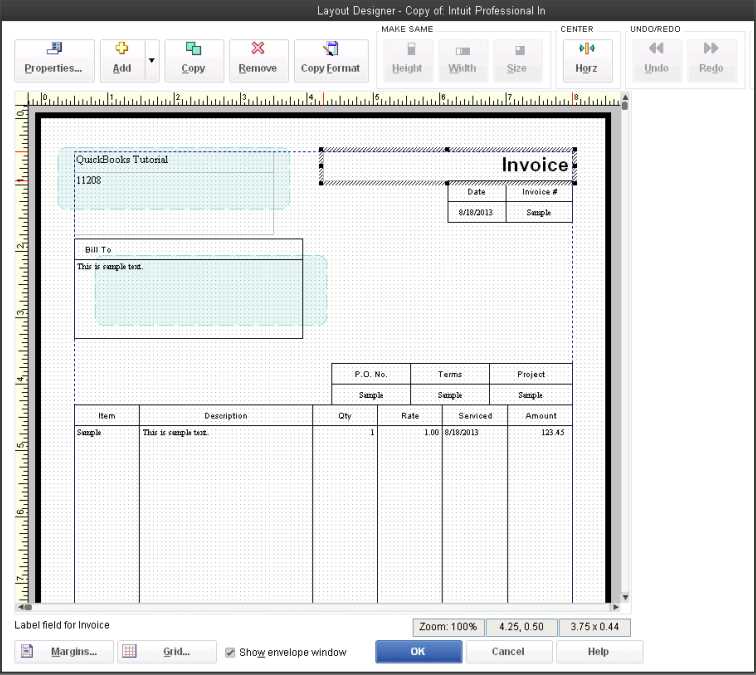
To ensure clarity and prevent confusion, it’s important to present payment options in an easy-to-read format. Listing the available methods prominently and providing clear instructions can guide your clients through the payment process. Make sure to include:
- Contact information or links for online payments or platforms.
- Account details for direct transfers or bank payments.
- Instructions for mailing checks if this is an accepted option.
- A payment due date to encourage timely action.
Additionally, you can offer incentives like discounts for early payments or other benefits to motivate clients to pay faster.
In summary, integrating payment options directly into your documents makes it easier for clients to pay in a way that’s convenient for them, speeding up the payment process and reducing administrative burdens. Clear presentation and a variety of options will not only improve cash flow but also enhance customer satisfaction.
Sharing and Printing Your Invoices
Once you have prepared your financial documents, the next step is to share or print them for your clients. The ability to send documents quickly and efficiently is essential for maintaining smooth business operations and ensuring timely payments. Whether you prefer digital or physical copies, knowing how to properly share or print your documents is crucial to staying organized and professional.
Sharing Documents Electronically
In today’s digital world, sharing documents via email or cloud services has become the most common method. Sending documents electronically is fast, cost-effective, and environmentally friendly. To share your document electronically, you can:
- Email Attachments: Save your document as a PDF file and attach it directly to an email. Make sure to include a clear subject line and any necessary instructions for the recipient.
- Cloud Services: Upload your document to a cloud storage service like Google Drive or Dropbox and share the link with your client. This option is particularly useful for large files or when sending multiple documents at once.
- Payment Platforms: Some online payment services allow you to send documents directly through their platform, which may also include options for automated reminders and tracking.
Printing Documents for Physical Delivery
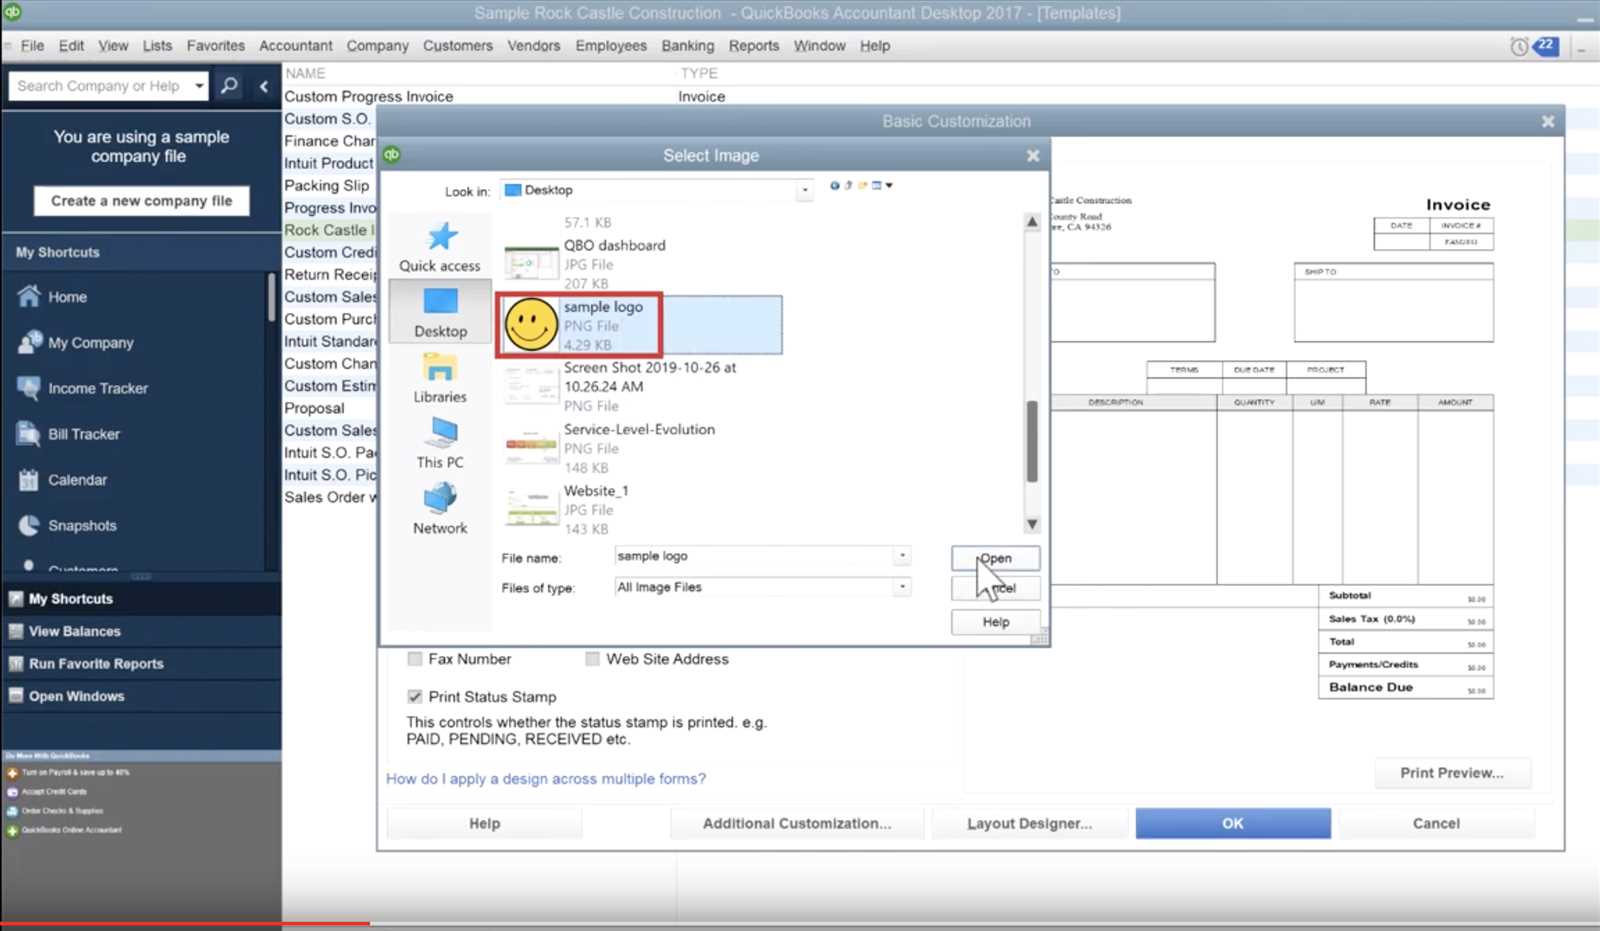
If you need to send a physical copy, printing your document ensures it reaches your client in a tangible form. To print your document efficiently:
- Choose the Correct Printer: Ensure that your printer is set up correctly and has enough paper and ink for high-quality prints.
- Format for Printing: Double-check that the layout looks good on paper. Some designs may need adjustments to fit the print format properly.
- Provide a Cover Letter: If sending via post, consider including a brief cover letter to explain the details of the document and how the recipient should proceed with payment.
Tracking Shared Documents
After sharing your document, it’s important to track whether it has been received and read by the client. You can:
- Request Read Receipts: If using email, enable read receipt options to confirm when the document has been opened.
- Use Delivery Confirmation: For physical copies, consider using services like certified mail or delivery tracking to ensure the document reaches its destination.