How to Create an Invoice Template in Word
Managing financial transactions effectively requires clear and consistent documentation. Whether you’re a freelancer, a small business owner, or part of a larger organization, having a reliable method for outlining payments is essential. A well-structured document can not only enhance professionalism but also streamline your accounting process.
With the right tools, it’s easy to produce a custom layout that suits your needs. In this guide, we will walk you through the steps to build a tailored billing document using one of the most accessible and familiar tools available–an advanced text editor. The process is simple, and with a bit of attention to detail, you’ll have a professional-looking file ready to send out in no time.
By following this guide, you’ll learn how to incorporate important details like payment deadlines, charges, and tax information. Whether you need to send a one-time request or set up a recurring format, the flexibility of the tool ensures you can adjust your layout to fit various needs. In the next sections, we will show you how to set up a document that’s both functional and visually appealing.
How to Design a Billing Document in Word
Setting up a clear and organized billing structure is crucial for maintaining a smooth financial workflow. To begin, you’ll want to focus on the core elements that should appear in your document: details of the business or service provider, recipient information, itemized charges, and payment terms. Once you have these in mind, it’s easy to customize your layout to suit your needs.
The first step in setting up your document is choosing the right layout. While you can start with a blank page, most text editing software provides pre-built formats that you can customize to fit your style. Look for a layout that suits the nature of your transactions and provides enough space for the necessary details. Adjusting margins, fonts, and spacing can help ensure clarity and readability.
Next, it’s essential to add key components such as your business name, contact information, and the recipient’s details. Typically, these should be placed at the top of the page, with clear labels like “From” and “To.” Following this, you can list the products or services provided, along with their respective costs, quantities, and any applicable taxes or discounts. Make sure the information is organized in a neat table format for easy reading.
Once you have the main content set up, focus on the finer details, such as payment terms, due dates, and any late fees. This is important to prevent misunderstandings and ensure that the recipient knows exactly when and how payment should be made. You can also add your logo or any other branding elements to make the document feel more professional and personalized.
Lastly, save the document for future use. By keeping a reusable structure, you can easily adapt it for different clients or transactions without needing to start from scratch every time. If necessary, adjust the format periodically to keep it aligned with your business’s evolving needs.
Why Use Word for Billing Documents
Choosing the right tool to handle financial records is essential for efficiency and professionalism. While there are many software options available, using a popular text editing program offers a number of advantages that make it an ideal choice for crafting formal billing statements.
Advantages of Using a Text Editor
Here are some reasons why a word processor is a great option for creating billing documents:
- Accessibility: Most users already have access to text editors, which makes them a convenient and cost-effective choice.
- Ease of Use: The interface is user-friendly, even for those with minimal technical expertise. You can quickly insert and format key information.
- Customizability: You can easily adjust fonts, colors, and layout to match your branding and professional style.
- Template Flexibility: You can either start from scratch or customize existing layouts to fit your exact needs.
Why Word Documents Are Ideal for Financial Records
Text-based documents offer a level of versatility and control that makes them particularly effective for managing financial information. Here’s why:
- Easy Editing: If any details change, it’s simple to update the document without much effort.
- Compatibility: Word files are universally recognized and can be opened by almost any device or system.
- Professional Appearance: With proper formatting, your document can look polished and consistent every time you send it.
- Storage and Sharing: Word files can be easily stored, printed, or shared via email, providing flexibility in how you manage transactions.
Overall, using a text editor provides a simple yet effective solution for creating detailed, professional documents that streamline your billing process.
Steps to Design an Invoice Template
Designing a clear and professional document for billing purposes involves several key steps. By focusing on structure, content, and formatting, you can ensure that your final document is both easy to read and comprehensive. The following steps will guide you through the process of creating a functional and visually appealing document.
1. Set Up Your Document Structure
Before adding any content, it’s important to establish the layout of your page. This involves determining the appropriate margins, orientation, and overall structure. Consider the following when setting up your page:
- Page size: Typically, use standard letter size (8.5 x 11 inches) for easy printing or sharing.
- Margins: Set up balanced margins (1 inch on all sides) to give the document a clean, professional look.
- Orientation: Choose portrait orientation, which is the standard format for most documents.
2. Include Essential Information
Now it’s time to fill in the details that make the document functional and complete. A well-organized layout should include:
- Business Information: At the top, include your business name, logo, address, and contact details.
- Recipient Details: Include the recipient’s name, address, and contact information, typically aligned on the left side.
- Transaction Date and Number: Add a unique reference number and the date of the transaction to help with future tracking.
3. Add Itemized Details
Next, you’ll need to list the products or services provided, along with their associated costs. This section should be clear and easy to follow, typically in a tabular format. Organize the following details in separate columns:
- Description of goods/services: Provide a short, clear description of each item.
- Quantity and Unit Price: List the quantity and price per unit for each item.
- Total cost: Calculate and display the total for each item and the overall sum.
4. Add Payment Terms
Include specific details about how and when the payment should be made. Common items in this section include:
- Payment method: Indicate acceptable forms of payment (e.g., credit card, bank transfer, check).
- Due date: Clearly state when payment is due.
- Late fees: If applicable, mention any penalties for delayed payments.
5. Apply Professional Formatting
Once all necessary information is in place, it’s time to focus on formatting. Make sure the document is visually appealing and easy to read:
- Font choice: Use a clear, professional font such as Arial or Times New Roman.
- Font size: Keep the font size between 10pt and 12pt for the main text, with larger sizes for headings.
- Bold and underline: Use these for section headers and important details, such as the total amount due.
- Alignment: Ensure that text is properly aligned and table
Choosing the Right Layout for Billing Documents
The layout of your financial documents plays a crucial role in how clearly the information is presented. A well-structured design ensures that recipients can easily read and understand the details of the transaction. When selecting the right layout, it’s important to consider factors such as simplicity, readability, and the specific needs of your business.
Consider Your Business Needs
Different businesses have different requirements for their documentation. For example, a freelancer may need a simpler structure, while a large company might require more detailed breakdowns. Here are some key points to consider when choosing your layout:
- Nature of Transactions: If you provide multiple services or products, a detailed breakdown with itemized lists will be essential.
- Branding and Style: Ensure that the layout complements your brand’s image. A more polished design can help convey professionalism.
- Amount of Information: If your transactions are complex, you’ll need a layout with enough space to include all relevant details.
Key Elements of a Good Layout
To ensure that your document is both functional and easy to follow, focus on these core components:
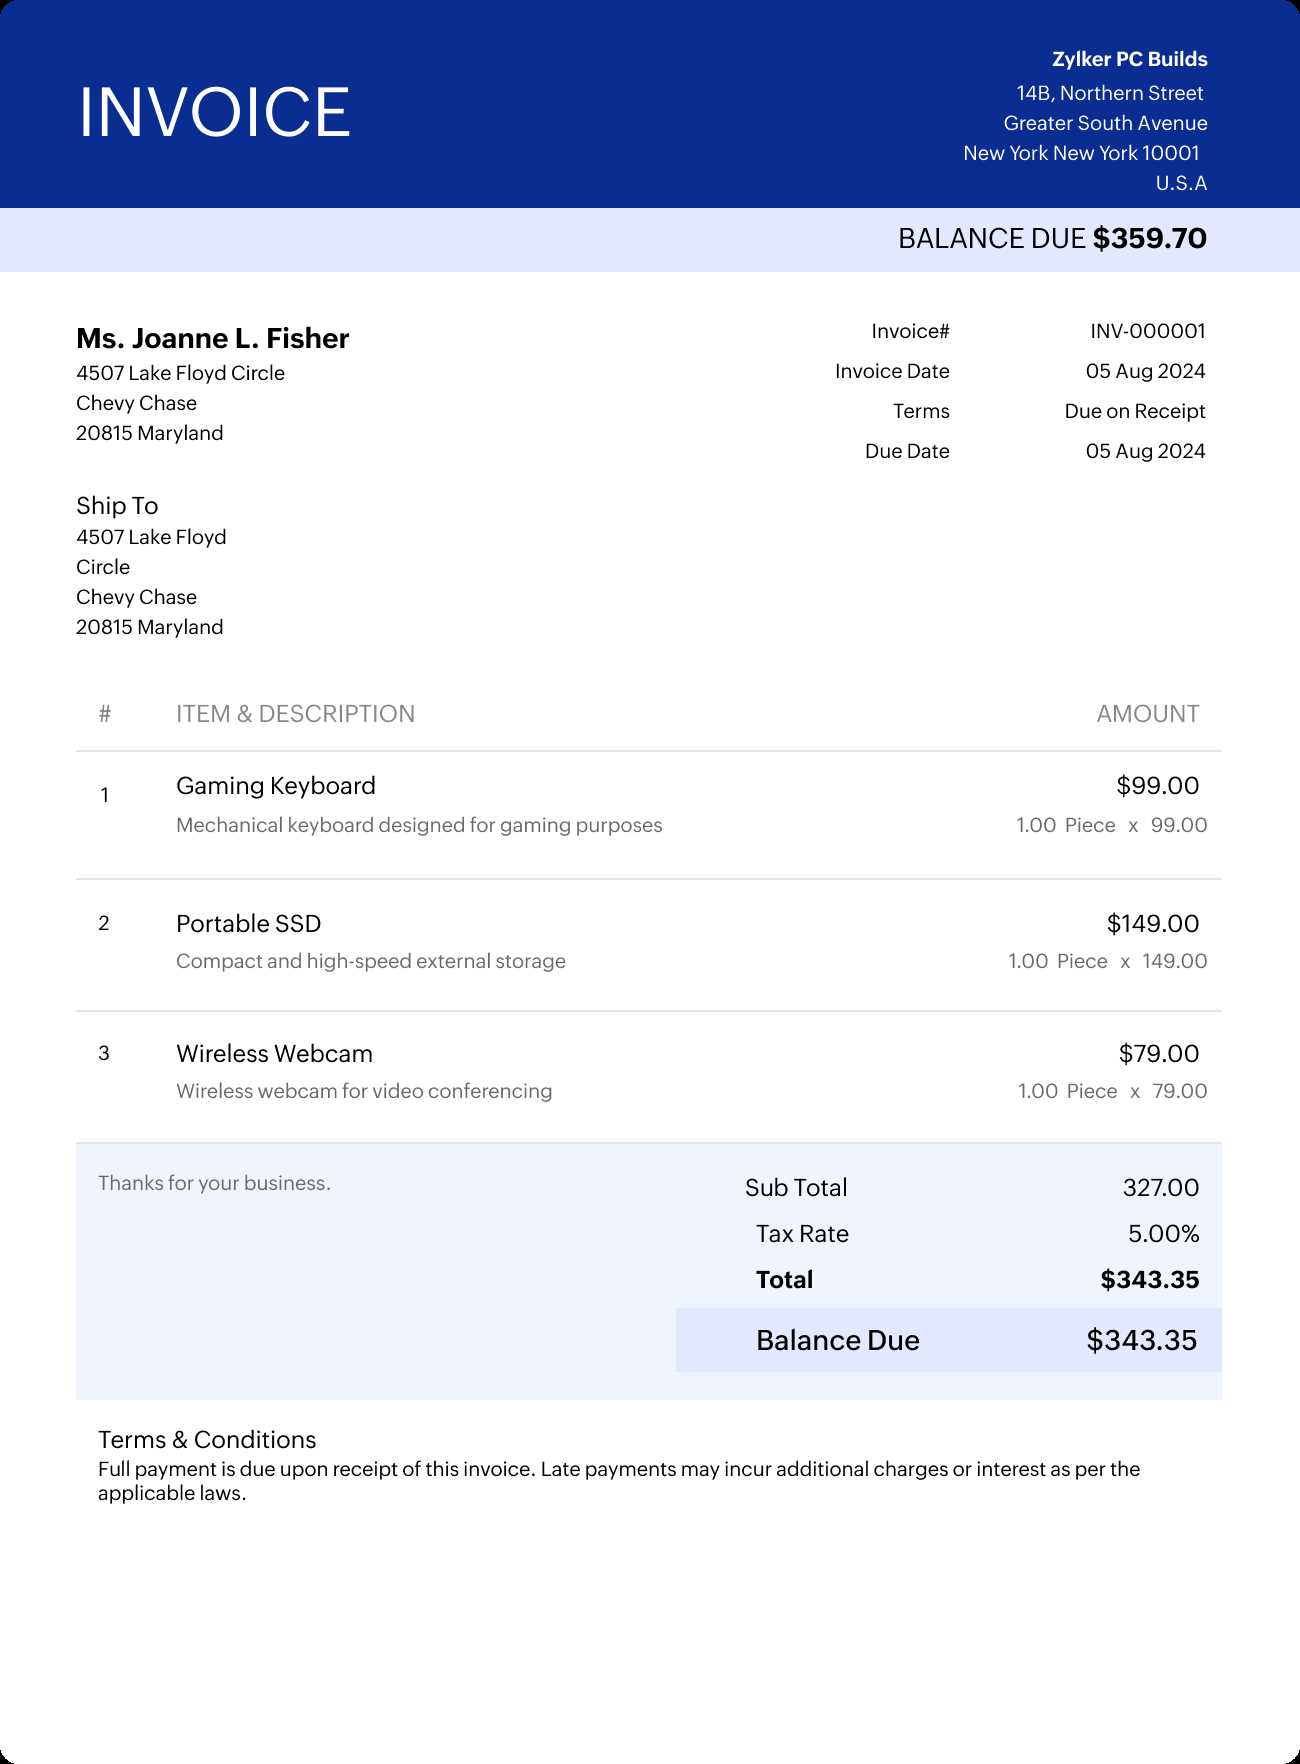
- Clear Sections: Divide your document into well-defined sections such as your business details, recipient information, items or services provided, and total costs.
- Table for Itemization: Use tables to list products or services, making it easier to align prices, quantities, and totals.
- Visual Hierarchy: Make sure headings and important details (such as the total amount due) stand out with bold fonts or larger text sizes.
- Whitespace: Leave enough space between sections to prevent the document from looking cluttered.
By considering both your business’s unique needs and the key elements of an effective layout, you can design a document that is not only professional but also functional and easy for clients to navigate. A clear and organized structure ensures that your clients can quickly find the information they need, leading to smoother transactions and faster payments.
Customizing Billing Elements in Word
Personalizing the various elements of your financial document is crucial for making it both functional and aligned with your business needs. Customization allows you to tailor each section, ensuring that all necessary details are included and presented in a professional manner. The flexibility of text editing tools enables you to adjust each part of your document with ease, from basic information to specific formatting choices.
Business Details
The first step in customization is adding your business’s contact information. This section should be easily identifiable and positioned at the top of the document. Consider the following when customizing your business details:
- Logo: Incorporating your business logo enhances brand recognition and professionalism.
- Business Name and Address: Include the full name of your company, physical address, phone number, and email address.
- Website or Social Media: If applicable, add links to your business website or social media accounts for easy access.
Recipient Information
Next, customize the recipient’s section to ensure accurate and up-to-date contact details. Key elements include:
- Recipient’s Name: Include the full name or business name of the recipient.
- Address: Ensure the recipient’s address is correctly listed, including any necessary billing or shipping details.
- Contact Information: Add phone numbers or email addresses to facilitate communication if needed.
Itemized Breakdown and Pricing
One of the most important parts of your document is the itemized list. Customizing this section allows you to specify all products or services offered, along with their respective costs. Here’s how to customize this element:
- Column Headers: Label columns clearly with titles such as “Description,” “Quantity,” “Unit Price,” and “Total Cost.”
- Item Details: Provide brief descriptions for each item, ensuring clarity for the recipient.
- Formatting: Use tables with borders to organize this information neatly, ensuring that the calculations are easy to follow.
Payment Terms and Additional Information
To prevent any confusion, clearly define payment terms and any other important details such as deadlines, late fees, or payment methods. Customizing this section includes:
- Due Date: Clearly indicate the payment due date in a prominent position.
- Payment Methods: Specify which payment methods are accepted (e.g., bank transfer, check, credit card).
- Late Fees: If applicable, outline any penalties for late payments and their corresponding rates.
By customizing these elements, you can ensure that your document reflects your business’s unique needs while maintaining a high level of professionalism. Each section can be modified to make the document more relevant to the specific transaction or client, offering both flexibility and clarity.
Adding Your Business Information to Billing Documents
Including your business information in billing records is essential for establishing credibility and ensuring that clients can easily contact you. This section typically appears at the top of the document and should include all the relevant details that identify your business. A complete set of information not only enhances professionalism but also makes it easier for recipients to reach out if they need to discuss the transaction or ask questions.
Key Details to Include
Your business section should contain the following core components:
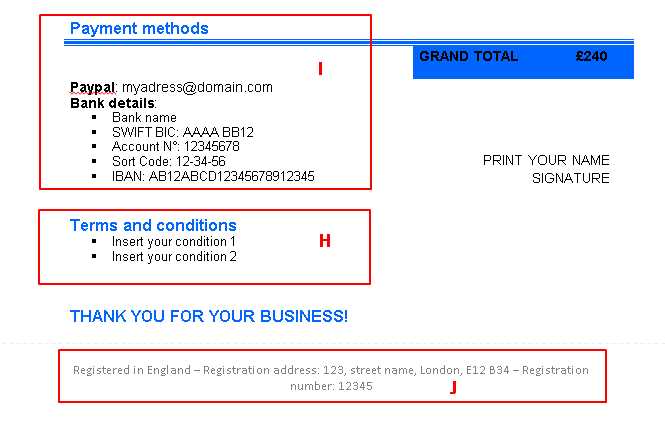
- Business Name: Ensure your full legal business name is prominently displayed.
- Logo: If applicable, add your company logo to strengthen your brand presence.
- Contact Information: Include your phone number, email address, and any other means of communication.
- Physical Address: List your business address, including the city, state, and postal code. If you work remotely, consider including the address of your registered business or headquarters.
- Website: If your business has an online presence, include a link to your website for further engagement or reference.
Formatting Your Business Information
Proper formatting can make your business details stand out and make the document easier to navigate. Consider the following tips:
- Alignment: Typically, business information is aligned to the left or centered at the top of the document.
- Font Size: Use a larger font size for your business name and logo to make it easily noticeable, while keeping contact information slightly smaller but legible.
- Consistency: Ensure that your business details are consistent with other branding materials, such as your website or business cards, to maintain a cohesive brand identity.
By including these elements in your document, you ensure that your clients have all the necessary information to contact you if needed. Clear and professional business details also create a positive impression and make your billing process more transparent and efficient.
Incorporating Payment Terms and Due Dates
Clear payment terms and due dates are essential for ensuring smooth transactions and minimizing delays. These details help set expectations and provide clients with a clear understanding of when and how payments should be made. Properly outlining these aspects in your financial documents helps prevent misunderstandings and ensures timely processing of payments.
Key Payment Terms to Include
When defining payment terms, it’s important to include all relevant information that will guide the recipient. Here are the most common details to incorporate:
- Payment Due Date: Specify the exact date by which payment must be received. This is usually a set number of days after the transaction or service delivery date (e.g., 30 days, 45 days, etc.).
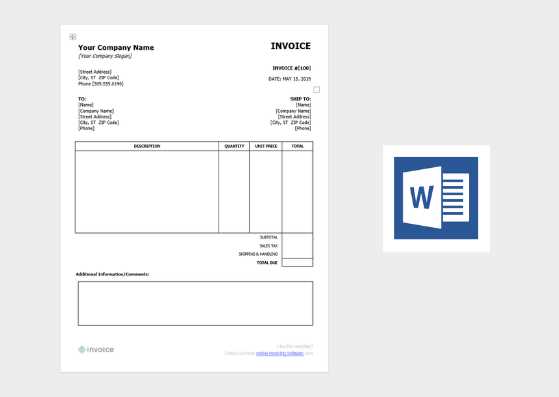
- Accepted Payment Methods: Clearly list all payment methods you accept, such as bank transfers, credit cards, checks, or online payment systems.
- Early Payment Discounts: If you offer a discount for early payments, state the percentage and time frame (e.g., 5% discount if paid within 10 days).
- Late Payment Fees: Include any penalties or interest rates for overdue payments. Specify the rate (e.g., 1.5% per month) or flat fee charged after the due date has passed.
Choosing the Right Placement for Payment Information
Properly positioning your payment terms ensures that they are easy to find and understand. Here are a few tips on placement:
- Visibility: Place payment terms near the bottom of the document but above the total amount due. This makes them easily accessible without overwhelming the rest of the information.
- Highlighting Key Points: Use bold or italics to emphasize important details such as the due date, payment methods, or late fees.
- Separate Section: Consider dedicating a separate section or paragraph specifically to payment terms to make them stand out.
Incorporating clear and concise payment terms in your documents ensures a smoother financial transaction process and helps maintain a professional relationship with clients. By setting expectations upfront, you minimize the risk of delays or disputes, leading to more efficient business operations.
Inserting Document Number and Date
Including a unique reference number and transaction date in your billing documents is essential for tracking and organizing financial records. These elements help both you and your clients keep clear records of each transaction. Properly formatting and positioning these details ensures that your document is easy to reference for future communications or audits.
Why You Need a Document Number
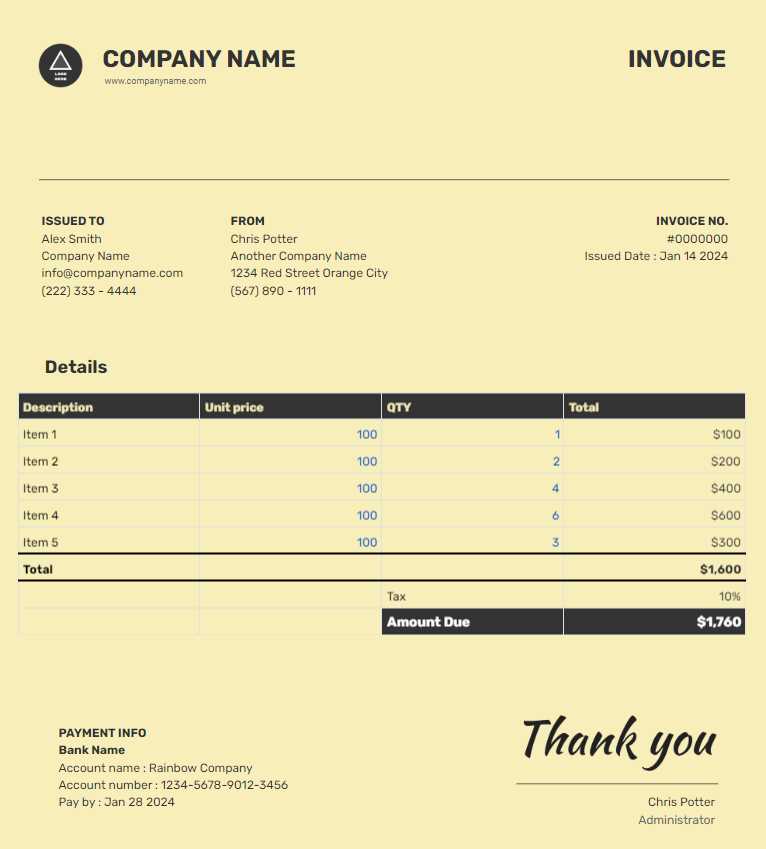
A unique reference number allows you to easily track individual transactions and avoid confusion with other documents. Here’s why it’s important:
- Tracking and Organization: A distinct number helps you quickly locate a specific document in your records or financial software.
- Prevents Duplicates: Each document number should be unique, reducing the risk of generating duplicate entries for the same transaction.
- Streamlines Communication: Clients and internal teams can refer to the number when discussing or querying a specific transaction.
Choosing the Right Format for Document Number and Date
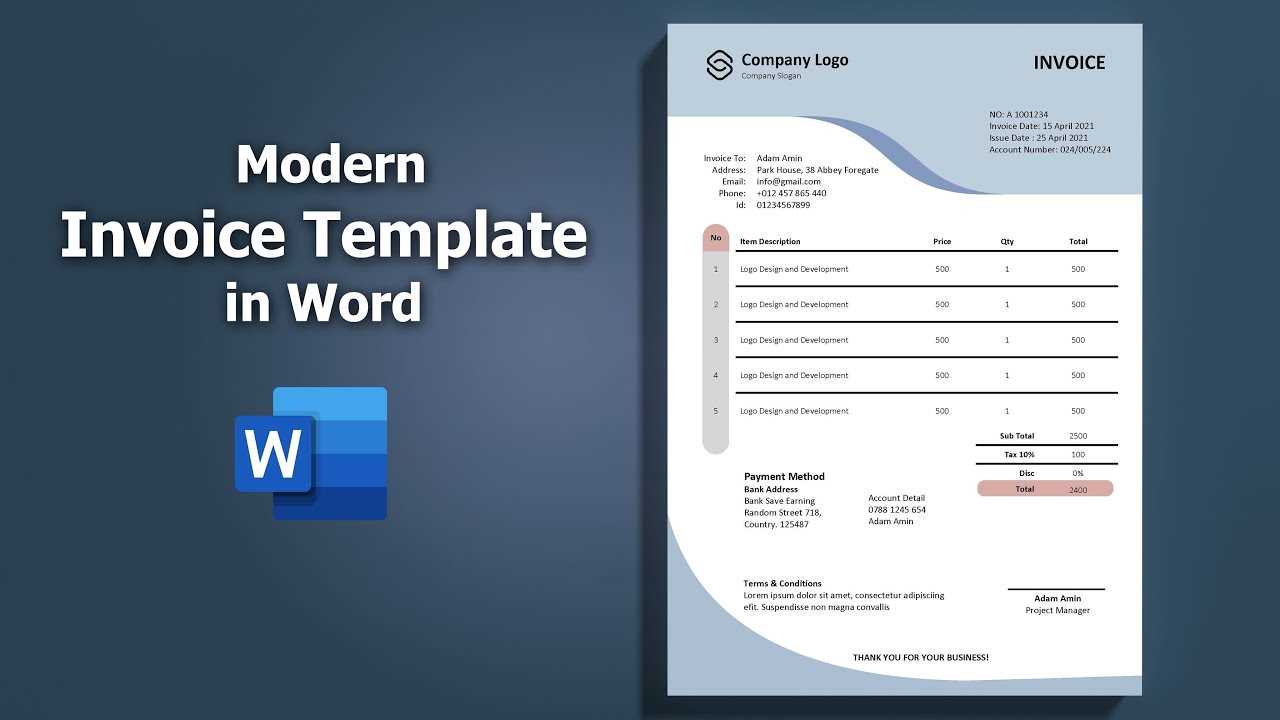
Both the document number and transaction date should be easy to find and formatted consistently. Here are some tips for inserting these details:
- Document Number: Position the number in the top-right or top-left corner of the page, making sure it stands out. You can use a simple numbering system (e.g., INV-001, INV-002) or a more detailed format that includes the year or month (e.g., 2024-001, 04-2024-001).
- Transaction Date: Place the date near the document number, usually beneath it or next to the recipient’s information. It should clearly indicate when the transaction took place (e.g., 01/15/2024 or January 15, 2024).
By inserting a unique reference number and date in the correct places, you ensure that both you and your clients can easily reference the document whenever needed. It simplifies record-keeping and helps maintain a more organized approach to your financial transactions.
Formatting Your Billing Document for Professionalism
A well-formatted financial document not only conveys the necessary details but also reflects your business’s professionalism and attention to detail. A polished appearance helps build trust with clients and ensures that your communication is clear and easy to understand. Proper formatting can make a significant difference in how your document is perceived, so it’s essential to follow a few key guidelines to achieve a clean and professional look.
Key Formatting Principles
Here are some important elements to focus on when formatting your billing document:
- Consistency: Use consistent fonts, colors, and styles throughout the document. Stick to one or two fonts at most (e.g., Arial or Times New Roman) and avoid excessive use of bold, italics, or underlining.
- Readable Font Size: Ensure that your font size is large enough to read easily. Typically, the body text should be between 10pt and 12pt, with larger sizes for headings and important details like totals.
- Clear Structure: Divide your document into distinct sections, such as your business information, recipient details, transaction breakdown, and payment terms. Use headings and subheadings to help guide the reader.
- Whitespace: Leave enough space between sections and columns to avoid clutter. Proper use of whitespace improves readability and gives the document a clean, professional feel.
Formatting the Key Sections
Each section of your document plays a vital role in presenting information clearly. Here’s how to format the most important sections:
- Business Details: Place your business name, logo, and contact information at the top of the document, ensuring they stand out. This section should be easy to spot and formatted neatly.
- Recipient Information: The recipient’s name and contact details should be aligned neatly to the left or right side, depending on your layout choice. Ensure this section is clearly separated from the other details.
- Itemized List: Use a table to organize items, quantities, prices, and totals. Ensure the text aligns properly in each column and that the table does not appear crowded.
- Totals and Payment Terms: The total amount due should be prominently displayed, typically at the bottom or right-hand side of the document. Bold or highlight this figure to make it stand out. Payment terms should follow immediately after.
By following these formatting guidelines, you can ensure that your billing documents are not only functional but also convey a sense of professionalism and attention to detail. A well-organized document enhances communication, reduces confusion, and leaves a lasting positive impression on clients.
Using Tables for Organized Billing
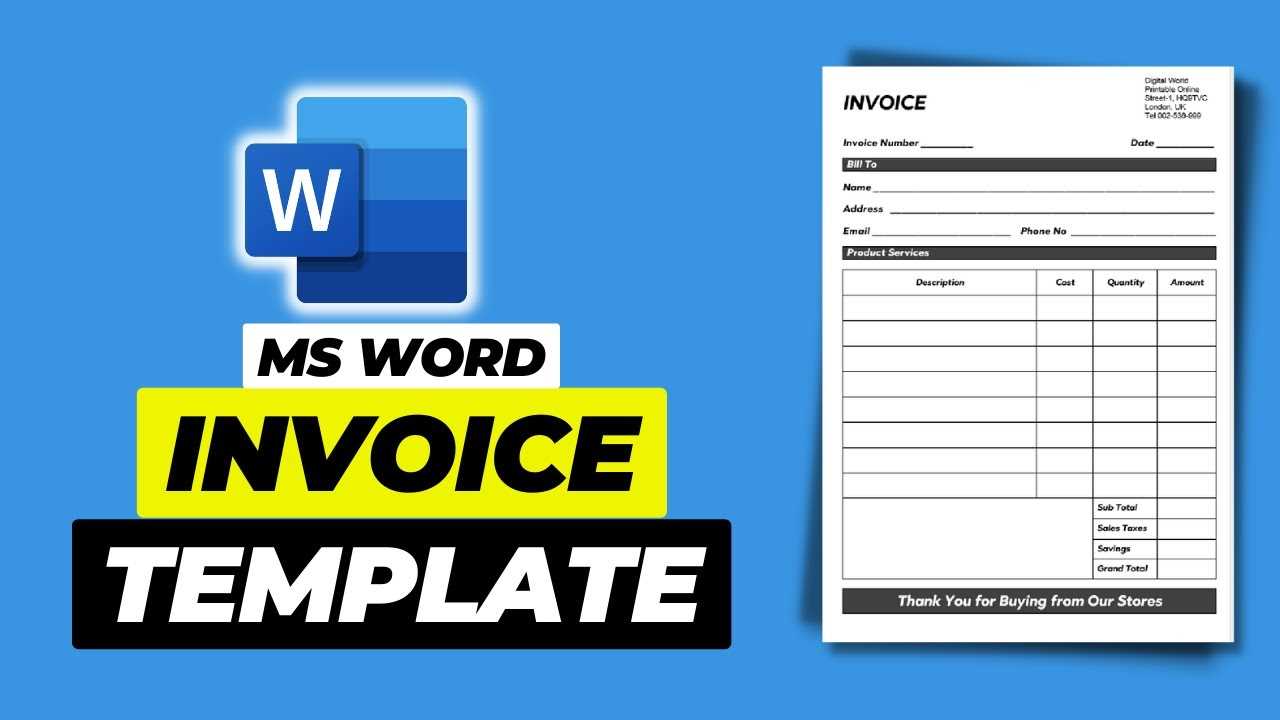
Tables are a valuable tool for organizing the details of financial transactions, ensuring clarity and ease of reference. They allow you to neatly display itemized lists, quantities, prices, and totals in a structured manner. By utilizing tables, you can break down complex information into clear, digestible sections that make it easier for both you and your clients to track the items or services being billed.
Benefits of Using Tables
Incorporating tables into your billing documents offers several advantages:
- Clarity: Tables provide a clear visual structure, helping to organize data in a way that is easy to follow. Each column serves a distinct purpose, such as listing items, specifying quantities, or showing prices.
- Improved Readability: With properly aligned data, tables prevent the document from looking cluttered or chaotic, making it more visually appealing and easier to read.
- Efficiency: By using tables, you can quickly calculate totals and apply formulas, ensuring accuracy in your financial records.
Key Elements to Include in a Table
When using tables in your financial documents, there are several key elements to consider for maximum effectiveness:
- Column Headings: Clearly label each column to define the information it contains. Common headings include “Description,” “Quantity,” “Unit Price,” and “Total Cost.”
- Consistent Alignment: Ensure that the data in each column is aligned properly. For example, numerical values like prices and totals should be aligned to the right, while item descriptions should be left-aligned.
- Simple Borders: Use simple table borders to separate sections clearly, but avoid overly bold or distracting lines that can make the document appear cluttered.
- Row for Totals: Always include a row at the bottom to sum the total cost. This should be clearly marked and easily distinguisha
How to Add Tax and Discounts
Including taxes and discounts in your billing documents ensures that the final amount reflects all applicable charges and reductions. Properly calculating and displaying these amounts helps maintain transparency with clients and ensures compliance with tax regulations. By following a clear structure, you can make these adjustments easily understandable and avoid confusion.
Adding Tax
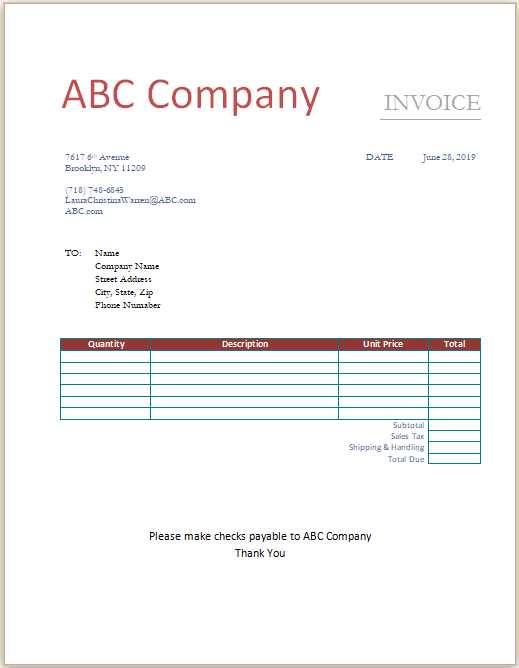
When adding tax, it is important to calculate it based on the applicable rate for the product or service being sold. Most often, tax is calculated as a percentage of the subtotal. Here’s how you can display tax in your financial documents:
Description Amount Subtotal $500.00 Tax (10%) $50.00 Total $550.00 In this example, the tax rate is 10%, and it’s applied to the subtotal, resulting in a tax amount of $50. The total amount due is then calculated by adding the tax to the subtotal.
Applying Discounts
Discounts are typically subtracted from the subtotal or total amount before tax is applied. To display discounts, you can either specify a percentage or a fixed amount. Here’s how to structure it:
Description Amount Subtotal $500.00 Discount (15%) -$75.00 Tax (10%) $42.50 Total $467.50 In this case, a 15% discount is applied to the subtotal of $500, which reduces the price by $75. The tax is then calculated based on the reduced amount, and the final total comes to $467.50.
By clearly showing tax and discount calculations in your documents, you ensure that clients understand how the final amount is determined. Transparency in these details not only improves trust but also reduces the likelihood of any billing disputes.
Saving Your Document for Future Use
Once you have designed a billing document that suits your business needs, it’s important to save it in a way that makes it easy to access and reuse. By saving your document properly, you ensure that you can quickly generate future records without starting from scratch each time. This not only saves time but also maintains consistency across all your financial communications.
To save your document for future use, follow these steps:
- Save as a Template: If you plan to use the same layout and structure repeatedly, save the document as a template. This allows you to open the file, fill in new details, and save it as a new document each time.
- Organize Your Files: Store your saved documents in a dedicated folder with clear naming conventions. For example, you could name the file “Billing Template” or “Client Billing Format.” This makes it easy to locate when needed.
- Backup Your Files: Regularly back up your saved documents to prevent data loss. Consider using cloud storage or an external hard drive for added security.
- Update When Necessary: As your business or services evolve, make sure to update the saved file with any new information, such as changes in payment terms or business details. Keeping your saved documents up-to-date will ensure accuracy over time.
By saving your document for future use, you streamline your administrative tasks and reduce the chance of errors. Each time you need to generate a new record, you’ll have a reliable foundation to build on, allowing you to maintain efficiency and professionalism.
Printing or Sending Your Billing Document
Once your financial document is finalized, the next step is delivering it to your client. Whether you choose to send it electronically or print a physical copy, it’s important to ensure the document reaches the intended recipient in a timely and professional manner. The delivery method you choose will depend on the preferences of both you and your client, as well as the nature of your business.
Here are some tips for printing or sending your billing document effectively:
- Sending Electronically: One of the most convenient methods is to send your document via email. Make sure to save it as a PDF file before attaching it to your email to preserve the formatting and ensure compatibility across devices. In your email, include a brief and polite message with the attached document and any necessary instructions or payment reminders.
- Using Online Payment Systems: If you use an online invoicing system or payment platform, you can directly send the document to the client through the system’s built-in features. Many platforms offer automated notifications and tracking options, making it easier to monitor the payment process.
- Printing and Mailing: For clients who prefer physical documents or in cases where email isn’t an option, printing and mailing the document may be necessary. Ensure the printout is of high quality, with clear and legible text. If sending by mail, consider using an envelope that protects the document and a reliable postal service to avoid delays.
- Confirm Receipt: Regardless of the delivery method, it’s a good idea to confirm that the client has received the document. For emails, you can request a read receipt or follow up with a quick message. For physical copies, consider using registered mail or a similar service to track the delivery.
By ensuring that your billing documents are sent efficiently and professionally, you promote smooth communication and help facilitate timely payments. Choose the method that works best for your business and client needs, and always follow up to confirm receipt if necessary.
Tips for Ensuring Document Accuracy
Accuracy is crucial when preparing any financial document, as even small mistakes can lead to misunderstandings or delays in payment. Ensuring that all details are correct helps maintain professionalism and avoids disputes with clients. Taking the time to double-check figures, dates, and other key information can save you time and effort down the line, ensuring smooth transactions and positive relationships with clients.
Key Areas to Verify
Here are some specific areas to check for accuracy before finalizing your billing documents:
- Client Information: Ensure that the client’s name, address, and contact details are accurate and up-to-date. An incorrect address or contact info can delay processing or cause the document to be sent to the wrong recipient.
- Item Descriptions: Double-check that all items or services are listed clearly with the correct quantities and descriptions. Ambiguities in what is being billed can lead to confusion or disputes.
- Pricing: Confirm that the unit prices and total amounts are correct. Check for any pricing adjustments, such as discounts, and ensure they are properly applied before calculating the final total.
- Tax and Additional Fees: Review the tax calculations and any additional charges to make sure they align with the applicable rates or agreements. Errors here can significantly affect the final amount due.
- Dates and Payment Terms: Verify that the transaction date, payment due date, and any other relevant deadlines are correct. Late payments can be avoided by clearly communicating the due dates upfront.
Tools for Ensuring Accuracy
In addition to manual checks, several tools and strategies can help you improve the accuracy of your documents:
- Use Calculation Features: Many software tools allow you to use automatic calculations to ensure that totals, taxes, and discounts are applied correctly.
- Review Before Sending: Always take a final look at the document before sending it out, or consider having a colleague or assistant review it as well.
- Keep Templates Updated: If you use a pre-made format, make sure it’s updated regularly to reflect any changes in your pricing or business details.
- Use Accounting Software: Integrating accounting software can reduce human error by automating data entry and calculations, ensuring everything is consistent and accurate.
By paying attention to these details and using the right tools, you can minimize mistakes and enhance the overall reliability of your financial documents. This not only improves your efficiency but also reinforces your professionalism in the eyes of your clients.
Common Mistakes to Avoid in Billing Documents
When preparing financial documents, even small mistakes can have a significant impact, leading to confusion or delayed payments. It’s essential to ensure that every detail is correct to maintain professionalism and streamline the billing process. Understanding the common errors people make can help you avoid them and ensure that your documents are accurate and clear.
Here are some of the most frequent mistakes to watch out for:
- Incorrect Client Information: Failing to update or verify the client’s name, address, or contact details can lead to delays in delivery or communication issues. Always double-check this information before sending.
- Missing or Incorrect Dates: Dates are essential in any financial record. Not including the correct date of issue or payment due date can lead to confusion about when the payment is expected and may even affect late fees or terms.
- Calculating Totals Incorrectly: Errors in adding up line items, taxes, or applying discounts can lead to incorrect amounts due. Always double-check calculations or use automatic calculation features to ensure accuracy.
- Vague Descriptions: Ambiguity in describing the goods or services provided can cause misunderstandings. Make sure descriptions are detailed enough to be clear to the client but concise enough to avoid unnecessary complexity.
- Not Including Payment Terms: It’s crucial to outline your payment terms clearly, including accepted payment methods and any late fees. Failing to do so can create uncertainty about how and when payments should be made.
- Omitting Tax Information: Not specifying applicable taxes, or forgetting to calculate them, can result in discrepancies between what is expected and what is due. Always ensure that tax rates are accurate and clearly stated.
- Failure to Include a Unique Reference Number: Each billing document should have a unique reference number to make it easy to track and refer to. Without this, clients may struggle to identify specific records, leading to confusion.
- Not Double-Checking for Typos: Spelling errors, especially in client names or financial terms, can affect the professionalism of your documents. Always proofread your work before sending it out.
By avoiding these common mistakes, you can ensure that your financial documents are professional, clear, and accurate. This will help maintain smooth transactions and build trust with your clients.
How to Make Your Billing Document Editable
Making your financial document editable allows for easy customization whenever you need to send out new records. This flexibility is essential when dealing with various clients or making adjustments to details like amounts, dates, and descriptions. By ensuring that your document is editable, you can save time and avoid the need to start from scratch each time you issue a new record.
Using Editable Fields
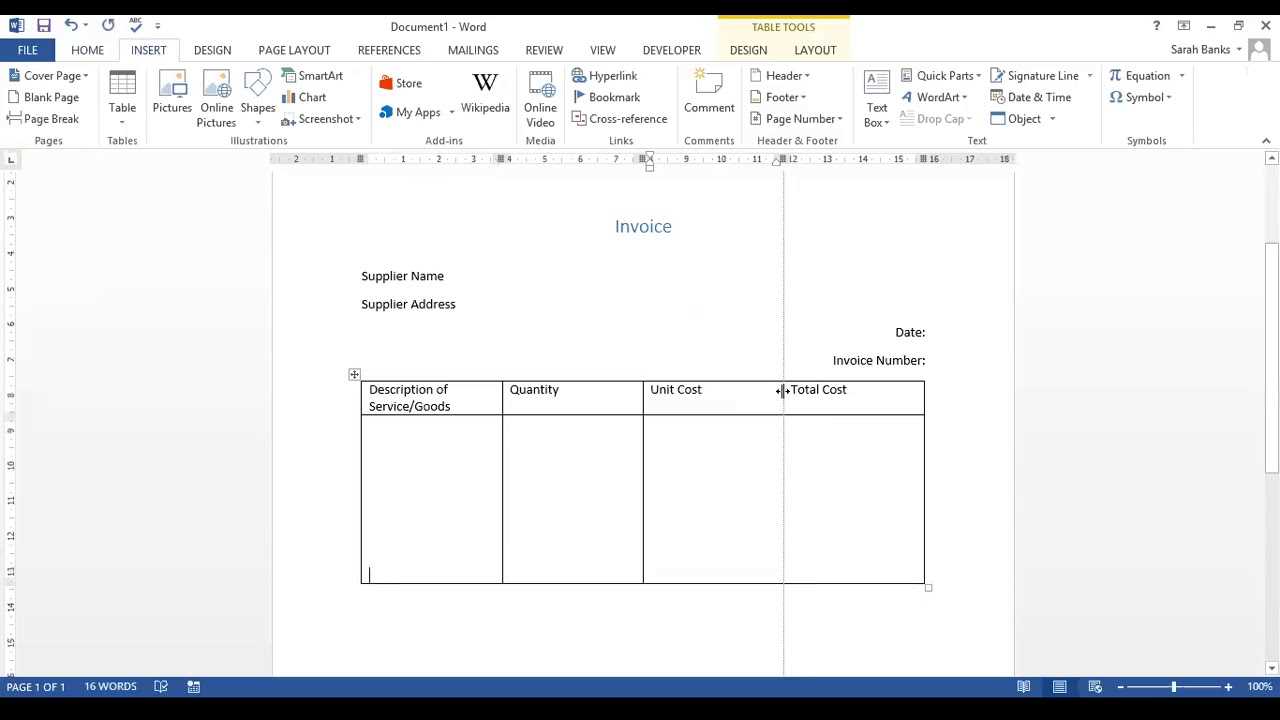
One way to make your document editable is by incorporating fields that can be filled out easily. Most word processing programs, like Microsoft Word, allow you to insert these fields, making it possible for users to input data such as client names, amounts, and dates without altering the structure of the document itself.
- Text Fields: These can be added where specific information, like the client’s name or the total due, needs to be entered. Text fields are especially useful for creating a reusable document with consistent formatting.
- Date Pickers: Adding date fields allows users to select dates directly, preventing mistakes in date formats and ensuring consistency across all records.
- Drop-Down Lists: For items with multiple options, like payment methods or service types, you can include drop-down lists to make selections easier and faster.
Save as a Fillable Document
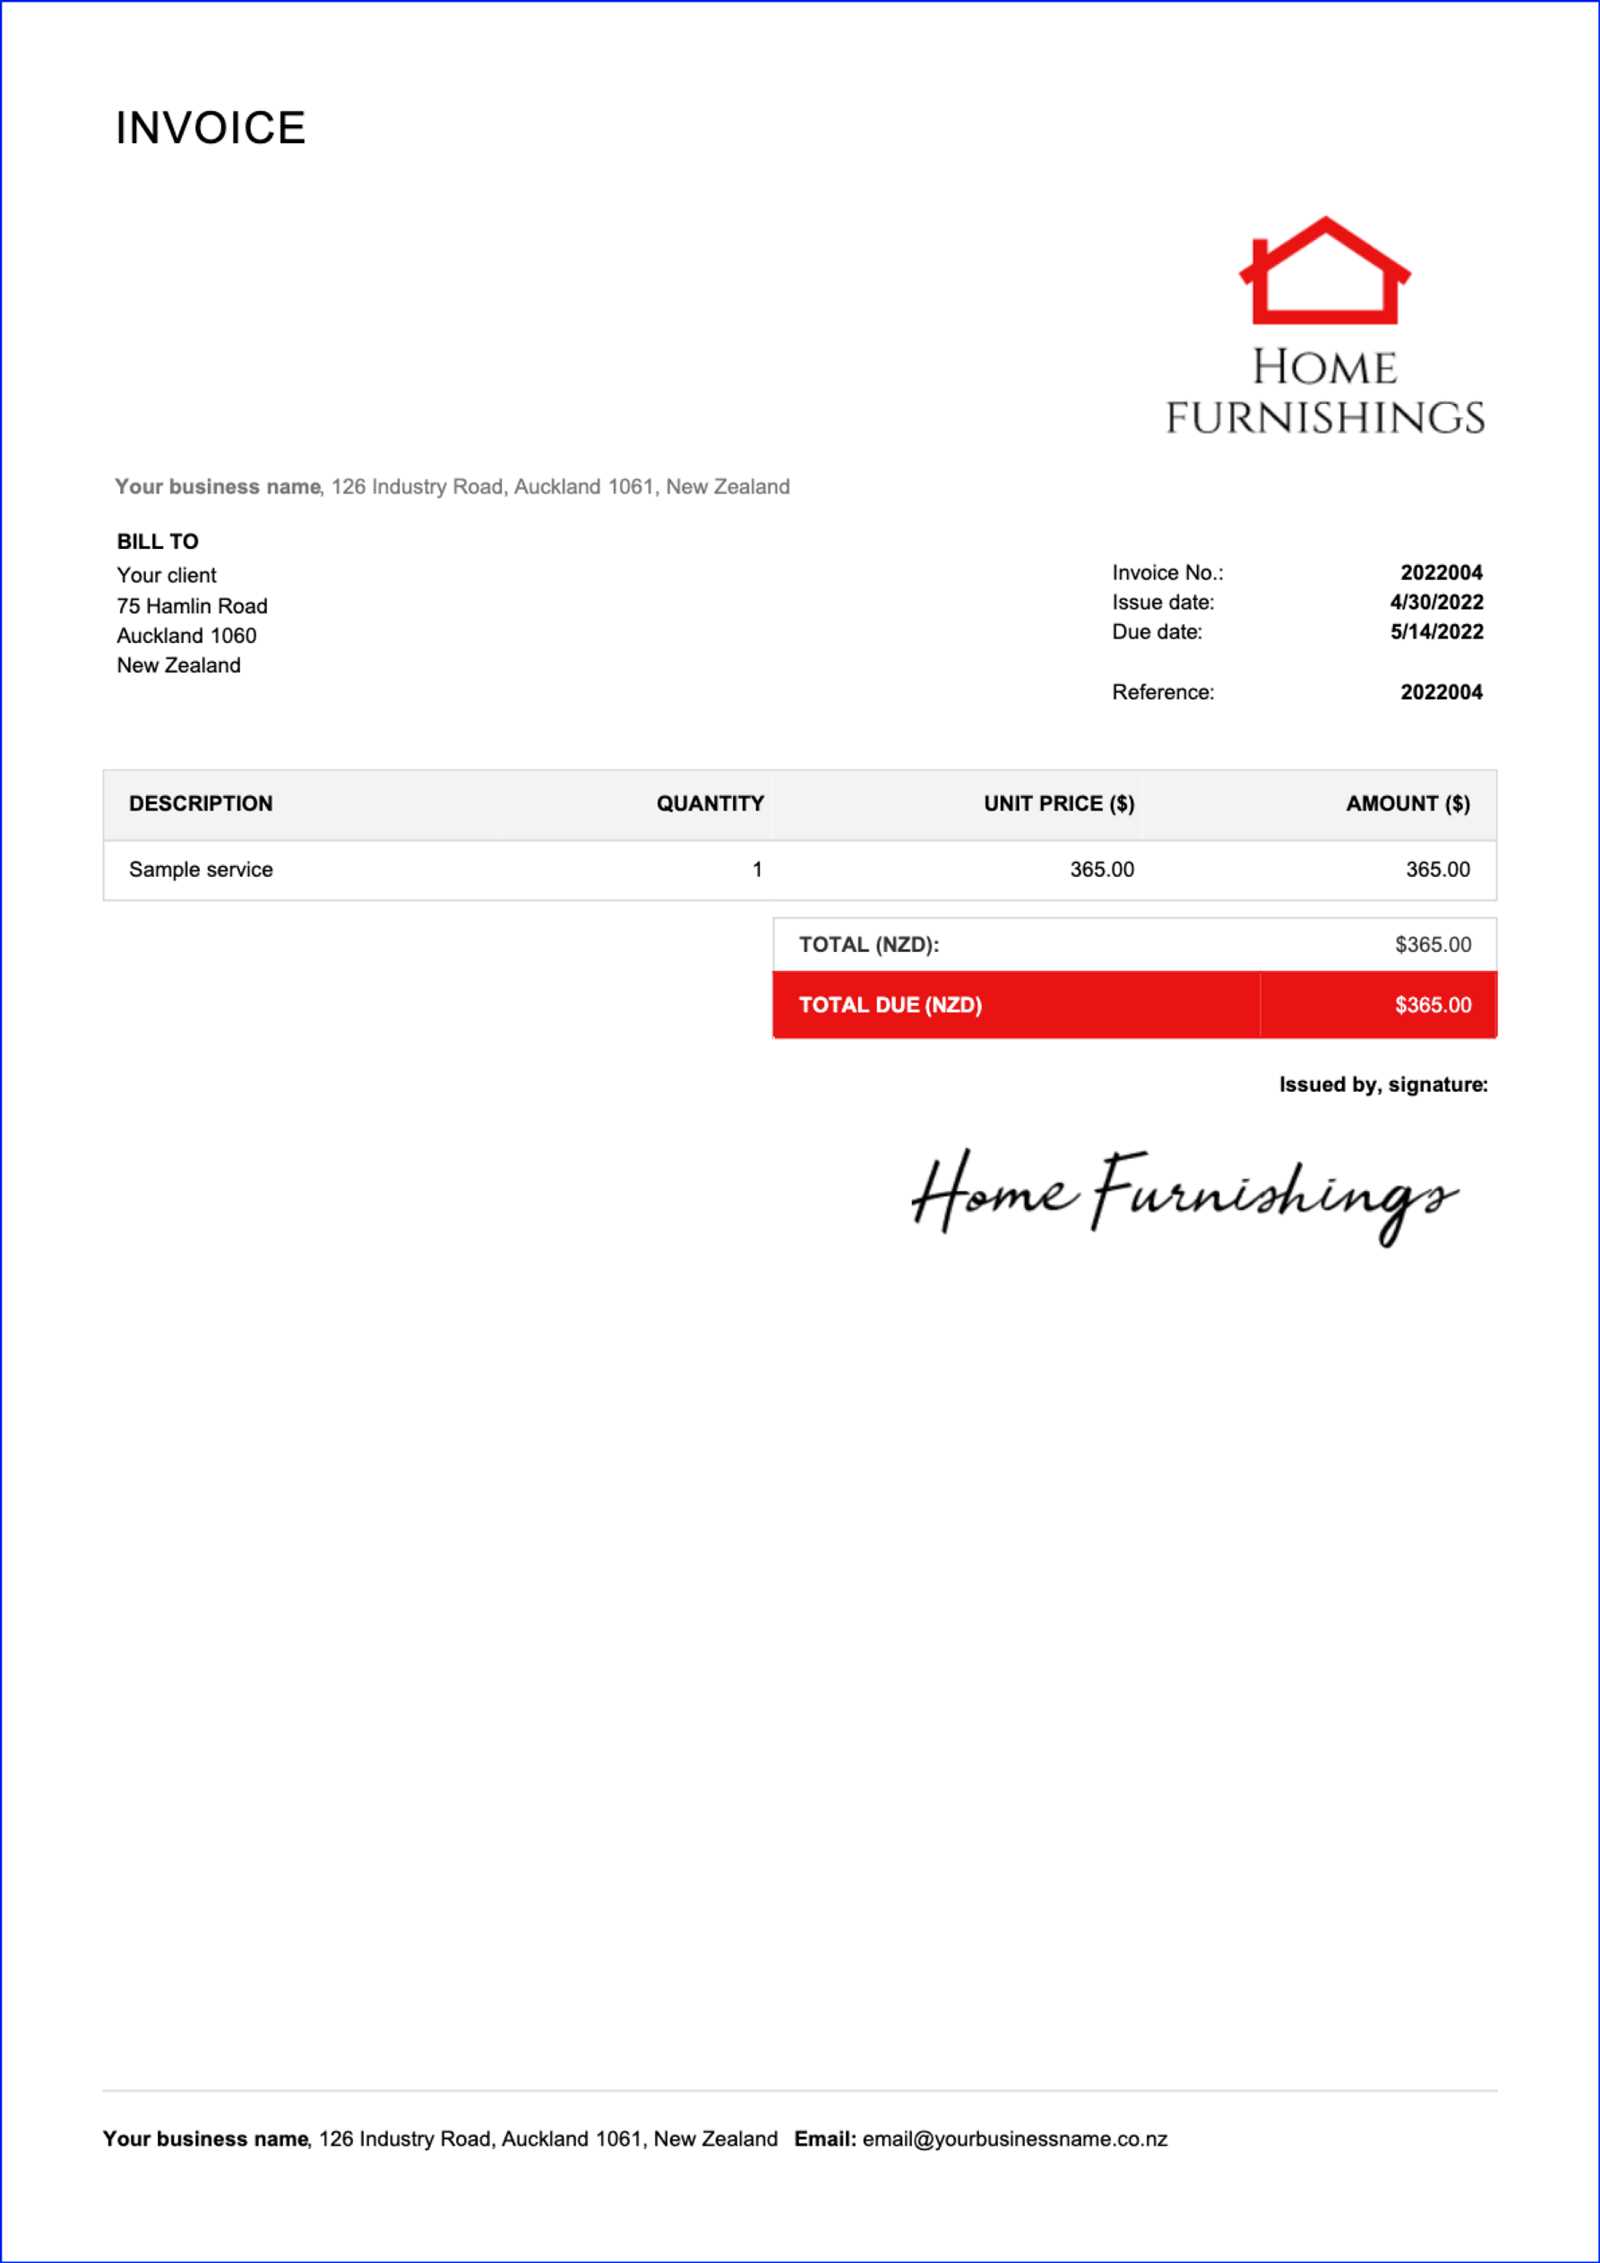
Another method for making your document editable is to save it as a fillable PDF form. Using PDF editing software, you can design fields that allow the user to enter details like quantities, prices, and personal information. This format is ideal for clients who prefer filling out forms electronically, ensuring that the data is entered correctly and that no formatting is accidentally altered.
By making your document editable, you simplify the process for both you and your clients, reducing the time spent on customization and minimizing the chance for errors. Whether using fields in a word processing document or creating a fillable form, these tools help you maintain consistency and professionalism in all your financial records.
Benefits of Using a Digital Billing Document
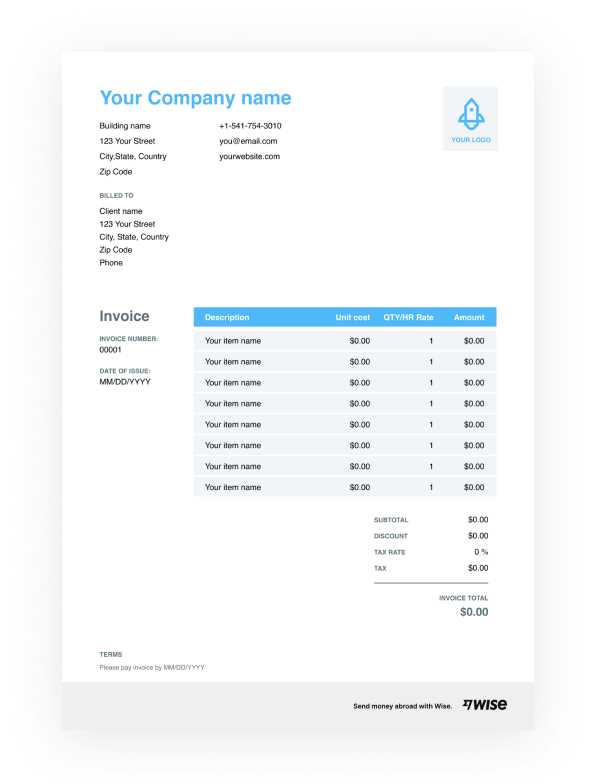
Utilizing a digital format for your financial records offers numerous advantages over traditional paper-based methods. Digital documents not only streamline the process of creating and sending records, but they also improve accuracy and enhance your professional image. With easy access to customizable designs and automation features, digital billing documents can save you time and effort, making them a valuable tool for any business.
Here are some key benefits of using a digital version of your billing documents:
- Time Efficiency: Digital documents allow for quick edits, duplication, and updates. Once you have a basic structure set up, you can easily adjust details like amounts or dates, without having to start from scratch each time.
- Improved Accuracy: With built-in formulas and fields, digital documents can help you minimize human error. Automated calculations for taxes, totals, and discounts reduce the chances of mistakes in your financial records.
- Professional Presentation: A well-designed digital document gives a polished and consistent appearance to all your financial records. You can customize fonts, logos, and layout to ensure your branding is evident in every communication.
- Easy Distribution: Sending a digital record via email or through a secure online platform is fast and efficient. No need for printing, postage, or handling physical copies, which can delay the process and increase costs.
- Environmentally Friendly: By going digital, you reduce the need for paper, ink, and postage. This not only lowers your business expenses but also contributes to a more sustainable approach to managing your documents.
- Storage and Organization: Digital files can be stored in a central location on your computer or cloud system, making it easier to organize and search for specific records. You can also set up automatic backups to prevent data loss.
- Security Features: Digital files can be encrypted, password-protected, and tracked. This provides an added layer of security, ensuring sensitive financial information remains safe and confidential.
By switching to digital billing documents, businesses can benefit from greater efficiency, accuracy, and security while also offering clients a more modern and convenient experience. Whether you’re a small business owner or part of a larger organization, the transition to digital can significantly improve your workflow and financial operations.