How to Customize Invoice Template in QuickBooks Online
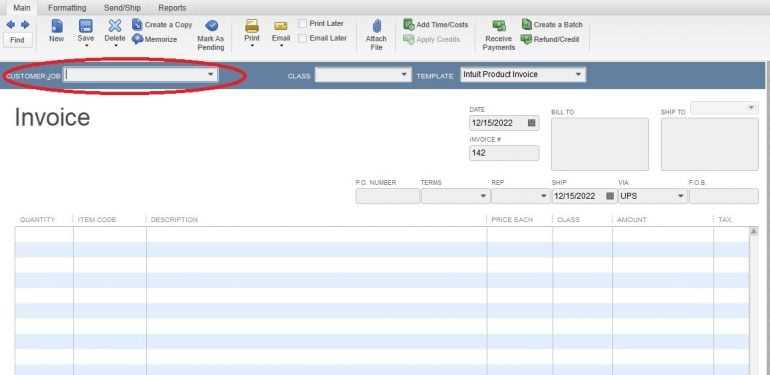
Creating professional and consistent business documents is essential for maintaining a polished image and improving communication with clients. When it comes to sending financial statements, having a well-designed document that reflects your brand can make a significant difference. Whether you’re looking to add your logo, adjust the layout, or include specific details, it’s crucial to tailor these documents to meet your business needs.
QuickBooks provides an intuitive platform for modifying these documents to better align with your company’s style and preferences. With just a few simple adjustments, you can ensure that every statement you send out looks professional and cohesive with your overall branding. In this guide, we’ll walk you through the steps to easily personalize your financial documents, from basic edits to advanced features.
By following these steps, you’ll have full control over the appearance and content of your business documents, ensuring they not only serve their purpose but also present your company in the best possible light.
How to Customize Invoice Template in QuickBooks Online
When running a business, presenting your documents in a professional and consistent manner is key to establishing credibility with your clients. The platform allows you to adjust the structure and appearance of your documents, ensuring they align with your branding and business needs. You can modify several elements, including colors, fonts, and layout, to make each statement you send reflect your unique style.
To begin, navigate to the settings menu where you’ll find options for document design. From there, you can choose a basic structure and make necessary adjustments such as adding your logo, changing text fields, and including specific payment details. These changes ensure that your documents are not only functional but also visually appealing and aligned with your company’s identity.
By following simple steps, you can make your financial documents stand out, contributing to a more professional and organized business image.
Why Customize Your Invoice Template?
Tailoring your business documents is an important step in creating a lasting impression with clients. A personalized design allows you to highlight your brand, making your communications feel more professional and trustworthy. Whether you’re adding a logo, changing the font, or adjusting layout elements, these adjustments help reflect your company’s unique identity.
Moreover, customizing these documents enables you to include relevant information that best suits your business model. From payment terms to special notes, having the flexibility to modify content ensures that every communication serves its specific purpose. This attention to detail not only enhances the clarity of your documents but also fosters stronger relationships with clients by demonstrating your professionalism.
Getting Started with QuickBooks Online
Before you can begin adjusting your business documents, it’s important to set up your account and familiarize yourself with the platform. Once you’ve logged in, you’ll be able to navigate the different sections where you can manage your company’s financial details and document settings. Understanding the basics of the interface will make the process of personalizing your business documents much easier.
Setting Up Your Account
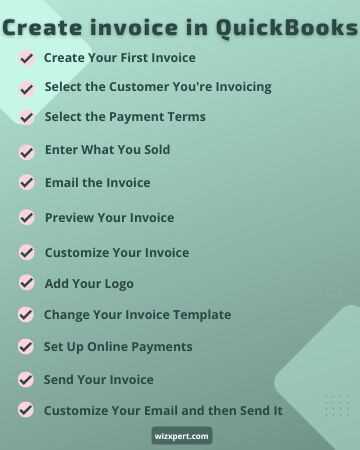
To start, ensure your company profile is complete, including business name, address, and logo. This foundational information will be used across all documents you generate. Once the basic setup is complete, you can move on to the customization options.
Understanding the Dashboard
The dashboard provides an overview of your business’s financial health. It includes essential tools for managing transactions, creating reports, and editing document formats. Familiarizing yourself with these tools will help you quickly navigate the platform and locate the customization options you need.
| Step | Description |
|---|---|
| 1. Log in | Enter your account credentials to access the platform. |
| 2. Complete Profile | Fill in company details such as name, logo, and contact info. |
| 3. Explore Features | Familiarize yourself with the main sections for managing transactions and documents. |
Once you’re comfortable navigating the platform and have completed the initial setup, you’ll be ready to begin personalizing your business documents to meet your needs. The next step is exploring the document settings where you can make adjustments to appearance and content.
Accessing the Invoice Customization Settings
To begin adjusting your business documents, it’s important to know where to locate the settings that allow for these changes. The platform provides an easy-to-navigate menu where you can manage the appearance and content of your generated statements. Understanding how to access these options is the first step toward making your documents truly reflect your brand’s identity.
Locating the Document Settings
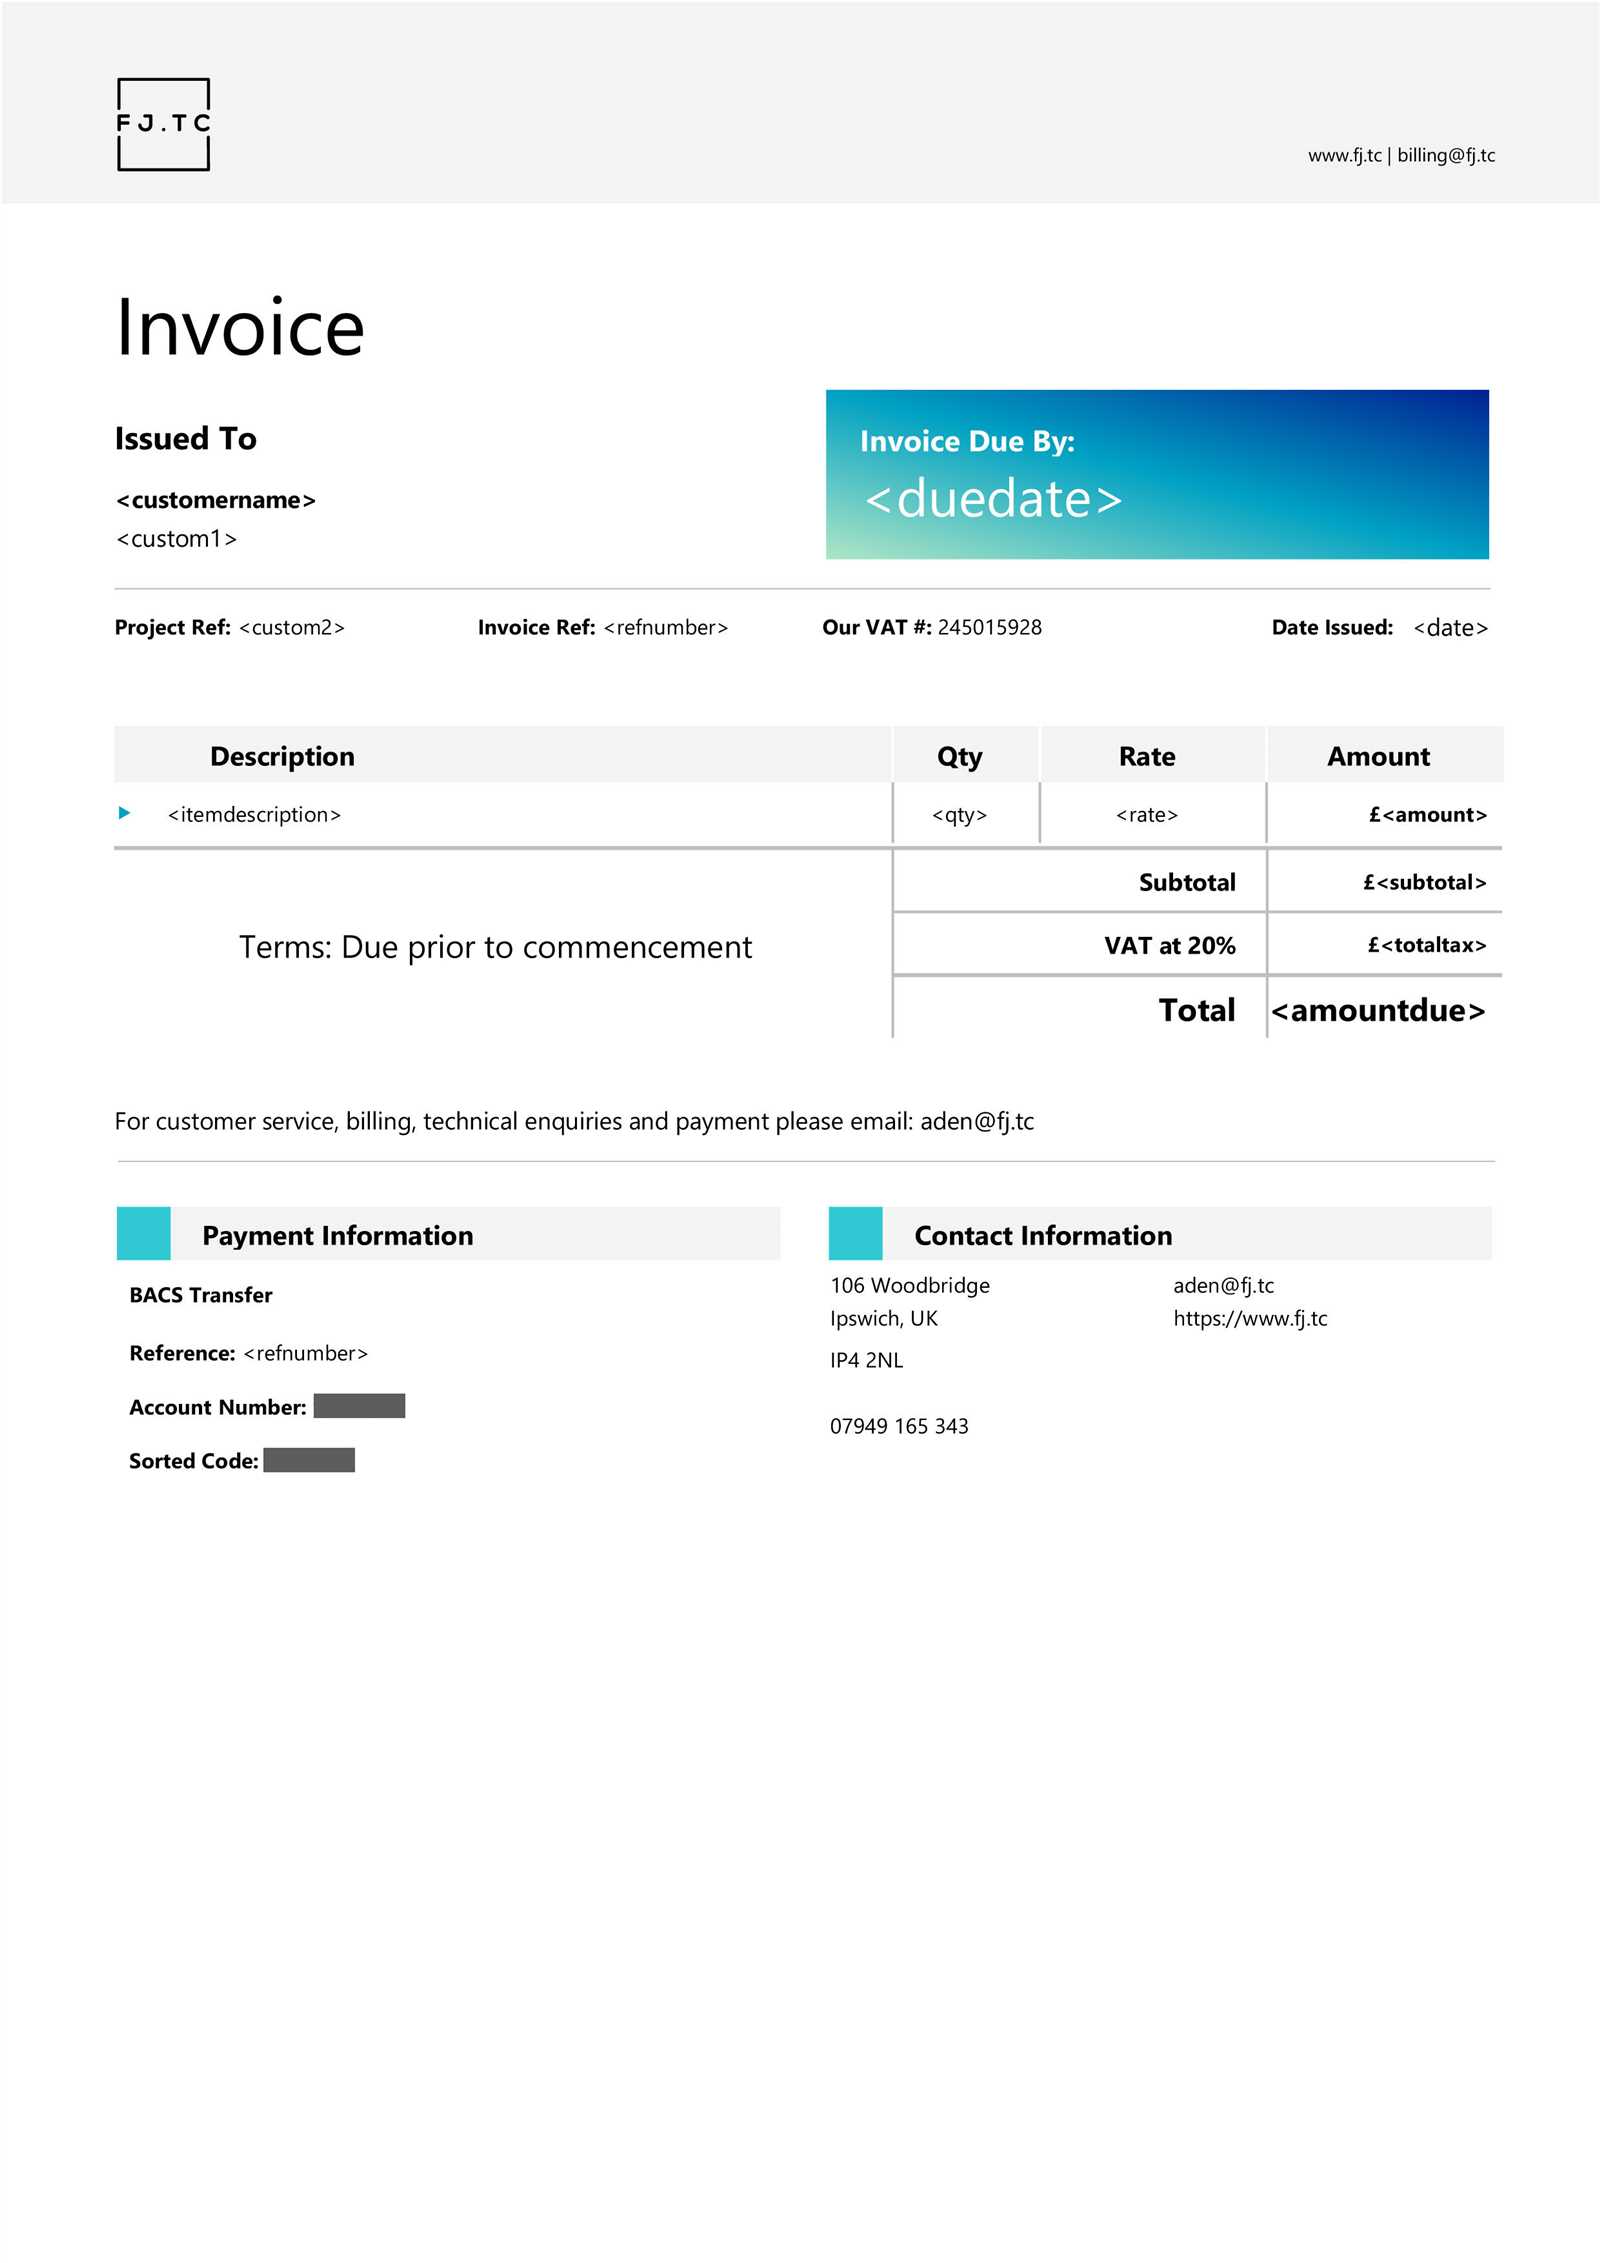
Once you’re logged into your account, navigate to the settings or gear icon, usually found in the top right corner of the screen. From there, look for the section dedicated to managing templates and document formats. This is where you can find all the tools needed to modify the way your business paperwork looks and feels.
Choosing the Correct Option
Within the document management section, you will typically find a variety of formats and styles to choose from. Select the option that best fits your needs, and you’ll be able to begin making adjustments to its design, content, and layout. This allows you to create a more professional and personalized experience for your clients.
It’s important to remember, that any changes made in this area will affect all future documents, so it’s a good idea to preview your changes before saving them. Once you’re satisfied with the design, you can easily apply it to all your outgoing communications.
Selecting the Right Template for Your Business
Choosing the correct format for your business documents is an essential step in presenting a professional image. There are several options available, each designed for different types of businesses and use cases. Selecting the right one ensures that your communications are clear, well-structured, and aligned with your company’s branding and needs.
When selecting a design, consider the following factors:
- Industry Type: Some industries may require specific layouts or additional fields for services and products. For example, retail businesses might need more detailed item descriptions, while service-based companies may focus more on payment terms.
- Brand Identity: Your chosen layout should reflect your company’s style. Consider colors, fonts, and the overall look to ensure it aligns with your existing marketing materials.
- Client Preferences: Think about what will be most user-friendly for your clients. A simple, clean layout may be more effective for certain audiences than a complex or highly detailed design.
By considering these factors, you can make an informed choice that not only serves your business needs but also enhances your client relationships.
Once you’ve chosen the right layout, you can move forward with personalizing it further to fit your exact requirements. From there, you’ll be ready to make adjustments to the details that matter most to your business.
Modifying Layout and Design Elements
Once you’ve selected the appropriate document format, it’s time to begin adjusting the layout and design elements to match your brand and business style. The platform offers a variety of tools that allow you to change everything from text positioning to color schemes. These modifications can enhance readability, create a more professional appearance, and ensure your documents align with your company’s identity.
Adjusting Text and Logo Placement
One of the first things you can modify is the placement of your logo and text fields. By moving these elements around, you can ensure that important information, like the company name and contact details, stands out. You can also decide where to place the client’s information, item descriptions, and payment terms for better clarity.
Changing Fonts and Colors
The design tools also allow you to select different fonts and color schemes. Choosing the right typography can make your documents more readable, while the appropriate color palette can reinforce your brand’s image. It’s important to maintain consistency with your business’s other marketing materials, so your documents appear cohesive and professional.
| Element | Modification Options |
|---|---|
| Logo | Resize, reposition, or replace with a higher-quality image. |
| Text | Adjust font size, style, and alignment. |
| Colors | Choose from predefined color schemes or set custom hues. |
By making these adjustments, you can create a document that is not only functional but also visually appealing. A well-designed layout can help convey your professionalism and improve client communication.
Adding Your Logo to the Invoice
Incorporating your company’s logo into your business documents is a crucial step in establishing brand identity and professionalism. Including your logo makes your communications instantly recognizable to your clients and adds a personal touch to every document you send. This simple addition enhances the overall appearance and reinforces your business’s visual branding.
To add your logo, follow these steps:
- Navigate to the Design Section: First, open the document design options and locate the area for adding a logo.
- Upload Your Logo: Choose the image file from your computer. Ensure that the file is of high resolution and in a suitable format (e.g., JPG, PNG).
- Position the Logo: Once uploaded, you can adjust the size and position of the logo. Typically, logos are placed at the top left or center of the document for maximum visibility.
- Save Changes: After positioning your logo, save your adjustments to apply it to all future documents.
Here are a few tips for the best results:
- Use a High-Quality Image: Ensure that your logo is clear and crisp, even when resized. A blurry or pixelated logo can reduce the professional look of your documents.
- Maintain Consistency: The logo should match the rest of your marketing materials. If your website and brochures use specific colors or styles, keep your document design in line with that.
- Test Visibility: Preview your document after adding the logo to ensure it’s visible and doesn’t interfere with other key information, such as payment terms or contact details.
Including your company’s logo is an easy yet impactful way to elevate your business’s image and make your documents feel more official and polished.
Changing Colors and Fonts
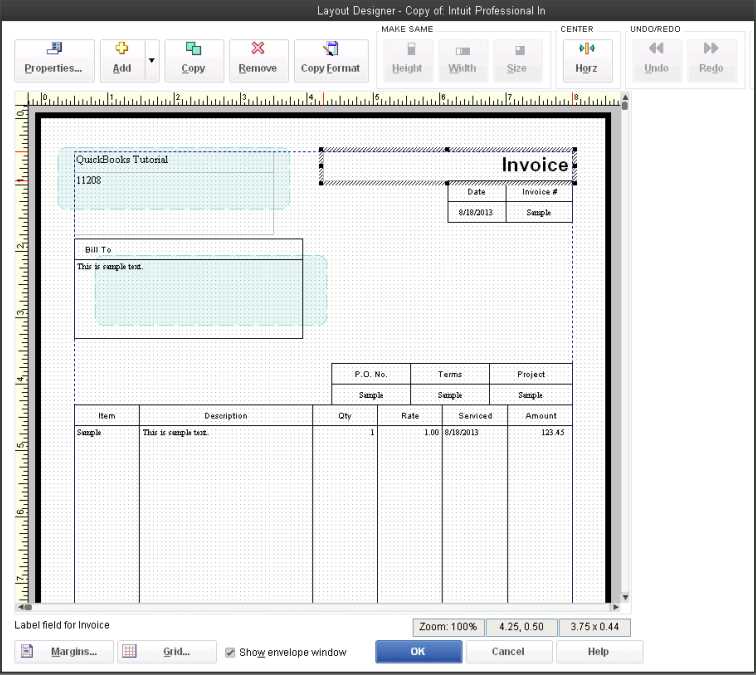
Adjusting the colors and fonts used in your business documents is a simple yet powerful way to align them with your brand identity. The right color scheme can evoke emotions and create a cohesive visual appearance, while the choice of font enhances readability and professionalism. By making these changes, you can ensure that your documents not only look good but also represent your business effectively.
Selecting the Right Colors
Colors play a crucial role in reinforcing your brand’s personality. You can adjust the color scheme of your document to match your logo or other marketing materials. Consider using your company’s primary color for key elements like headings or borders, and complementary shades for background or secondary text.
Choosing the Perfect Fonts
Choosing the right typeface is just as important as selecting the right color. Fonts should be easy to read while reflecting the style of your business. You can adjust the font type, size, and weight to create a clear hierarchy of information and highlight the most important details in your documents.
| Element | Customization Options |
|---|---|
| Colors | Choose from predefined color schemes or set custom shades for headings, borders, and backgrounds. |
| Fonts | Select from various font styles, adjust size and weight for headings, body text, and footnotes. |
Pro Tip: Always ensure that your chosen fonts and colors are consistent with your brand guidelines. A well-designed document is easier to read and leaves a lasting impression on clients and partners.
Including Custom Fields on Your Invoice
Sometimes your business needs to include additional information that is not covered by the standard fields provided. By adding custom fields, you can tailor your documents to include specific data that is relevant to your products, services, or internal processes. These fields can be used to capture extra details such as project names, tracking numbers, or personalized client information, ensuring that each document is fully aligned with your business needs.
Types of Custom Fields
There are several types of custom fields you can add to your documents, depending on the information you want to capture. Some common examples include:
- Project Information: If your business works on multiple projects, you can add a field for project names or codes to keep track of each one.
- Purchase Order Number: For companies that deal with purchase orders, this field helps track specific orders related to each document.
- Client Reference: A custom field that can be used to include a reference number or special client code for easier tracking.
- Delivery Instructions: If you need to provide special instructions to clients or vendors, a custom field can be used for this purpose.
Adding and Managing Custom Fields
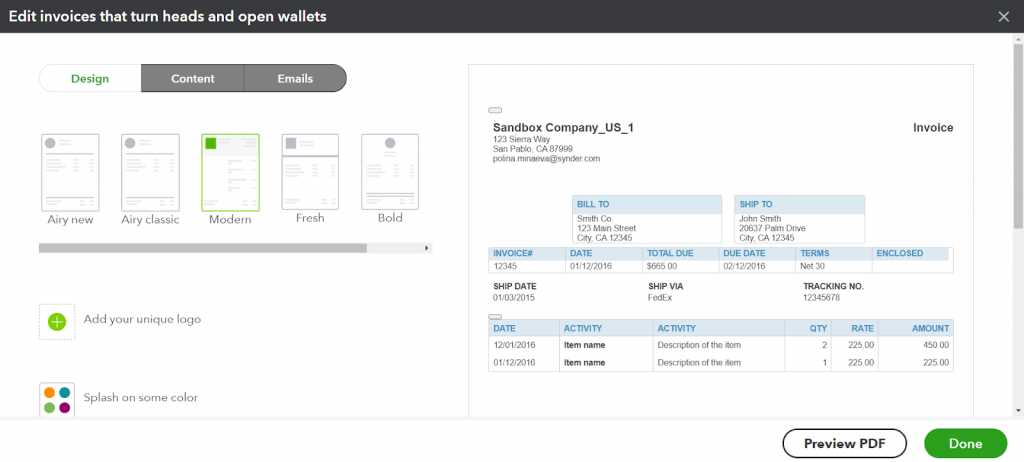
To add a custom field, navigate to the document settings, and select the option for adding new fields. From there, you can name the field, choose the type of data it will capture (e.g., text, number, date), and determine where it will appear in the document layout.
Once added, custom fields can be edited or removed as needed. This flexibility allows you to adjust your documents whenever your business requirements change.
Note: Be mindful of the space available on your document. Too many custom fields can clutter the design and make the document harder to read. It’s best to keep these additions to a minimum while ensuring that essential information is included.
How to Adjust Payment Terms
Setting clear payment terms is essential for managing cash flow and ensuring that both you and your clients have the same expectations when it comes to payments. Whether you offer standard net 30 terms or prefer to set up specific due dates for each client, adjusting payment terms in your documents ensures that your business remains organized and professional.
To adjust the payment terms, you first need to access the section where financial details are set. From there, you can select the preferred due date format or payment terms based on the type of service or product you provide. These options may include timeframes like “Due on Receipt,” “Net 30,” “Net 60,” or customized payment periods that best suit your business model.
Adjusting these terms gives you the flexibility to tailor each transaction to the specific needs of your clients, while also protecting your cash flow. You can set default terms for all clients or change them on a case-by-case basis, depending on the nature of the agreement.
Remember: Consistency in your payment terms helps avoid confusion and ensures your clients understand their responsibilities. It’s also helpful to include late fees or discounts for early payment if that aligns with your business policies.
Adding Additional Information to Invoices
Sometimes your business documents need to include extra details beyond the basic transaction information. This could include notes on delivery instructions, special discounts, or project-specific terms. Adding such information helps keep your clients informed and ensures all relevant details are captured in one place, reducing the need for follow-up communication.
There are several fields you can add to your documents to include additional information. Some common examples include:
| Information Type | Description |
|---|---|
| Payment Instructions | Details on how clients can submit payments, including bank account numbers or online payment links. |
| Special Discounts | Any promotional or negotiated discounts can be noted to provide transparency and encourage timely payment. |
| Delivery Notes | Instructions regarding the delivery of goods or services, including expected dates or locations. |
| Legal Terms | Any contract clauses or legal requirements relevant to the sale or transaction. |
By incorporating this additional information, you can provide your clients with all the details they need, ensuring smooth transactions and minimizing misunderstandings.
Tip: Keep your additional information clear and concise to avoid cluttering the document. Focus on key points that are most relevant to your client’s needs or your business policies.
Creating a Professional Invoice Look
Creating a polished, professional appearance for your business documents is crucial for establishing credibility and building trust with clients. The way your documents are presented reflects the quality of your services or products. A clean and organized layout, combined with well-chosen design elements, can elevate your brand’s image and leave a lasting impression on recipients.
To achieve a professional look, consider the following elements:
- Consistent Branding: Use your company’s color scheme, logo, and fonts to ensure your documents align with your overall brand identity.
- Clear Structure: Arrange information in a logical and easy-to-follow format. Highlight key details like payment terms, client information, and the items or services provided.
- Minimalistic Design: Avoid clutter by keeping the design simple and focusing on the most important elements. A clean design is often more effective than one overloaded with graphics or unnecessary details.
- Proper Alignment: Ensure that text, numbers, and columns are properly aligned. This creates a neat, orderly appearance that’s easy for clients to read and understand.
By focusing on these key design elements, you can create a visually appealing document that reflects the professionalism and attention to detail that your clients expect. A well-crafted document not only looks more professional but also helps communicate your brand’s values and message clearly.
Tip: Always preview your document before finalizing it. Check for any formatting errors, such as misaligned text or improperly sized elements, to ensure a flawless presentation.
Previewing Your Customized Template
Before finalizing any changes to your document layout, it’s important to preview it to ensure everything looks as expected. A preview allows you to see how your document will appear to clients and ensures that all adjustments, such as the layout, fonts, colors, and additional information, are correctly aligned. This step is crucial for spotting any errors or inconsistencies that may have been overlooked during editing.
Why Previewing is Essential
Previewing your document ensures that the changes you’ve made are displayed correctly and that no important information is cut off or misplaced. It’s your opportunity to catch any formatting issues, such as text overflow or misalignment of images, before sending the document to a client. It also gives you a sense of how the document’s overall look and feel will affect the client’s experience.
How to Preview Your Document
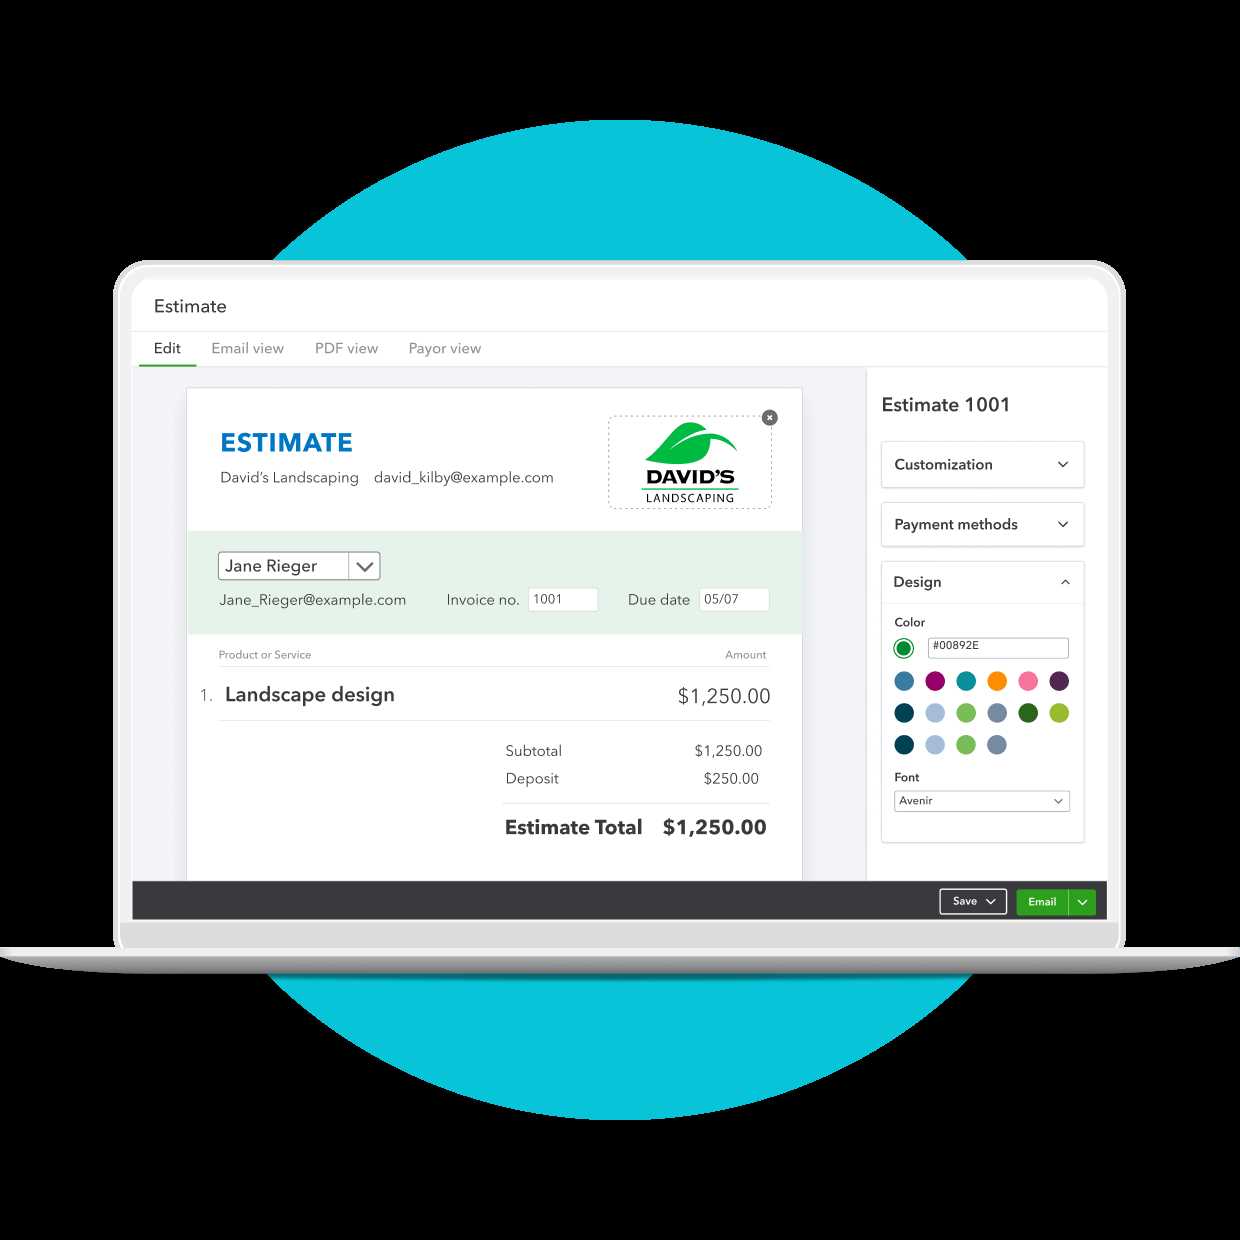
To preview your work, simply go to the preview mode within your editing tool. This will generate a full-screen version of the document, allowing you to scroll through and examine it as it will appear when printed or sent electronically. You can check for the following:
- Text Alignment: Ensure that all the text is properly aligned and easy to read.
- Visual Appeal: Confirm that the colors, fonts, and images are consistent with your brand.
- Layout Clarity: Verify that the layout is clear and that no content is too crowded or difficult to locate.
Tip: Consider getting a second opinion by asking a colleague or team member to review the document. A fresh pair of eyes can often catch things you may have missed.
Saving and Applying the Template
Once you’ve made all the necessary adjustments to your document layout, the next step is to save your work and apply it to future transactions. Saving your design ensures that you won’t need to redo your changes each time, while applying it guarantees consistency across all your documents. This process allows you to maintain a professional and cohesive look in all your communications.
To save your work, you can simply click on the “Save” or “Save as Default” button within the design tool. This will preserve your settings and make them available for future use. Once saved, the design can be selected whenever you generate new documents, ensuring that your brand’s appearance remains consistent across all communications.
Applying the Template: When you’re ready to use your design for a new document, select it from the available options in your document creation tool. This will automatically apply your saved layout, colors, fonts, and any additional fields or logos you have added.
Things to keep in mind: If you make further edits after saving the design, you can easily update the saved version by clicking “Save” again. This ensures that your changes are reflected across all future documents. Additionally, some tools allow you to create and store multiple designs, so you can choose different ones based on specific client needs or transaction types.
Tip: It’s a good practice to review your saved document regularly to ensure it continues to reflect any updates or changes to your branding, business terms, or communication style.
How to Create Multiple Invoice Templates
In many businesses, different types of transactions or clients require distinct document styles. By creating multiple designs, you can ensure that your documents meet specific needs, whether it’s for different service types, industries, or client preferences. Having a variety of document formats ready to use can streamline your processes and provide a more personalized experience for your customers.
Setting Up Multiple Designs
To set up various document layouts, you’ll first need to design one template and then create additional versions based on the specific requirements for each use case. Most tools allow you to save multiple formats, each with unique elements like text styles, logos, or additional fields. Here’s how you can do it:
- Create a Base Design: Start by creating a master layout that includes your basic brand colors, logo, and default information.
- Modify for Specific Needs: Duplicate this layout and adjust it for different situations, such as adding specific terms for certain clients or including additional details for project-based work.
- Save Each Version: After making adjustments, save each version with a distinct name to make it easy to identify later.
Managing Multiple Versions
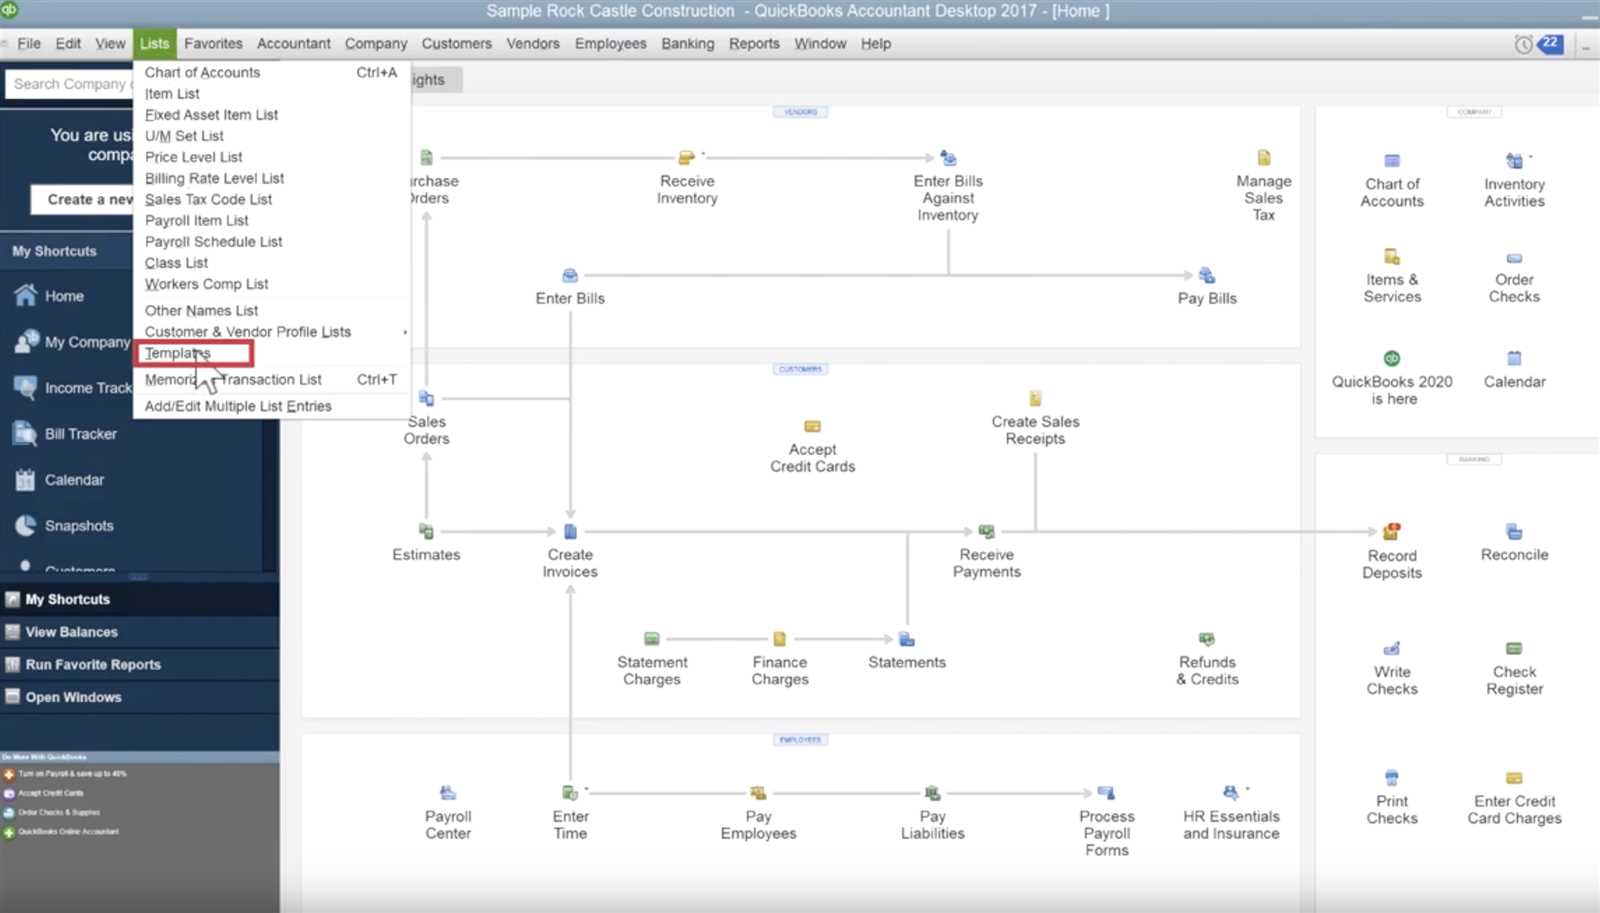
Once you have several formats created, you can manage them by selecting the appropriate version when creating new documents. Each saved design will be available in the selection menu, and you can choose which layout fits the transaction you’re working on. This ensures that your documents are always consistent with your client’s expectations and your business requirements.
Tip: Keep your naming conventions clear and organized. Label your saved formats in a way that makes it easy to distinguish between them, such as by client type, industry, or service category.
Reminder: Regularly review and update your designs to reflect any changes in your branding, pricing, or terms of service.
Tips for Consistent Branding on Invoices
Maintaining a cohesive brand identity across all business documents is essential for building trust and recognition with your clients. Consistency in design not only enhances the professionalism of your communications but also reinforces your company’s values and image. Whether it’s through the use of specific colors, fonts, or logos, ensuring that all your transaction-related documents align with your brand helps create a unified customer experience.
Key Elements to Focus On
There are several important aspects to consider when designing documents to reflect your brand consistently:
- Logo Placement: Always include your company’s logo in a prominent and consistent location. Typically, the top left or right corner of the document is ideal for brand visibility.
- Brand Colors: Use your brand’s color palette throughout the document. This includes header text, borders, and any highlighted information. Keep the color scheme subtle and professional.
- Font Choices: Stick to one or two fonts that match your brand’s visual style. Avoid using too many different types of text styles, as this can make the document look cluttered and inconsistent.
Best Practices for a Cohesive Look
To ensure that your branding is consistently reflected in your documents, follow these best practices:
- Use a Standard Layout: Set up a template with fixed positions for the logo, company details, and client information. This makes the layout uniform across all documents.
- Review Before Sending: Always double-check that your document’s design matches your branding before sending it to clients. This helps avoid any discrepancies that could harm your professional image.
- Update When Necessary: Periodically revisit your designs to ensure they align with any changes in your branding, such as new colors, logos, or updated company details.
Tip: Consistency doesn’t only apply to the design of your documents but also to the tone of language used within them. Keep the language professional and in line with your brand voice to ensure a comp
Common Mistakes to Avoid in Customization
When adjusting the layout and design of business documents, it’s easy to overlook certain details or make choices that may not reflect your brand well. These errors can negatively impact the professionalism of your documents and even confuse or frustrate your clients. To ensure a smooth experience and a polished result, it’s important to avoid these common pitfalls during the design process.
Overcomplicating the Design
One of the most frequent mistakes is making the design too busy or cluttered. While it’s tempting to add lots of decorative elements or a variety of fonts, this can detract from the key information and make the document difficult to read. Stick to a clean, organized layout with clear sections for essential details, ensuring that the focus remains on the most important content.
Neglecting Brand Consistency
Another common mistake is failing to maintain consistent branding throughout your documents. Using inconsistent fonts, colors, or logos can confuse clients and undermine the professionalism of your business. Always use your brand’s standard color scheme and fonts, and make sure your logo is placed in a consistent spot on every document. Consistent branding builds trust and reinforces your company’s identity.
Ignoring Mobile Optimization
More clients are accessing documents via mobile devices, so it’s crucial to ensure that your designs are mobile-friendly. Documents that look perfect on a desktop might not display well on smaller screens, resulting in text being cut off or layouts becoming misaligned. Test your documents on various devices before finalizing the design to ensure they are easily readable across all screen sizes.
Overlooking Important Information
While design elements are important, don’t forget to prioritize the necessary information. It’s easy to focus too much on aesthetics and neglect key details like payment terms, service descriptions, or contact information. Ensure that all essential content is clearly visible and well-organized, without being overshadowed by design choices.
Using Poor Quality Images
Using low-resolution images or logos can make your document look unprofessional. Always use high-quality, crisp images to represent your brand, especially for logos. Blurry or pixelated images can give a negative impression and suggest a lack of attention to detail.
Tip: Before finalizing any design, preview it multiple times on different devices and get feedback from others to ensure that it looks professional and meets your business standards.
Updating Your Template in the Future
As your business evolves, so should the appearance and content of your documents. Over time, you may need to make adjustments to reflect new branding, updated terms, or changes in your offerings. Keeping your document design up-to-date ensures that it continues to align with your business’s identity and provides a consistent experience for your clients.
When to Update Your Design
There are several reasons why you might need to update your document layout:
- Branding Changes: If your company undergoes a rebranding or logo change, you’ll want to ensure that all documents reflect the new style.
- Content Updates: Changes in your business offerings, payment terms, or contact information require updates to the document content.
- Client Feedback: If clients have provided feedback about the document’s layout or readability, consider making improvements based on their suggestions.
Steps to Update Your Design
Updating your saved document design is a simple process. First, open the existing version and make the necessary adjustments. This might include changing text, updating the logo, or adjusting the layout for better clarity. After making the changes, save the updated version as your new default or create a new version for future use.
Tip: Always test your updated design by previewing it to ensure everything looks correct before finalizing it. It’s important to check how the new design appears on different devices and in print formats to avoid any surprises later.
Regular Reviews and Adjustments
Even after an update, it’s important to regularly review your document design to ensure it stays aligned with your business goals and client expectations. Set aside time every few months to assess whether any further tweaks are needed or if new trends in design or branding should be incorporated.
Remember: A document that is consistently reviewed and updated will always reflect the professionalism and values of your business, creating a strong and lasting impression with your clients.